This post may contain affiliate links. Please read our disclosure policy.
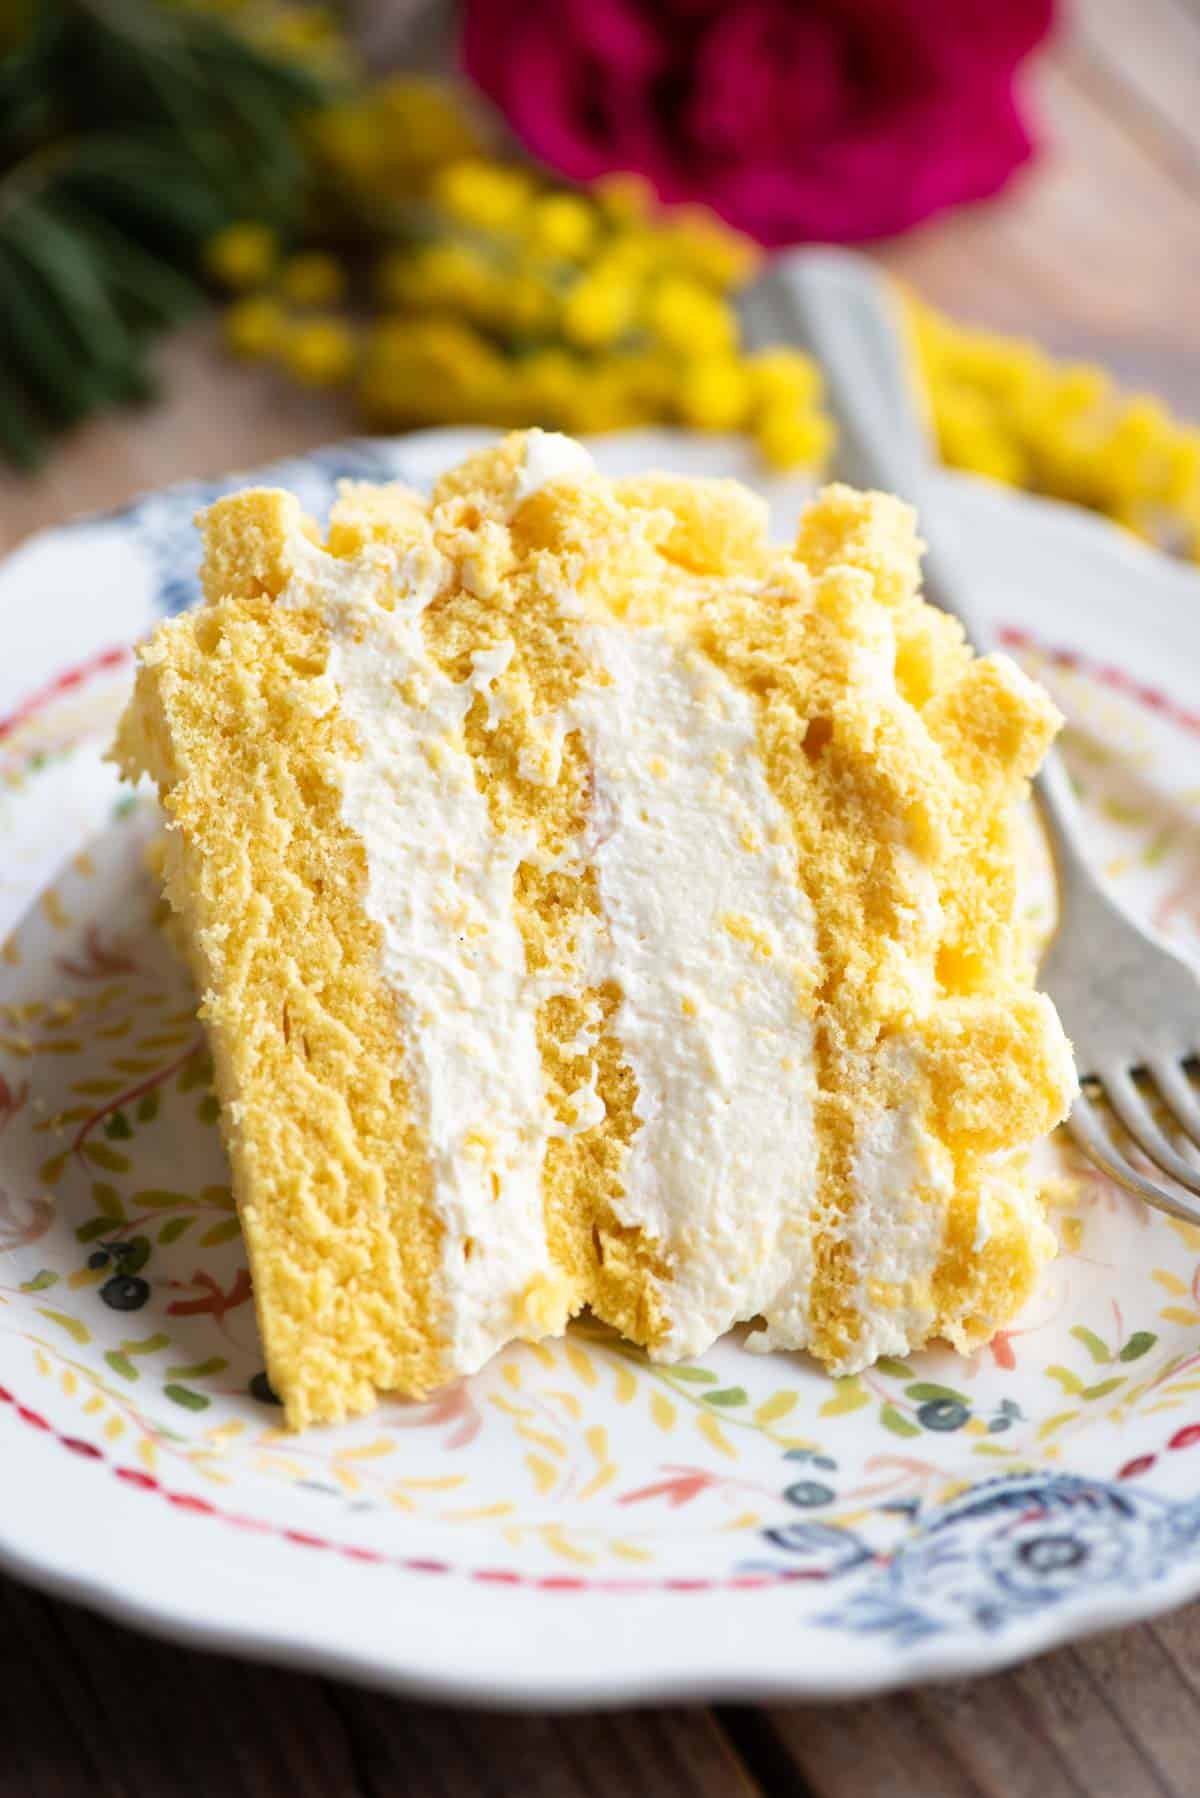
Torta Mimosa is a beautiful Italian cake made to resemble the mimosa flower that’s used to celebrate women on International Women’s Day. Made with the lightest sponge cake and filled with a beautiful mix of chantilly cream and pastry cream.
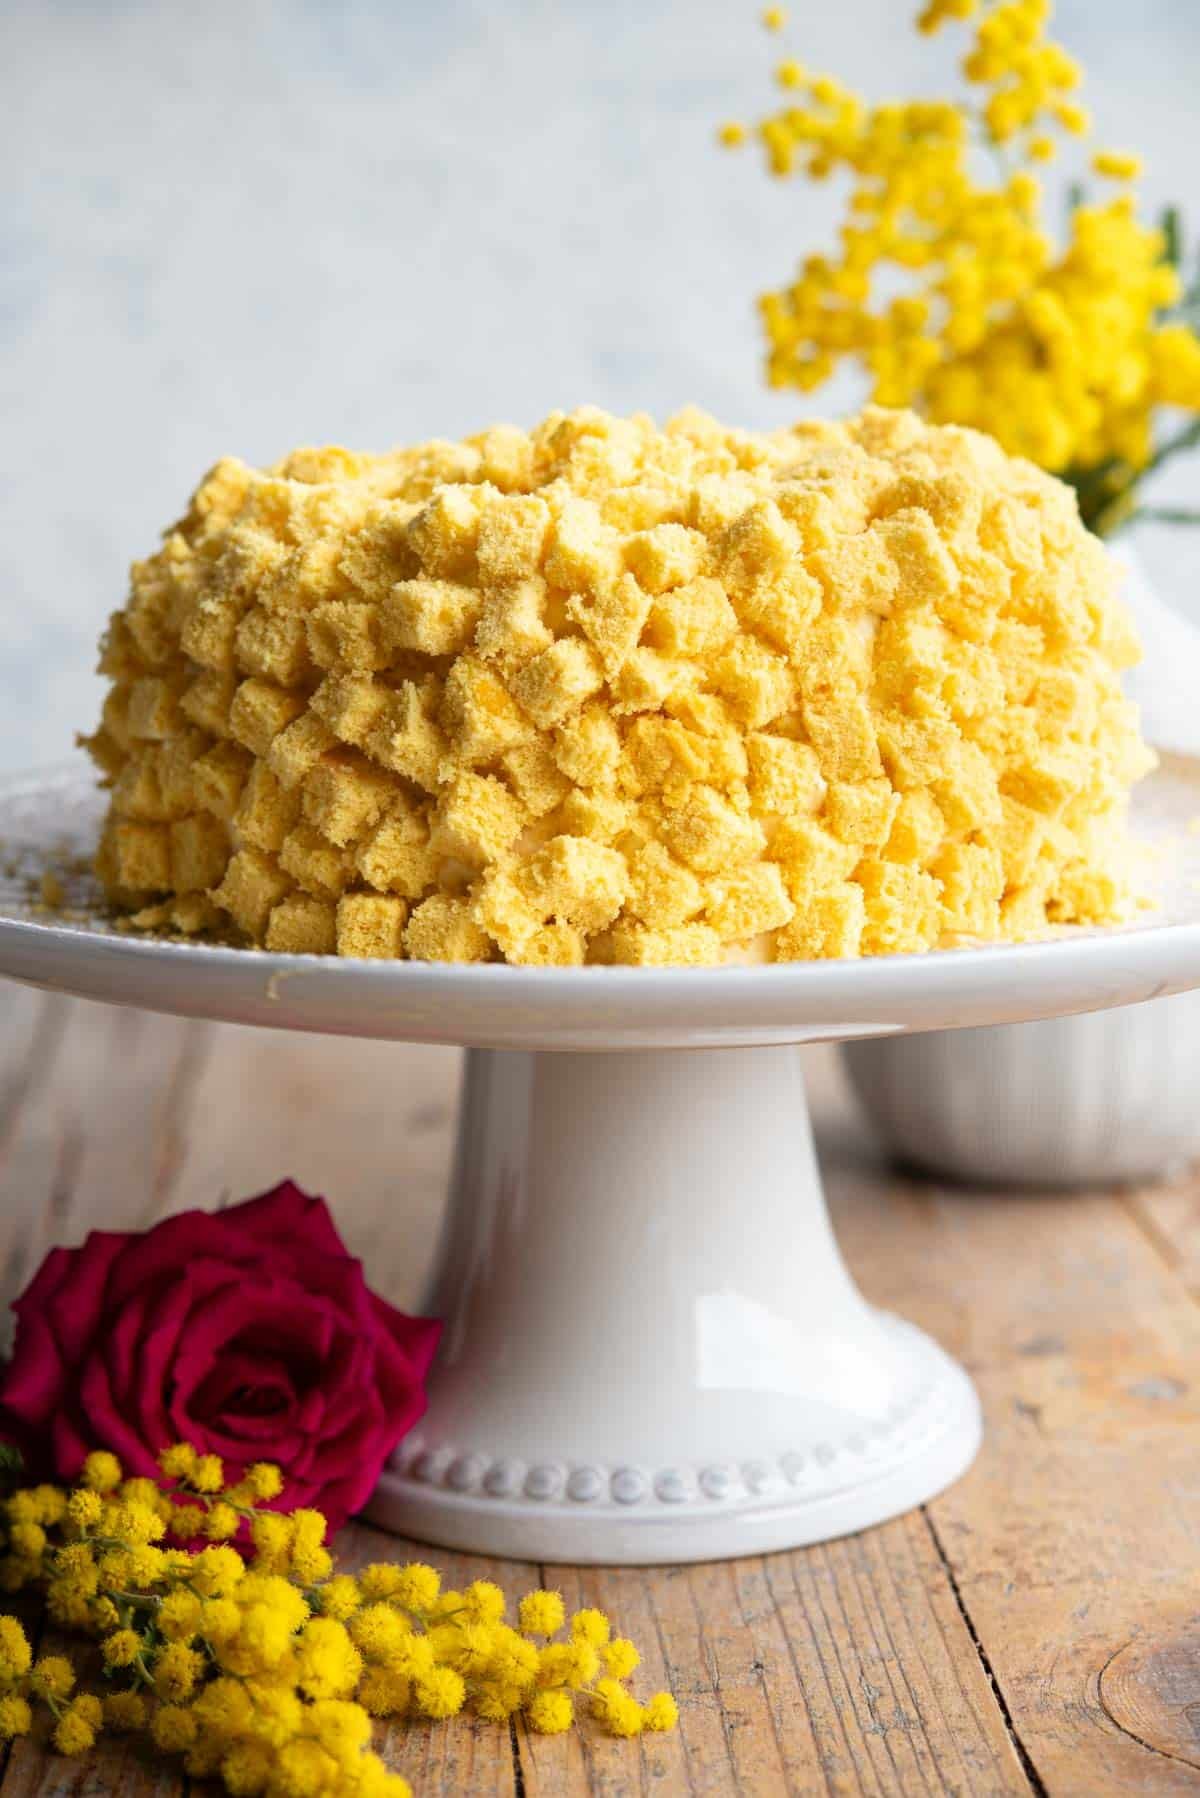
In Italy, a sprig of Mimosa flowers are given out to women on March 8th to celebrate International Women’s Day. If you’re ever in Italy at this time you’ll notice these stunningly beautiful Mimosa cakes everywhere.
The Mimosa cake is made with the lightest and most delicious sponge cake called Pan di Spagna which is made with lots of whipped eggs to give it its extra light texture.
It’s then drizzled in a sugar syrup with added liqueur and filled with a mix of chantilly cream and Crema Pasticcera (pastry cream).
The cake is not only beautiful but undeniably delicious. Make this to celebrate International Women’s Day, Spring, Easter or any occasion. It truly is extra special!
See the recipe below including notes on ingredients, step by step photos, tips, variations and a video tutorial. For the full printable recipe scroll to the bottom or click the recipe link below
Ingredients
Pin this now to find it later
Pin ItIngredient notes and substitutions
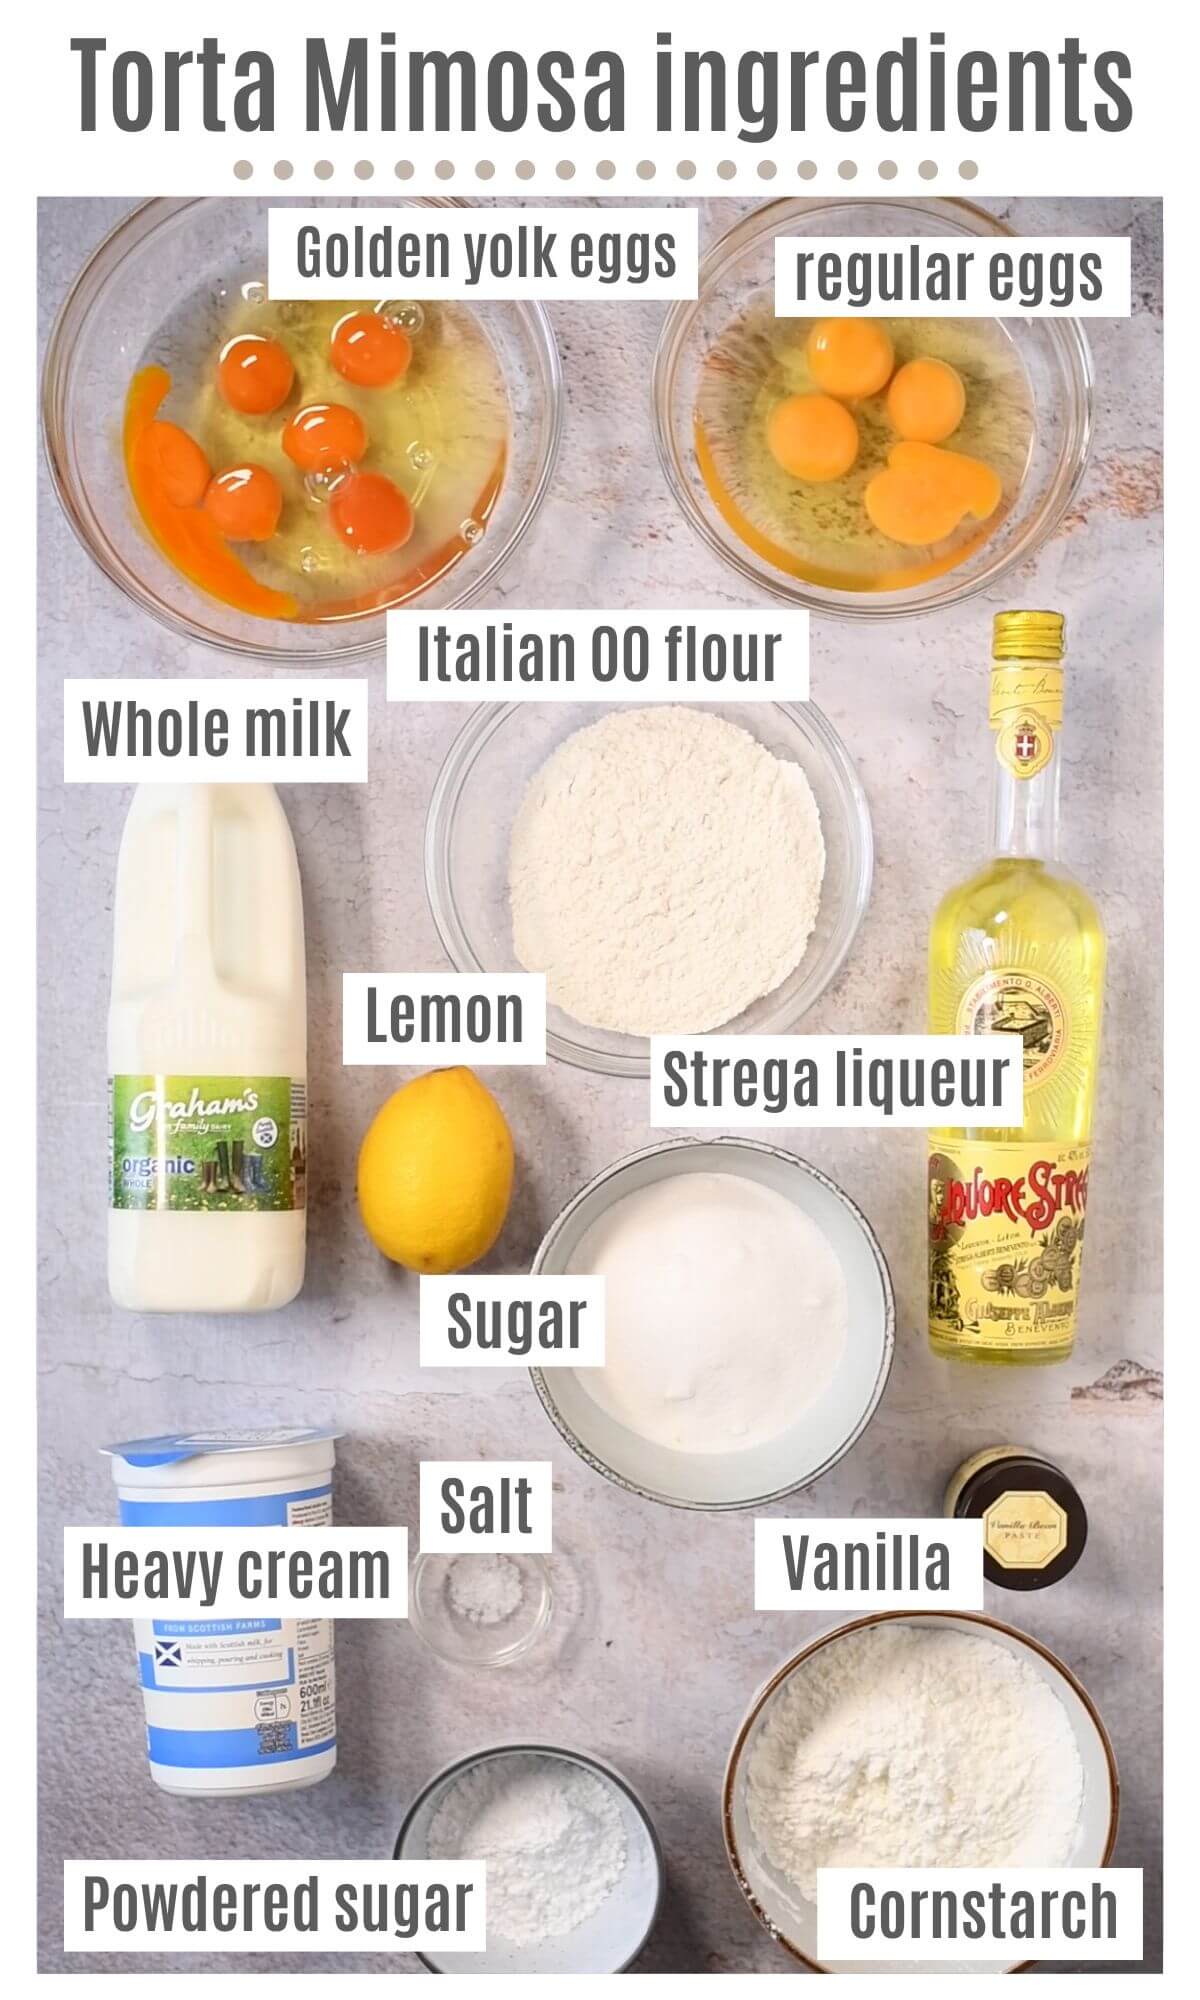
- Golden yolk eggs – I use these to achieve a yellow-coloured sponge without adding any food colouring. If the eggs you have don’t have golden yolks you can either leave it as it is (it’ll just be paler) or add a small amount of yellow food colouring.
- Sugar – I prefer to use caster sugar (extra fine sugar) for baking but granulated sugar will work just fine for this recipe.
- Italian 00 flour – you can replace this with all-purpose flour.
- Vanilla – you can use vanilla bean paste, a whole pod (seeds scraped out) or vanilla extract. Don’t use vanilla essence which is an artificial flavouring (it doesn’t taste great).
- Liqueur – we love to use Strega liqueur in our cakes but Limoncello also works really well. You can omit the alcohol altogether if you prefer.
Step by step photos and instructions
To make the sponge
Grease both cake pans with butter all over and line the bottom with baking parchment. Dust the sides of the cake pans with flour and shake out any excess. Pre-heat your oven to 160C (320F) static (no fan).
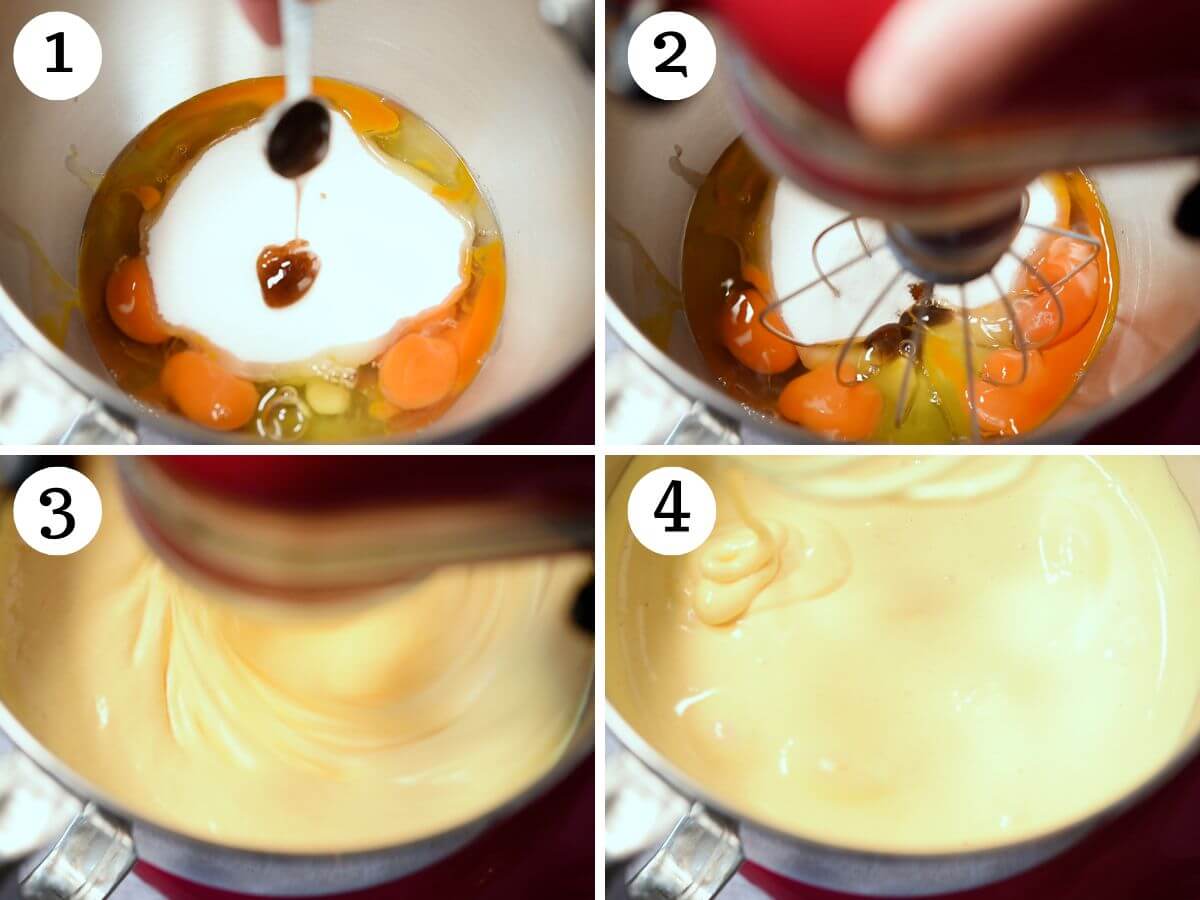
Put the 6 eggs, sugar, vanilla and a pinch of salt in your mixer and start to whisk the eggs on medium speed for about 15-20 minutes until pale, thick and fluffy. You’ll know the eggs are whipped enough when you can draw a ribbon in the mixture without it immediately disappearing (photos 1-4).
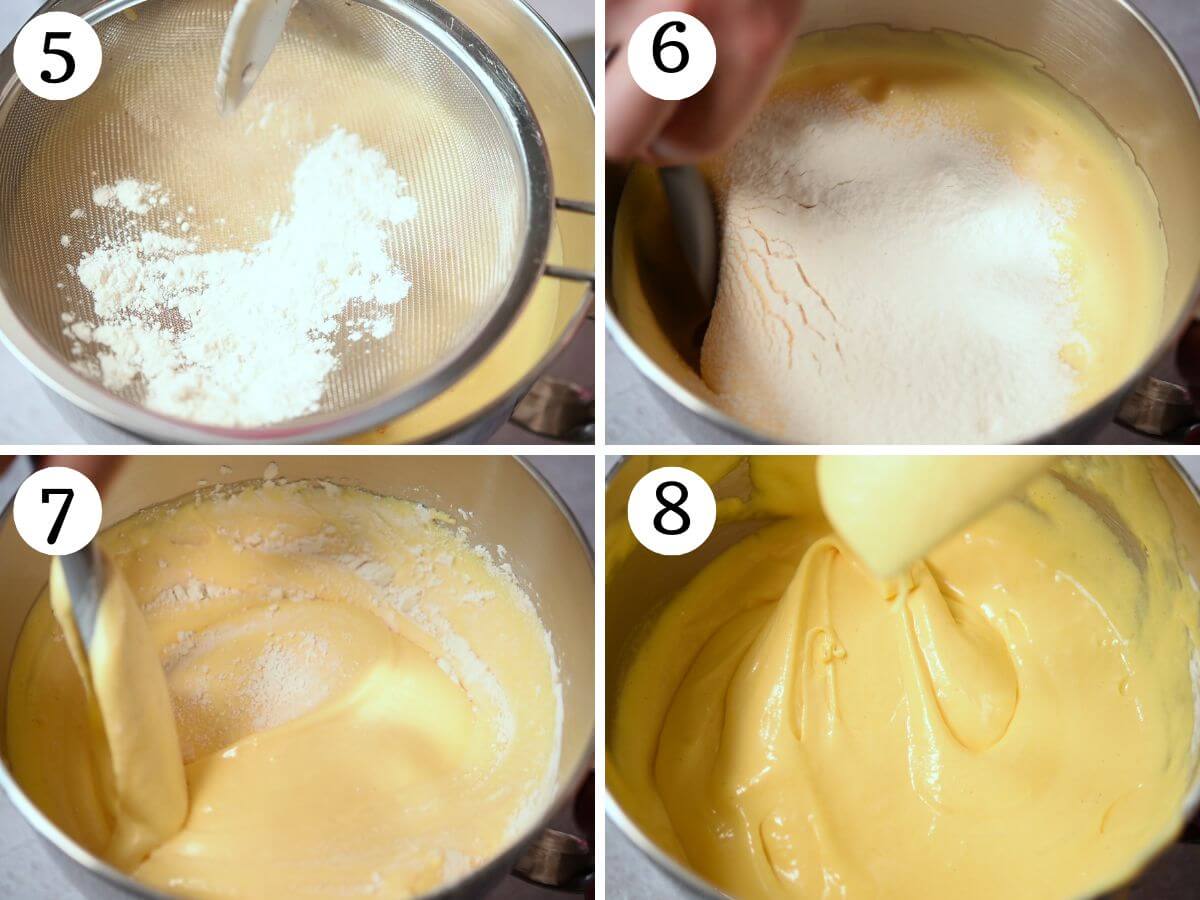
Once whipped, gently sift the flour and cornstarch into the batter 1-2 tablespoons at a time. Fold the flours gently into the eggs after each addition (make sure to scrape the bottom of the bowl as you’re folding to make sure there aren’t any pockets of flour) (photos 5-8).
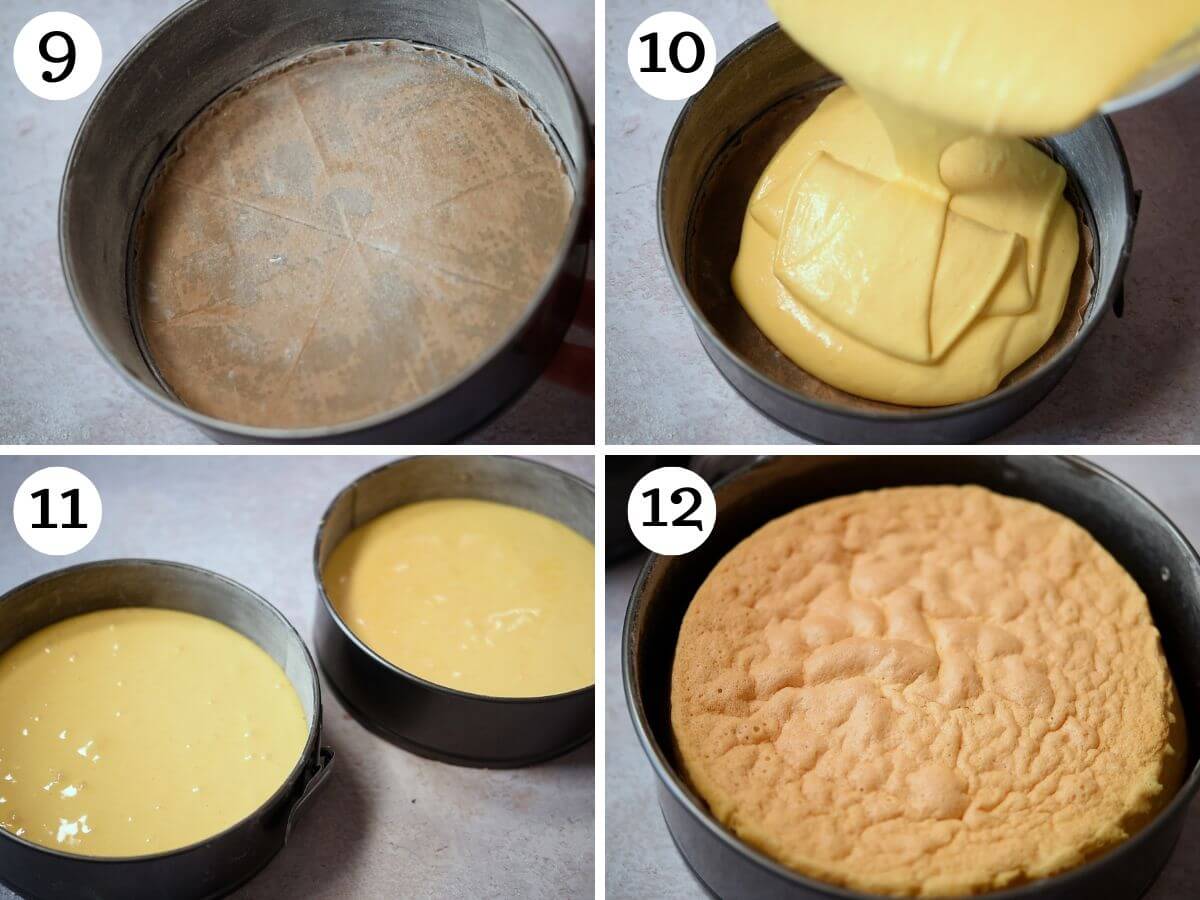
Divide the batter between two prepared 8 inch cake tins and bake on the bottom shelf of your oven for 40 minutes. Once done, leave the cakes in the oven with the door a jar for 5 minutes before removing them (photos 9-12).
Once the tins are cool enough to touch (5-10 minutes). Run a knife along the edge of the tins and remove the cakes. Let them cool completely on a wire rack.
Make the pastry cream
Tip: make the pastry cream when the cakes are in the oven.
Add the milk and vanilla to a saucepan. Peel the lemon using a vegetable peeler making sure you don’t remove too much white pith and add that to the milk. Bring to a simmer then turn off the heat immediately (photos 13 and 14).
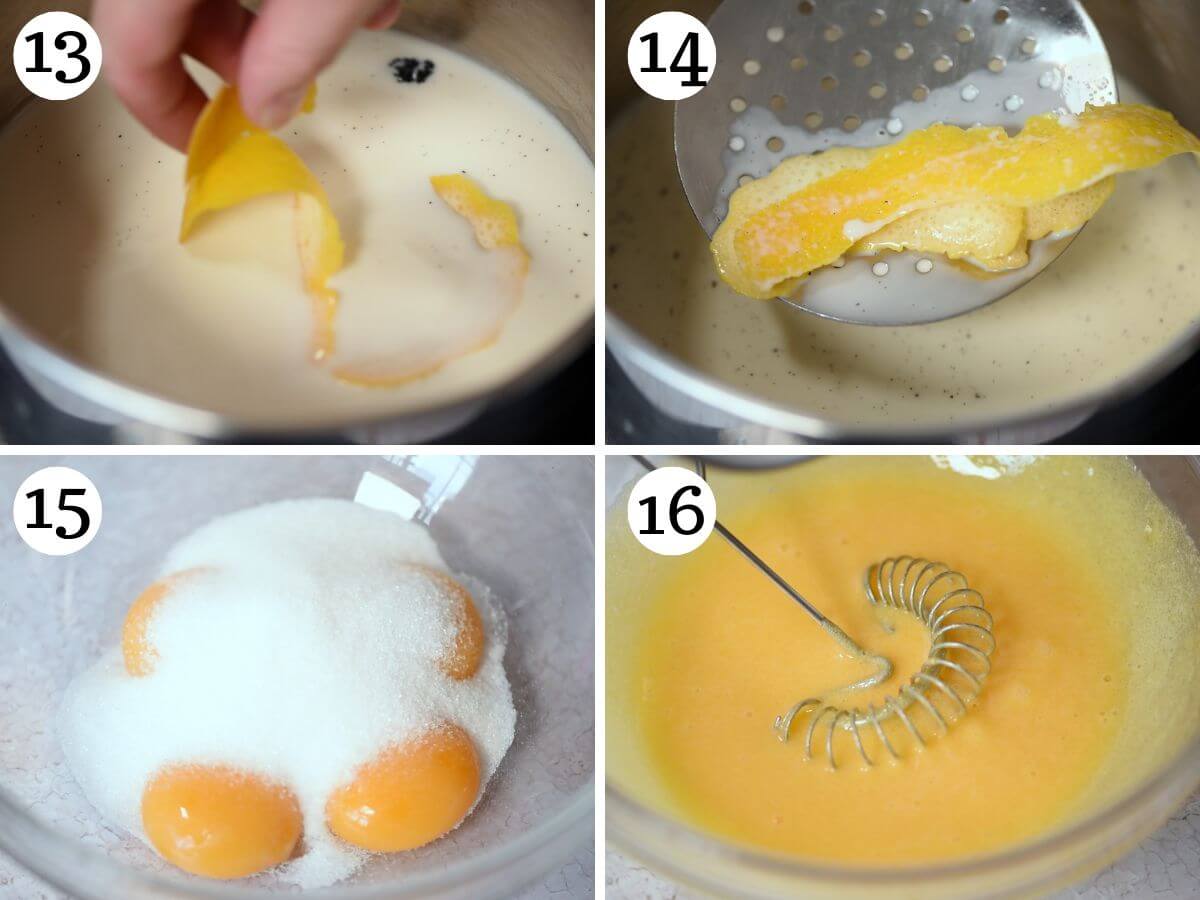
Meanwhile, add the egg yolks to a large bowl and whisk in the sugar until combined. Once combined add the cornstarch and whisk until dissolved (photos 15 and 16).
Remove the lemon peel from the milk then slowly add the hot milk to the egg mixture whilst whisking then pour it all back into the saucepan. Heat on a medium-low heat and whisk until pale and thick. It’s ready when it coats the back of a wooden spoon and you can draw a clear line through it without it dripping (photos 17-19).
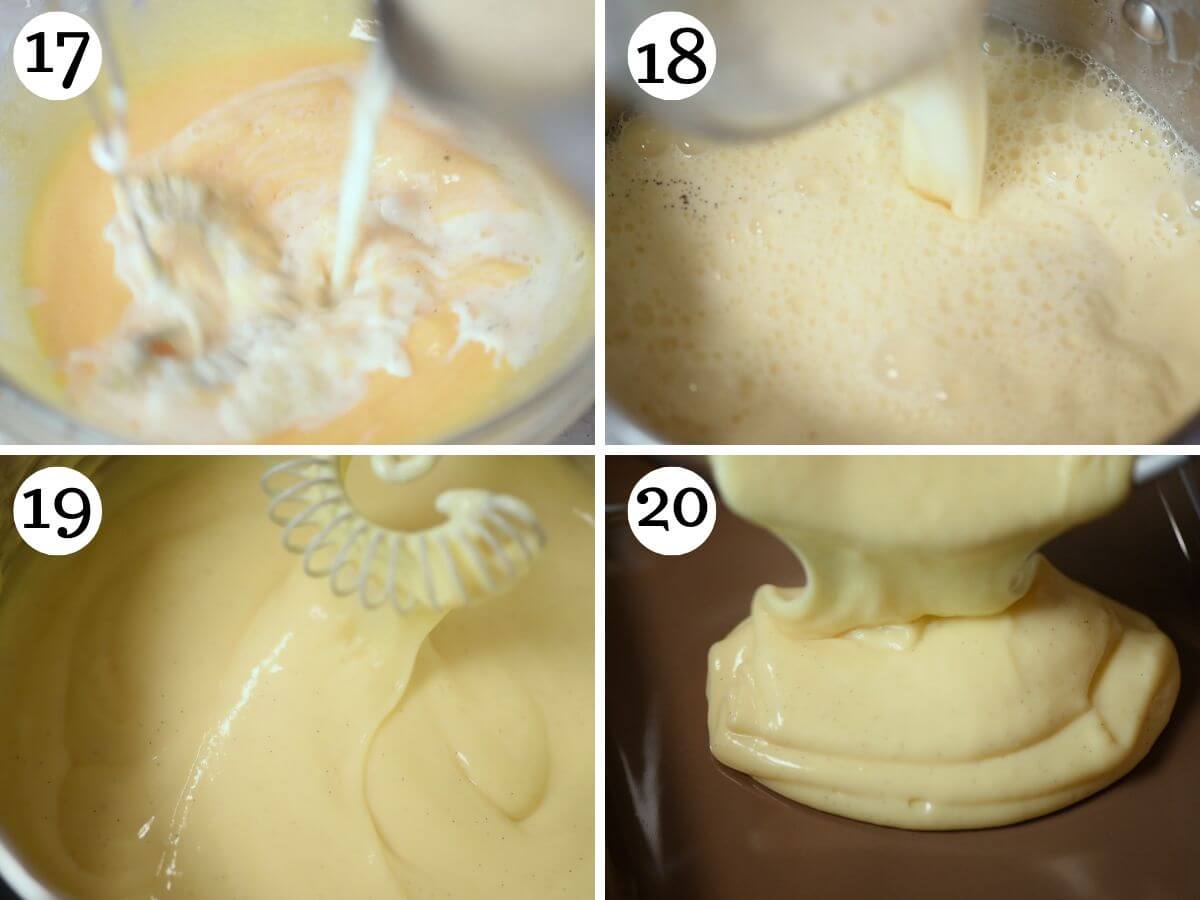
Pour the pastry cream into a medium sized baking dish and spread it out so it cools quickly. Place a piece of plastic wrap directly on top of the pastry cream so it doesn’t form a skin (photo 20).
Make the sugar water
Pour ½ cup (125ml) of water into a small saucepan and add 2 tablespoons of sugar. Bring to a boil and turn down to a simmer until the sugar has fully dissolved. Pour the sugar water into a bowl to cool down (photos 21-23).
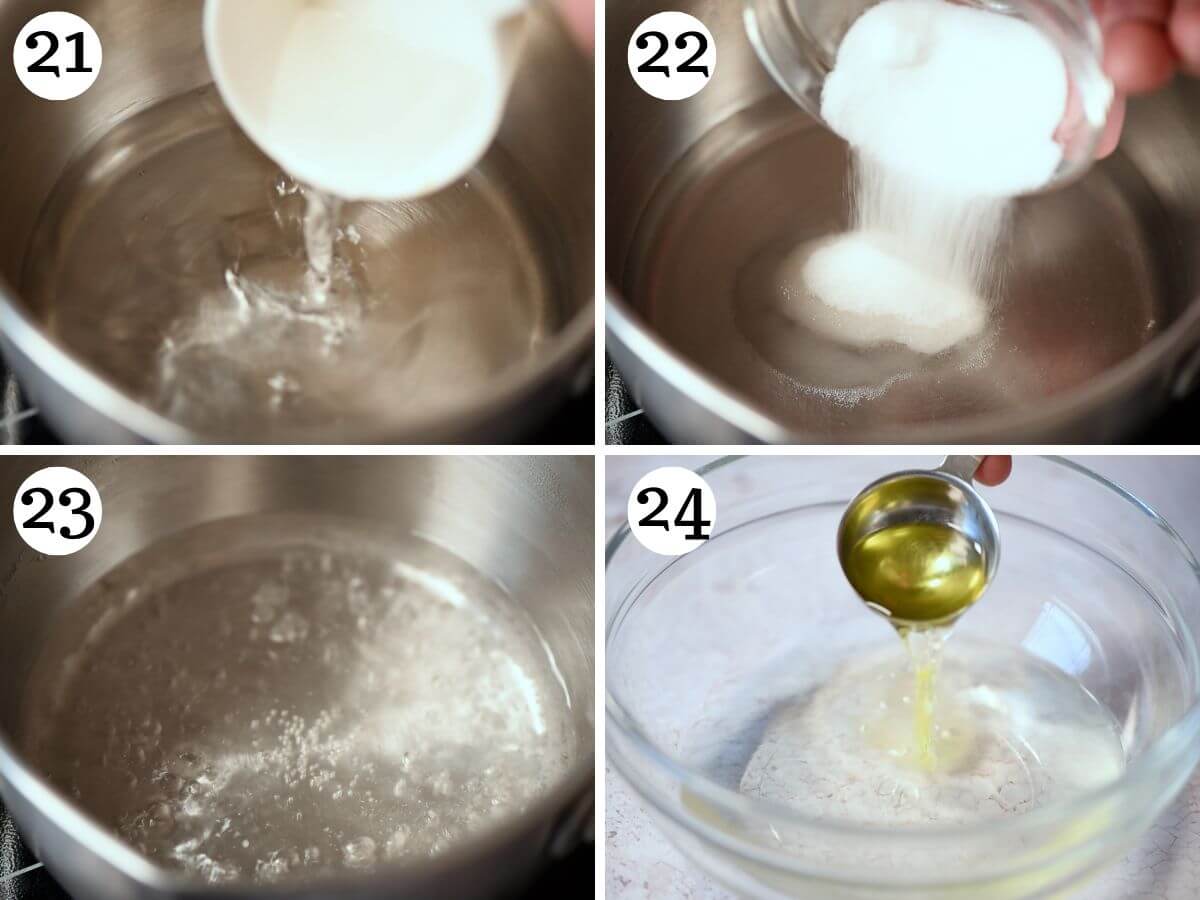
Once cooled, add 2 tablespoons of Strega or Limoncello liqueur (photo 24).
Make the chantilly cream
Add the heavy cream and powdered sugar to the bowl of your mixer and whip on medium speed to stiff peaks (be very careful not to overwhip as this happens quickly) (photos 25 and 26).
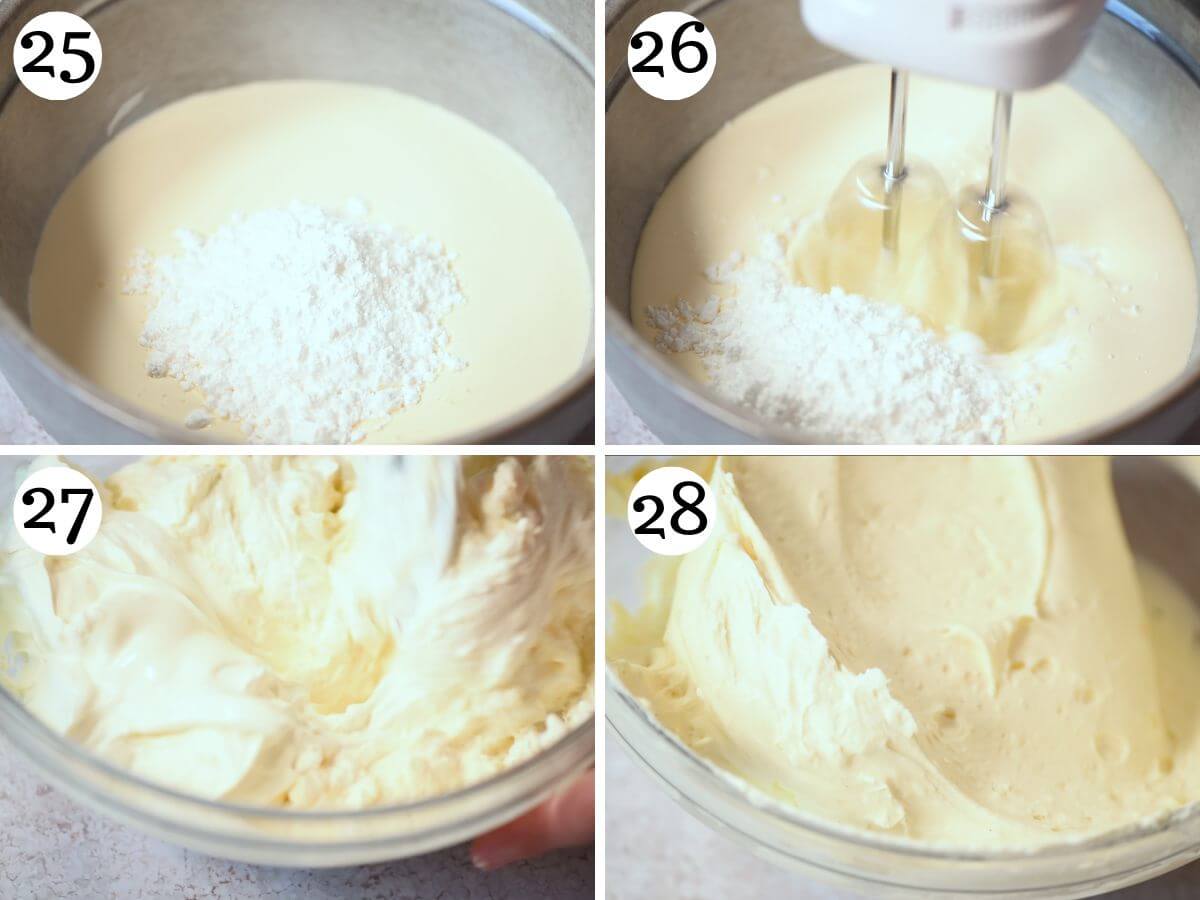
Transfer the cold pastry cream (make sure it’s cold and not warm) to a mixing bowl and give it a quick mix to loosen it. Gently fold in the whipped cream 1/3 at a time (photos 27 and 28).
Transfer to the fridge until you are ready to use.
Assembling the cake
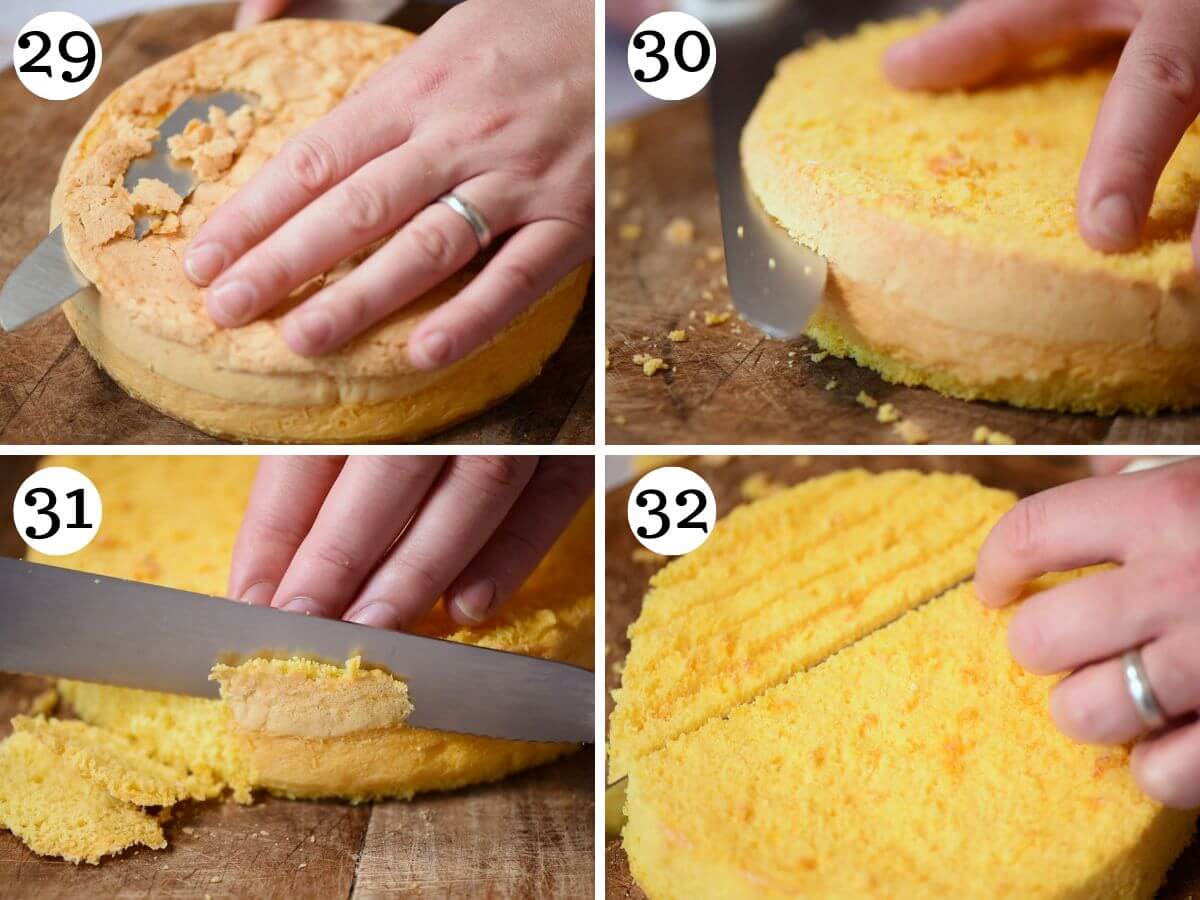
Remove the top crust from one of the sponges (take off as little as possible and cut it flat and even). Cut the sponge into 3 layers (photos 29 and 30).
Remove the crust from the top and sides of the second sponge. Cut it into slices then cut each slice into three strips lengthways. Cut each strip into small cubes about 1cm (about 1/3 of an inch) in size (photos 31-34).
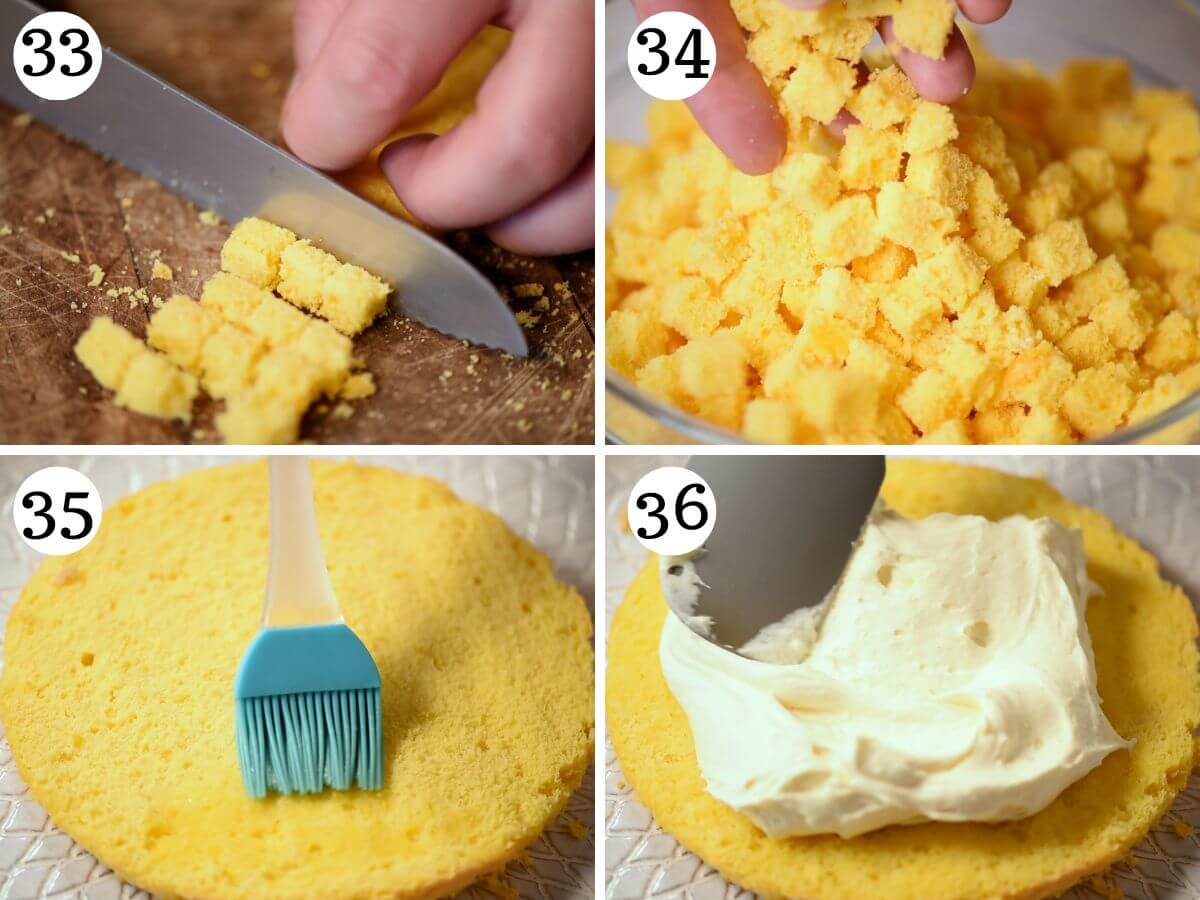
To assemble the mimosa cake, put the bottom layer of sponge cake on your cake stand or serving plate and brush over the sugar water. Spread ⅓ of the filling over that layer then top with the next layer (photos 35-37).
Brush over more sugar water and add another ⅓ of the filling. Make sure to spread it out evenly so the cake stays level (photo 38).
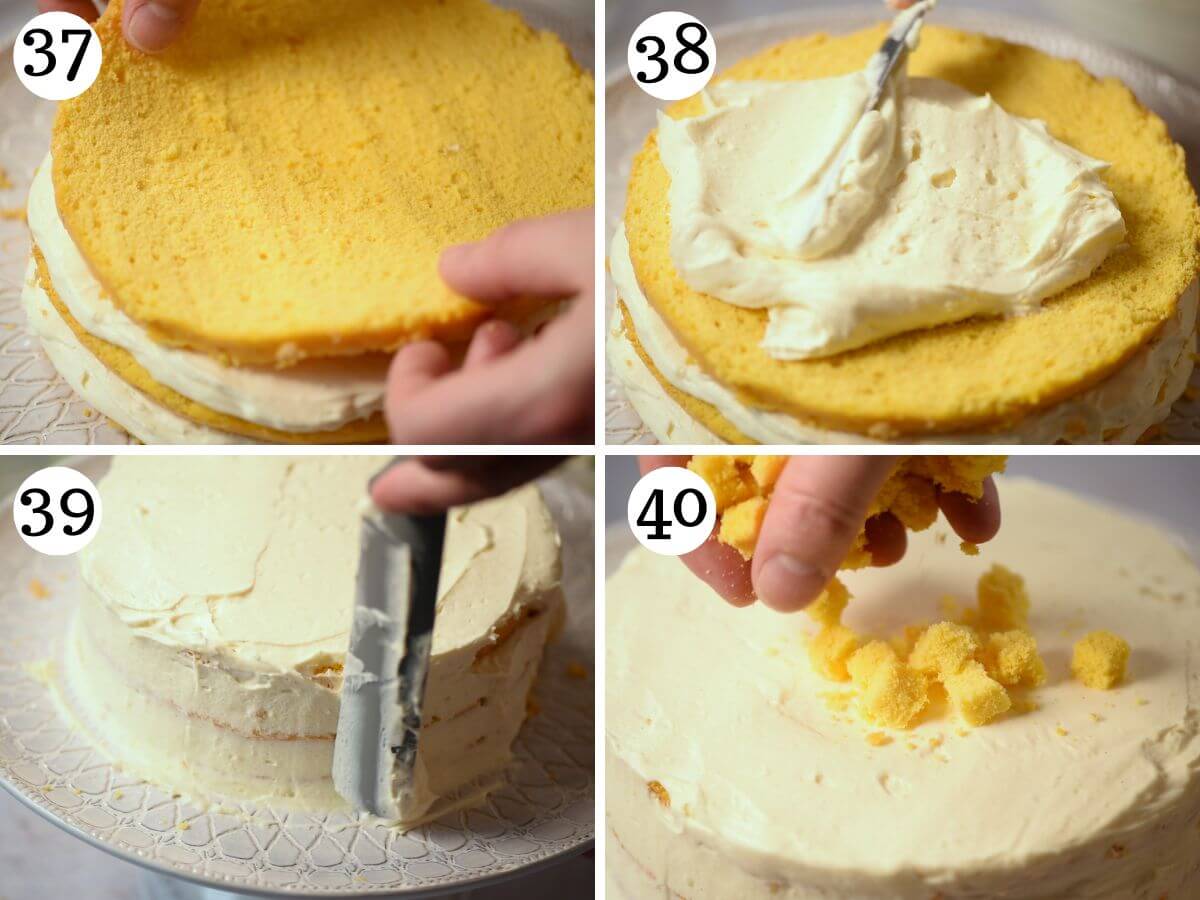
Finally, top with the final layer and use the remaining cream to spread all over the top and sides of the cake until it’s completely covered. Cover the cake in the small sponge cubes until completely covered and serve (photos 39 and 40).
Ways to decorate your mimosa cake
There are two ways you can decorate your mimosa cake. I’ve tried both options and they are both visually stunning and give the appearance of a mimosa flower so it really comes down to personal preference.
- Cubes – the most common way is by cutting the second sponge into small cubes and using them to cover the cake.
- Crumbs – the second option is to break the second sponge into crumbs and use the crumbs to cover the cake.
Recipe tips and FAQs
- Read the whole recipe first – a mimosa cake has a lot of different elements and steps but they’re not too difficult. It’s best to read the whole recipe before starting so you have a clear idea of each step. Always refer to the step-by-step photos or recipe video for clarification on each step.
- To achieve a yellow sponge cake – I used egg yolks with a deep orange/golden hue. These are the same eggs I use for pasta dough and they give both pasta and sponges a beautiful yellow colour. If you can’t get these you could use a little food colouring or just use regular eggs and don’t worry about the colour.
- Prepare your cake tins – make sure to grease and line the bottom of both cake tins. Grease the sides with butter (sparingly) and dust the edges with flour making sure to shake off any excess.
- Don’t open the oven door – it’s so important to let the cakes bake for the full 40 minutes before opening the oven door or they’ll sink.
- To stop it drying out – the sponge layers shouldn’t dry out because they’re soaked in sugar water but the little cubes on top of the cake can dry out quickly. You can reserve some sugar water and use it to dap the top of the cake the next day if you feel they’re drying out too much.
Yes, you can either make each element in advance (sponge, sugar water and pastry cream) or assemble the whole cake 1-2 days in advance. Store everything in the fridge.
The cake will keep well for up to 3 days in the fridge. Note that the sponge cubes that cover the cake will start to dry out.
More Italian desserts to try
Italian Desserts
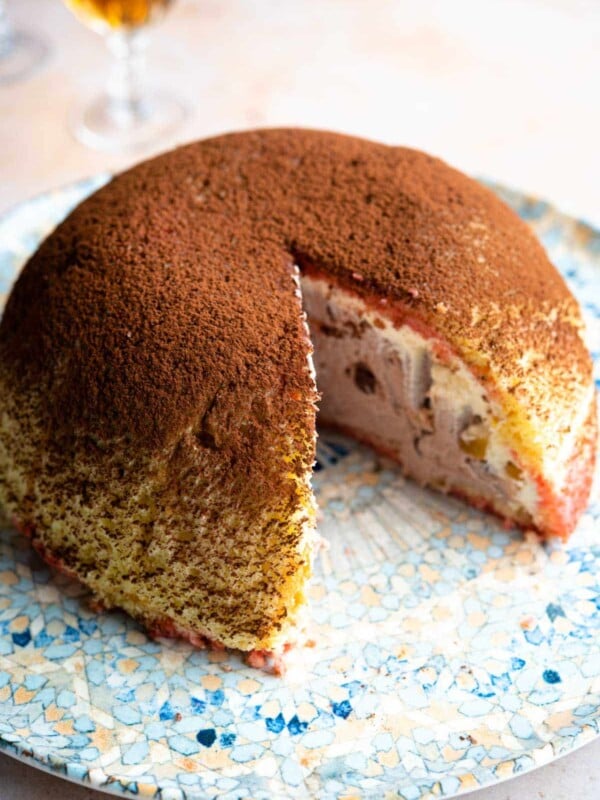
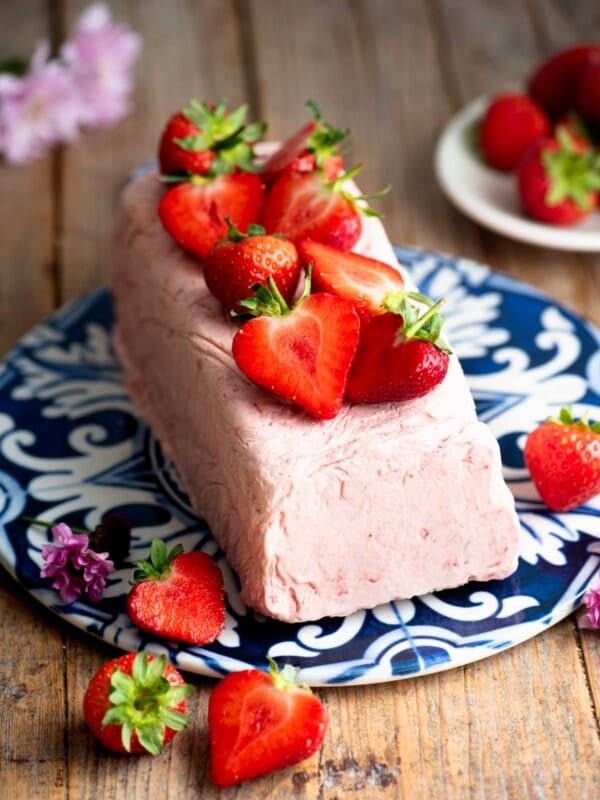
Zuccotto (Sponge Cake with Ricotta Filling)

Italian Desserts
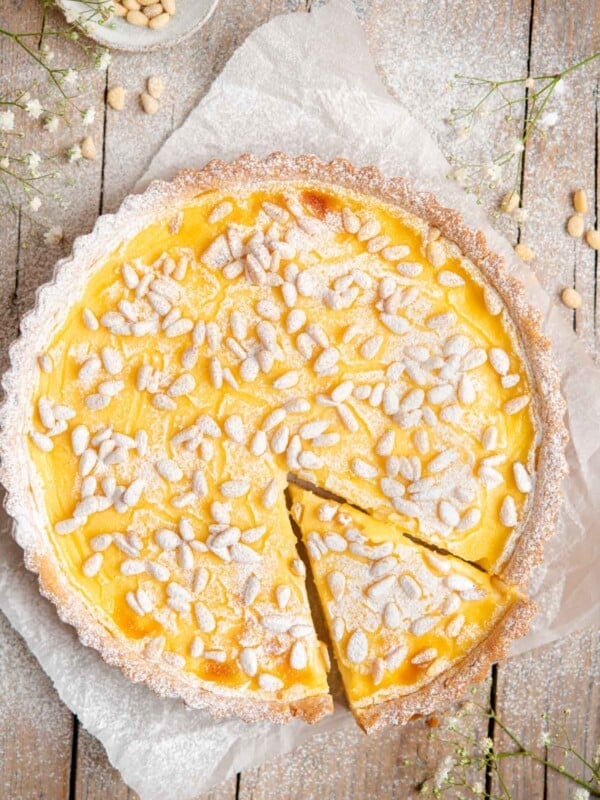
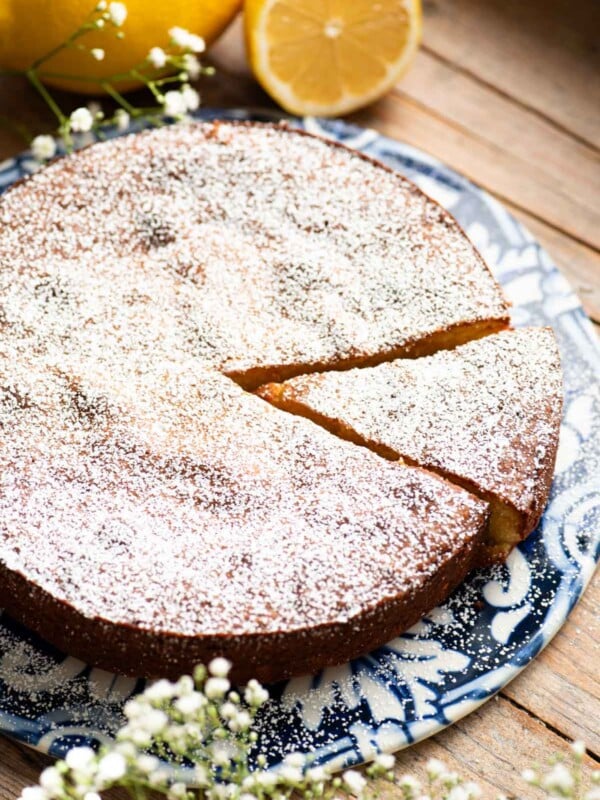
Torta della Nonna: Italian Custard Tart
Italian Desserts
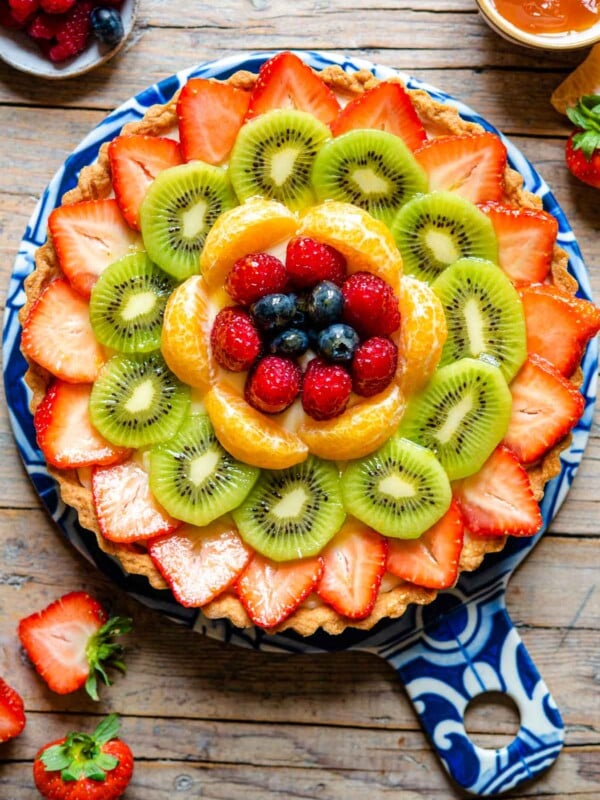
Crostata di Frutta (Italian Fruit Tart)
If you’ve tried this Mimosa Cake recipe or any other recipe on the blog then don’t forget to rate the recipe and let me know how you got on in the comments below, I love hearing from you! You can also follow us on Facebook, Instagram and Pinterest or sign up to our Newsletter to see more of our delicious food.
Step By Step Photos Above
Most of our recipes come with step by step photos, helpful tips and tricks to make it perfectly first time and even video!
Torta Mimosa (Italian Mimosa Cake)

Equipment
- 2 x 8 inch (20cm) springform cake pans
- Baking parchment
- Stand mixer or electric whisk
Ingredients
For the sponge (Pan di Spagna)
- 6 medium eggs, (300g)
- 130 g (1 cup) Italian 00 flour, can also use all-purpose
- 130 g (1 cup) corn starch
- 260 g (1.5 cups) caster sugar, can also use granulated
- 1 teaspoons vanilla bean paste or 1 vanilla bean, can also use 1 teaspoon of vanilla extract
- 1 pinch of salt
- Butter for greasing
For the pastry cream (Crema Pasticcera)
- 4 egg yolks
- 70 g (1/3 cup) caster or granulated sugar
- 30 g (1/4 cup) cornstarch (cornflour UK)
- 500 ml (2 cups plus 2 tablespoons) whole milk
- Peel of 1 whole lemon
- 1 teaspoon vanilla bean paste or extract
Chantilly cream
- 450 ml (2 cups) heavy cream (double cream UK)
- 5 tablespoons powdered sugar (icing sugar UK), (55g)
Sugar water
- 125 ml (1/2 cup) water
- 2 tablespoons caster or granulated sugar
- 2 tablespoons Strega or Limoncello liqueur
Instructions
To make the sponge
- Grease both cake pans with butter all over and line the bottom with baking parchment. Dust the sides of the cake pans with flour and shake out any excess. Pre-heat your oven to 160C (320F) static (no fan).
- Put the 6 eggs, sugar, vanilla and a pinch of salt in your mixer and start to whisk the eggs on medium speed for about 15-20 minutes until pale, thick and fluffy. You’ll know the eggs are whipped enough when you can draw a ribbon in the mixture without it immediately disappearing.
- Once whipped, gently sift the flour and cornstarch into the batter 1-2 tablespoons at a time. Fold the flours gently into the eggs after each addition (make sure to scrape the bottom of the bowl as you’re folding to make sure there aren’t any pockets of flour).
- Divide the batter between two prepared 8 inch cake tins and bake on the bottom shelf of your oven for 40 minutes. Once done, leave the cakes in the oven with the door a jar for 5 minutes before removing them.
- Once the tins are cool enough to touch (5-10 minutes). Run a knife along the edge of the tins and remove the cakes. Let them cool completely on a wire rack.
Make the pastry cream
- Tip: make the pastry cream when the cakes are in the oven.
- Add the milk and vanilla to a saucepan. Peel the lemon using a vegetable peeler making sure you don’t remove too much white pith and add that to the milk. Bring to a simmer then turn off the heat immediately.
- Meanwhile, add the egg yolks to a large bowl and whisk in the sugar until combined. Once combined add the cornstarch and whisk until dissolved.
- Slowly add the hot milk to the egg mixture whilst whisking then pour it all back into the saucepan. Heat on a medium-low heat and whisk until pale and thick. It’s ready when it coats the back of a wooden spoon and you can draw a clear line through it without it dripping.
- Pour the pastry cream into a medium sized baking dish and spread it out so it cools quickly. Place a piece of plastic wrap directly on top of the pastry cream so it doesn’t form a skin.
Make the sugar water
- Pour ½ cup (125ml) of water into a small saucepan and add 2 tablespoons of sugar. Bring to a boil and turn down to a simmer until the sugar has fully dissolved. Pour the sugar water into a bowl to cool down.
- Once cooled, add 2 tablespoons of Strega or Limoncello liqueur.
Make the chantilly cream
- Add the heavy cream to the bowl of your mixer and whip on medium speed. Add the powdered sugar 1 tablespoon at a time and continue to whip the cream to stiff peaks (be very careful not to overwhip as this happens quickly).
- Transfer the cold pastry cream (make sure it’s cold and not warm) to a mixing bowl and give it a quick mix to loosen it. Gently fold in the whipped cream 1/3 at a time.
- Transfer to the fridge until you are ready to use.
Assembling the cake
- Remove the top crust from one of the sponges (take off as little as possible and cut it flat and even). Cut the sponge into 3 layers.
- Remove the crust from the top and sides of the second sponge. Cut it into slices then cut each slice into three strips lengthways. Cut each strip into small cubes about 1cm (about 1/3 inch) in size.
- To assemble the mimosa cake, put the bottom layer of sponge cake on your cake stand or serving plate and brush over the sugar water. Spread ⅓ of the filling over that layer then top with the next layer. Brush over more sugar water and add another ⅓ of the filling. Make sure to spread it out evenly so the cake stays level.
- Finally, top with the final layer and use the remaining cream to spread all over the top and sides of the cake until it’s completely covered. Cover the cake in the small sponge cubes until completely covered and serve.
Video
Notes
- Read the whole recipe first – a mimosa cake has a lot of different elements and steps but they’re not too difficult. It’s best to read the whole recipe before starting so you have a clear idea of each step. Always refer to the step-by-step photos or recipe video for clarification on each step.
- To achieve a yellow sponge cake – I used egg yolks with a deep orange/golden hue. These are the same eggs I use for pasta dough and they give both pasta and sponges a beautiful yellow colour. If you can’t get these you could use a little food colouring or just use regular eggs and don’t worry about the colour.
- Don’t open the oven door – it’s so important to let the cakes bake for the full 40 minutes before opening the oven door or they’ll sink. Also leave them in the oven with the door open ajar (oven turned off) for 5 minutes before removing.
- To stop it drying out – the sponge layers shouldn’t dry out because they’re soaked in sugar water but the little cubes on top of the cake can dry out quickly. You can reserve some sugar water and use it to dap the top of the cake the next day if you feel they’re drying out too much.
- Storage – the cake will keep well in the fridge for up to 3 days.
Helpful Info for All Recipes
- I always use extra virgin olive oil in all of my recipes unless stated otherwise
- When I use canned or jarred tomatoes of any kind I always use Cirio or Mutti brands for the best results and flavour.
- All vegetables are medium sized unless stated otherwise
- All recipes are tested and developed using a fan (convection) oven
- Find out more about how nutrition is calculated.
- Check out our must have Italian Pantry Staples.
- You can also find all our Essential Kitchen Tools for Italian Cooking.
Nutrition
Nutrition information is automatically calculated, so should only be used as an approximation.


Absolutely delicious, refreshing, perfect for a summer day. Its flavor is unique. My entire family loved!!
Ah I’m so happy to hear that, thank you!
Just made the cake this afternoon. Easy to follow the recipe and looks ok, although I should have added some yellow as it looks pale. Tastes delicious. I love the filling especially – will use it again for other puddings! Thank you