This post may contain affiliate links. Please read our disclosure policy.


Our new and improved recipe for our Homemade Pizza Dough. This pizza dough is super easy to prep with an overnight cold ferment for added flavour and texture. Not only is the dough easy to handle, but it creates the most delicious light and airy pizzas that you’ll love.
Pizza is something we’ve been making for years, but as with anything, you learn and improve as time goes on, and the recipe we originally posted in 2017 no longer reflected how we make pizza today, so it needed a complete overhaul.
(If you do want the original recipe, you can email me and I’ll send it to you.)
I wanted to create a pizza dough that was easy for everyone, so this dough is at 65% hydration (more on that below).
If you make pizzas regularly, then I highly recommend getting yourself a pizza stone or steel and a pizza peel, which makes the pizza-making process a breeze…and so much more fun.
There’s a lot of information in this post, so use the TOC below to jump to the section you need or just jump straight to the full recipe to get started. Enjoy!
Table of Contents
The new and improved dough vs the original
- Minimal yeast – there is a drastic reduction in the amount of yeast we use in this recipe. We only use 1g or 1/4 teaspoon of instant yeast, which gives the dough a much lighter texture.
- Overnight proof – giving the pizza dough a longer fermentation time overnight not only provides a delicate, airy dough, but it also gives it a chance to develop a lot more flavour.
- No rolling pin – yikes! Yes, this dough uses stretching techniques (and gravity) to shape pizzas, which works well for round pizza or tray pizzas.
Notes on hydration
The higher the hydration of the dough, the airier and lighter the dough will be, but it also becomes a lot more difficult to handle espeically when it comes to pizza.
I find that when you go beyond 65% hydration for pizza dough, you have to be very quick in the shaping process, and although that might not be an issue for those with more experience handling dough, I didn’t want to use a super high hydration as my go-to pizza base since it’s not easy for everyone.
I find 65% to be the perfect ratio for both shaping the dough and achieving a light, airy and delicious crust.
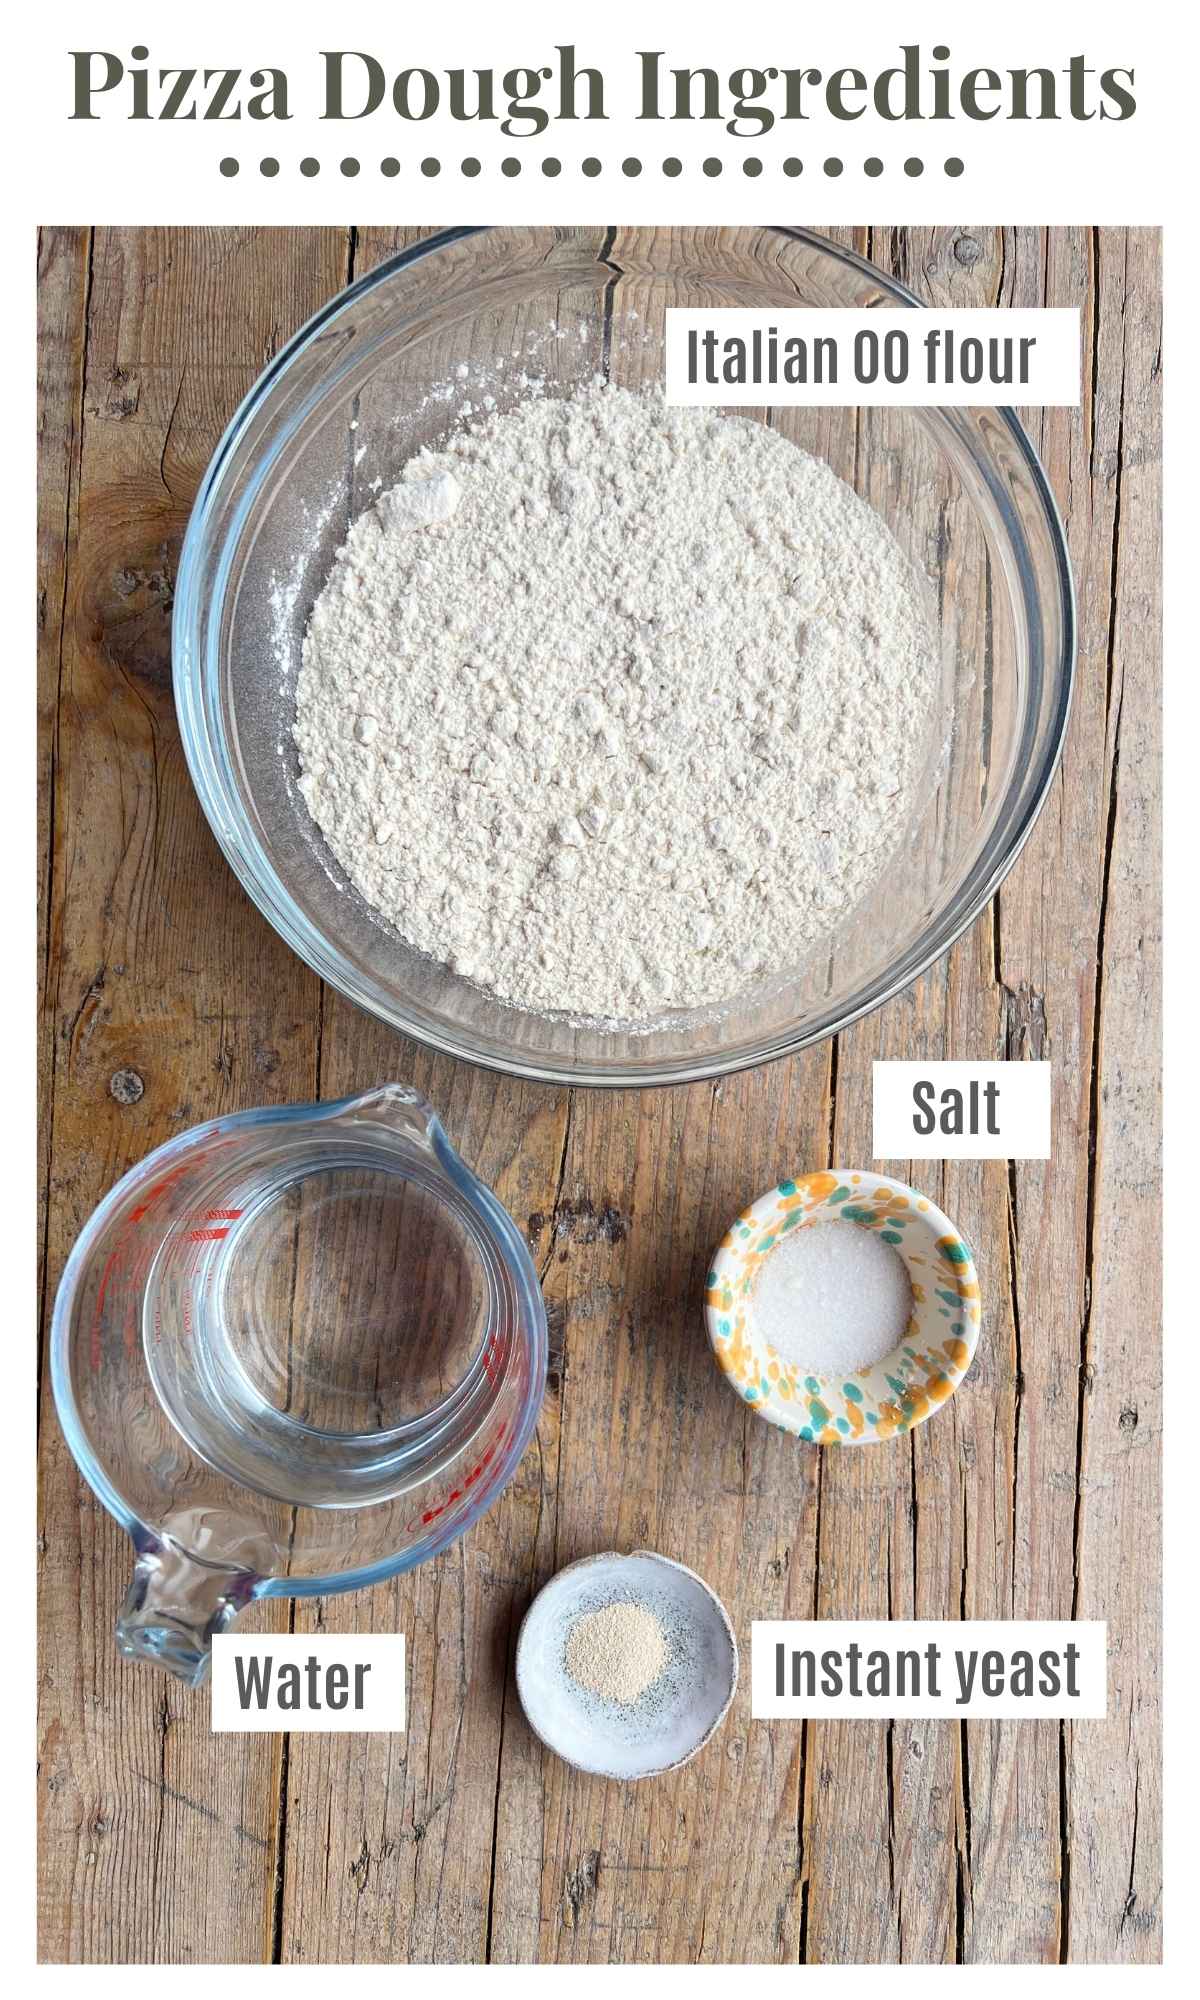
Ingredient notes
Pin this now to find it later
Pin It- Flour – living in Italy, I always used Tipo 0 (single zero) flour to make pizza because it’s the best flour for making pizzas and was readily available. That being said, I now use Tipo 00 (double zero) flour 100% of the time as it’s available in every supermarket. The important thing to look out for is for the flour to have at least 12% protein content.
- Instant yeast – this is yeast that can be incorporated straight into the flour. If you need to activate your yeast in water first, just use a little from the recipe.
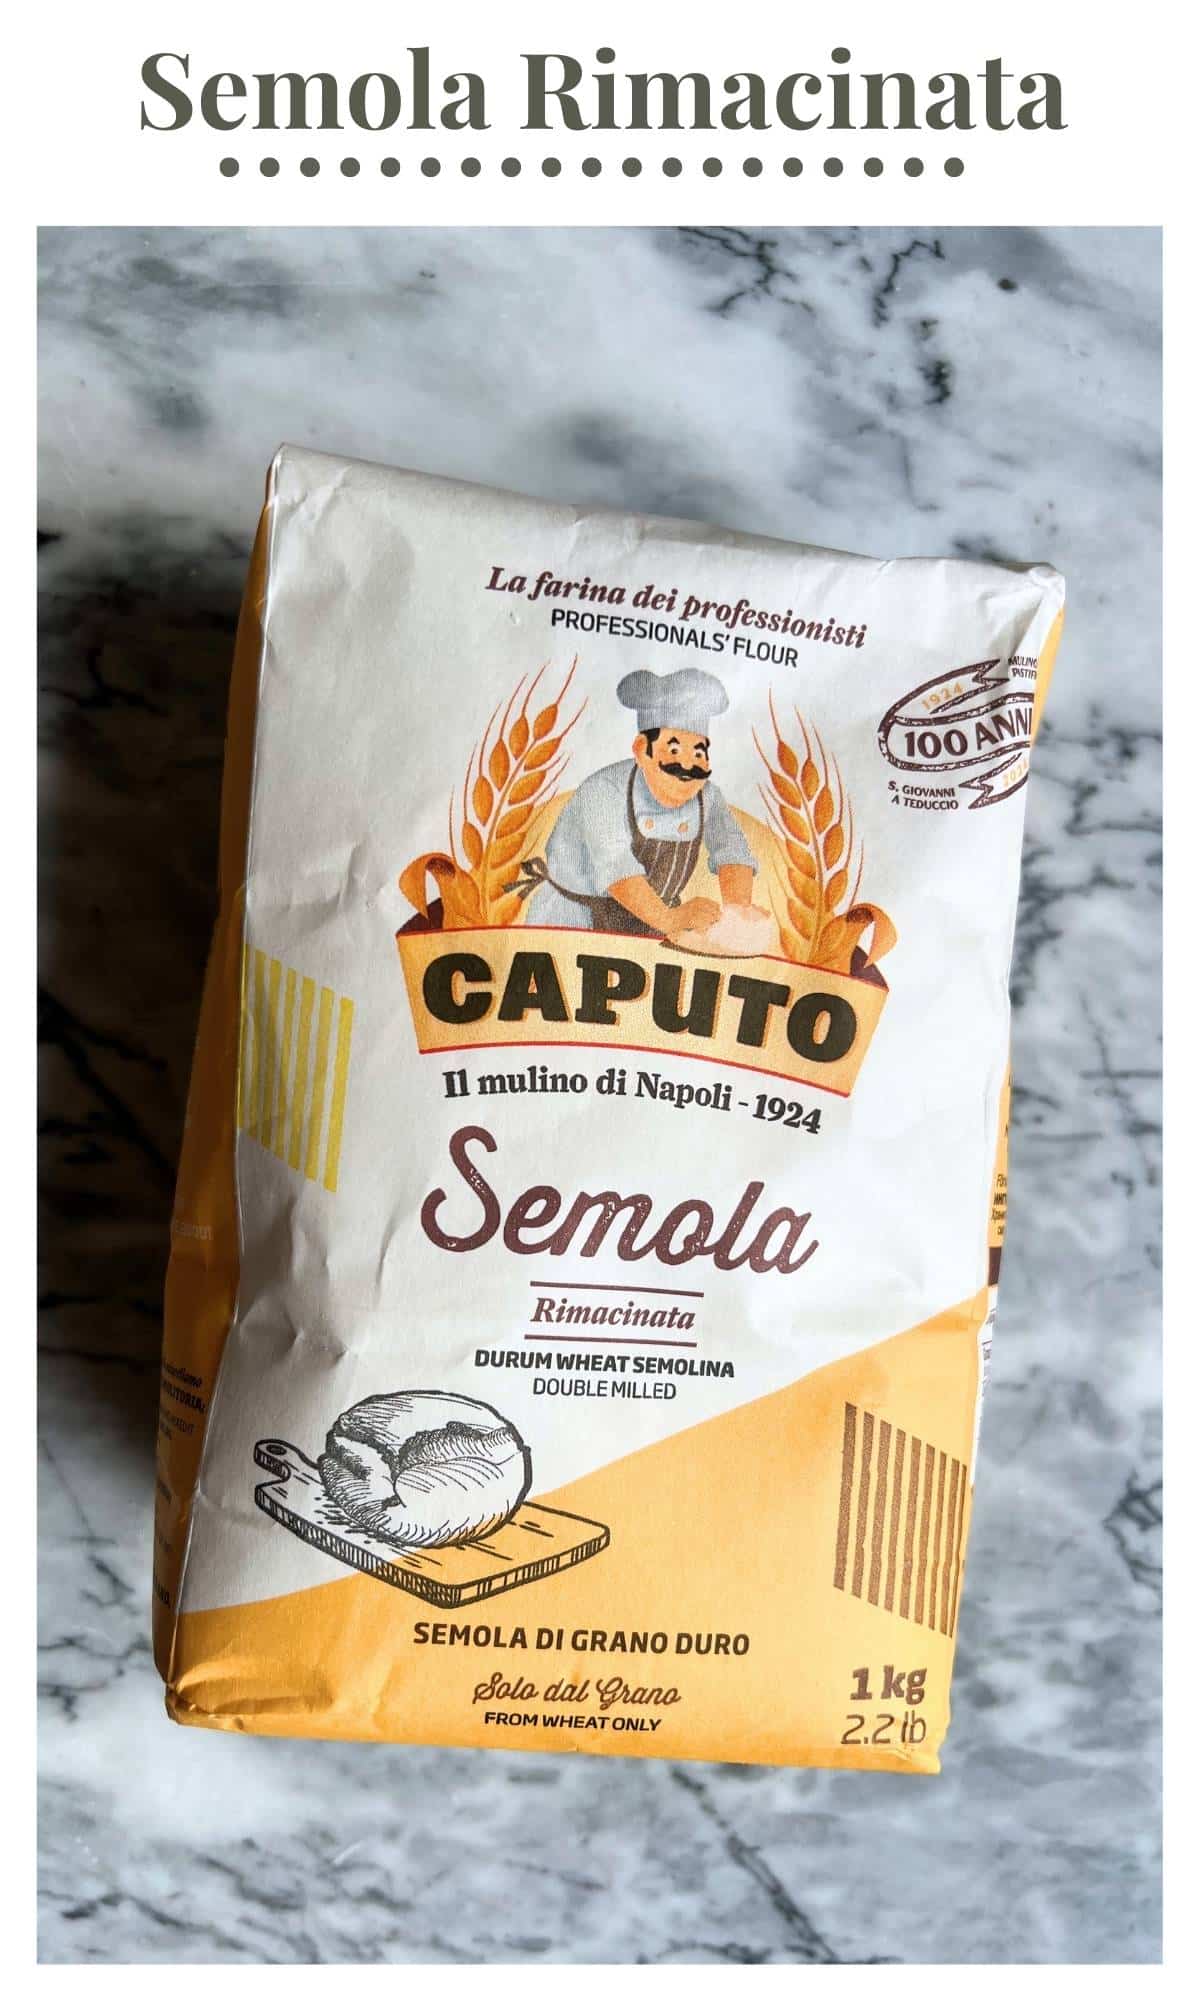
- Semola Rimacinata – I highly recommend using semola to shape your pizza dough before baking for several reasons: it doesn’t cling to your hands as flour does, it doesn’t absorb into the dough like flour does, and it makes it very easy to remove the pizza from the pizza peel. If you use baking trays to bake your pizza, just sprinkle some of this on the bottom of the tray too!
Visual walk-through of the recipe
Step 1 – Mix the flour, water and yeast together until a dough has formed. I use a dough hook on a stand mixer, but you can also do this in a bowl with a spoon, then use your hands when it starts to come together (photos 1 and 2).
Cover the bowl with plastic wrap and let it rest for 30 minutes.
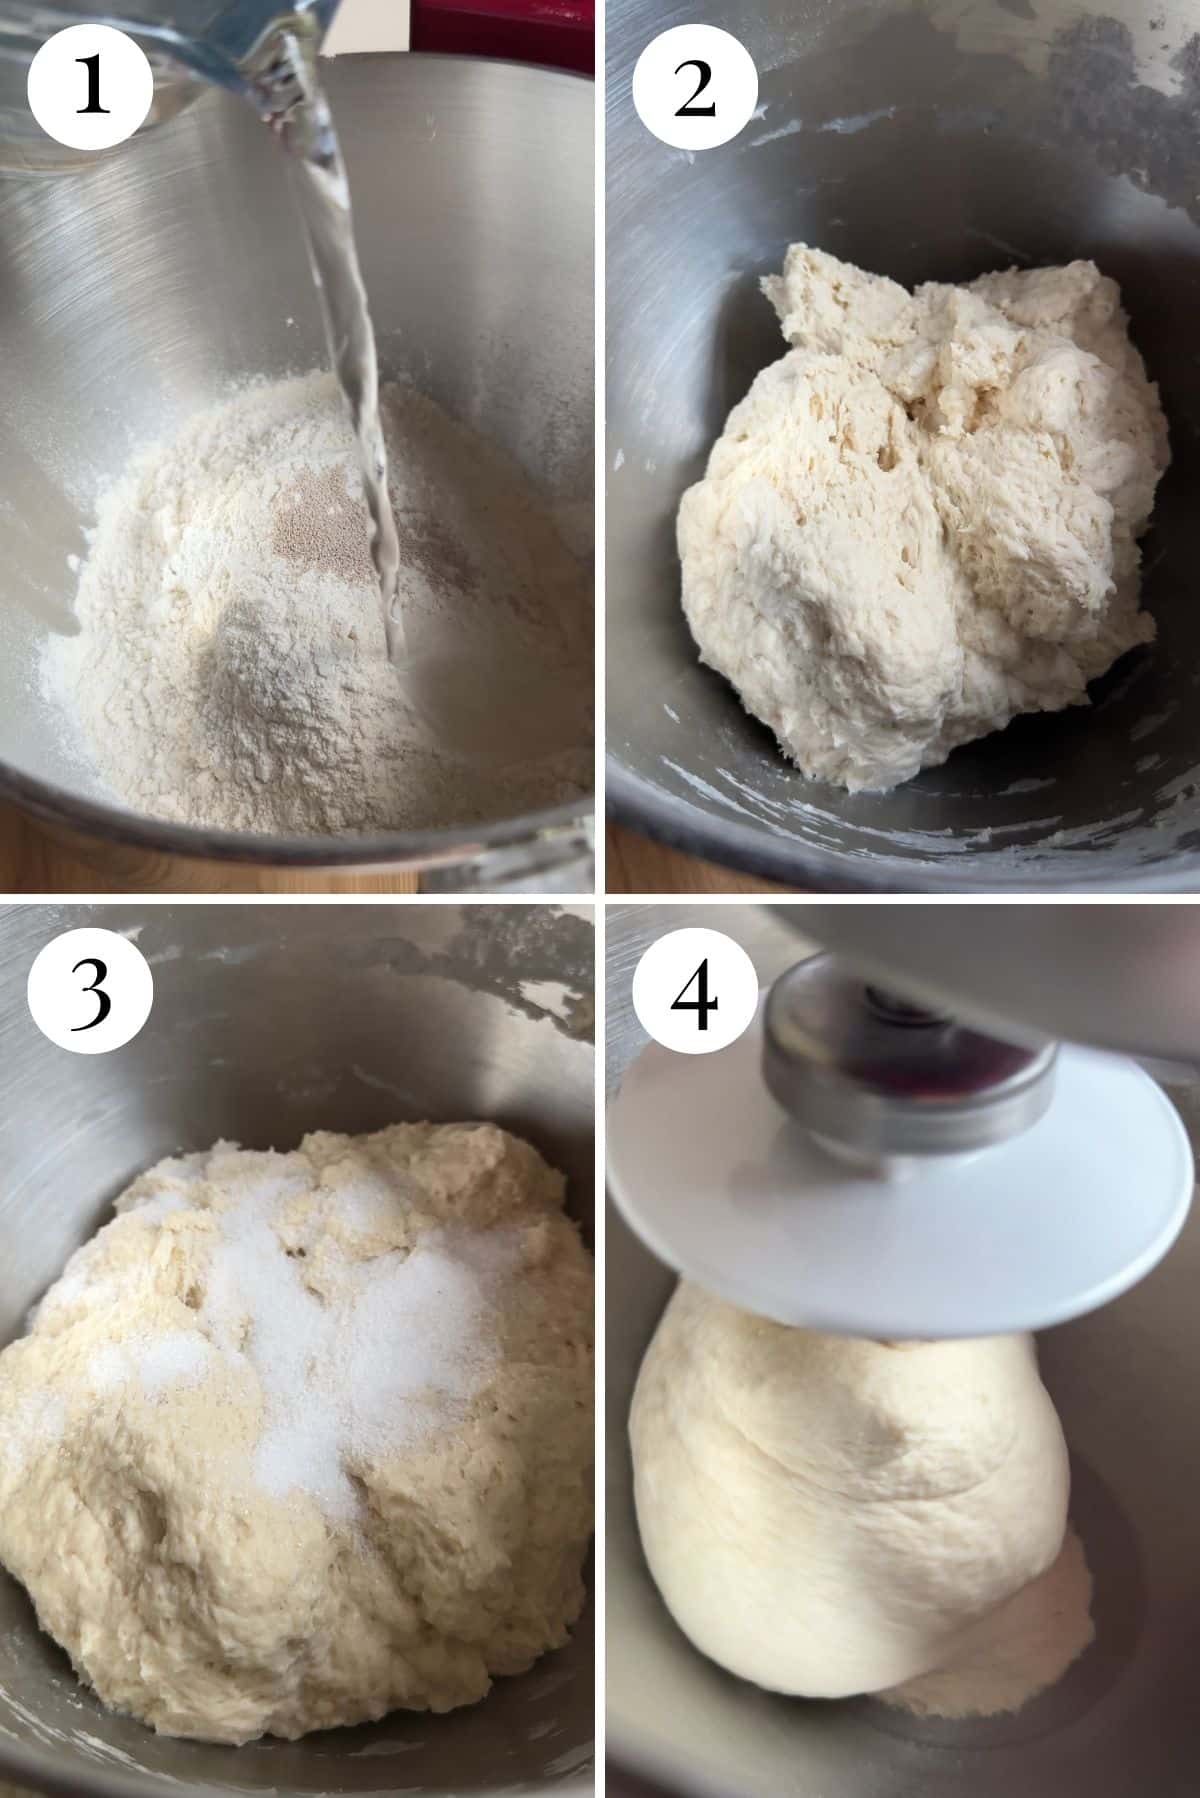
Step 2 – Add the salt and knead again for 10 minutes using a dough hook on a stand mixer or by hand (photos 3-5).
Step 3 – Tip the dough onto a clean work surface and shape it into a ball. Place the dough back in the bowl and cover with plastic wrap. Let it proof for 4 hours or until doubled in size.

Step 4 – Tip the dough onto a clean work surface and cut it into 4 quarters. I like to weigh my pieces of dough to between 235-240g, but you don’t have to do this (photo 6).
Step 5 – Take one piece of dough, gently pull the edges in towards the centre, then turn it over so the seam is underneath. Cup your hands around the dough and gently turn it on the work surface until it forms a smooth ball. Place it in a small bowl, then repeat the process with all 4 pieces of dough, placing them in individual bowls (photos 7 and 8).
Step 7 – Place the dough in the fridge to cold ferment for 18 to 48 hours.
Step 8 – Bring the dough out of the fridge 2-3 hours before baking so it’s not too cold. Preheat your oven to the highest temperature it will go. We use a pizza stone, which must be placed in a cold oven and preheated for 45 minutes to 1 hour.
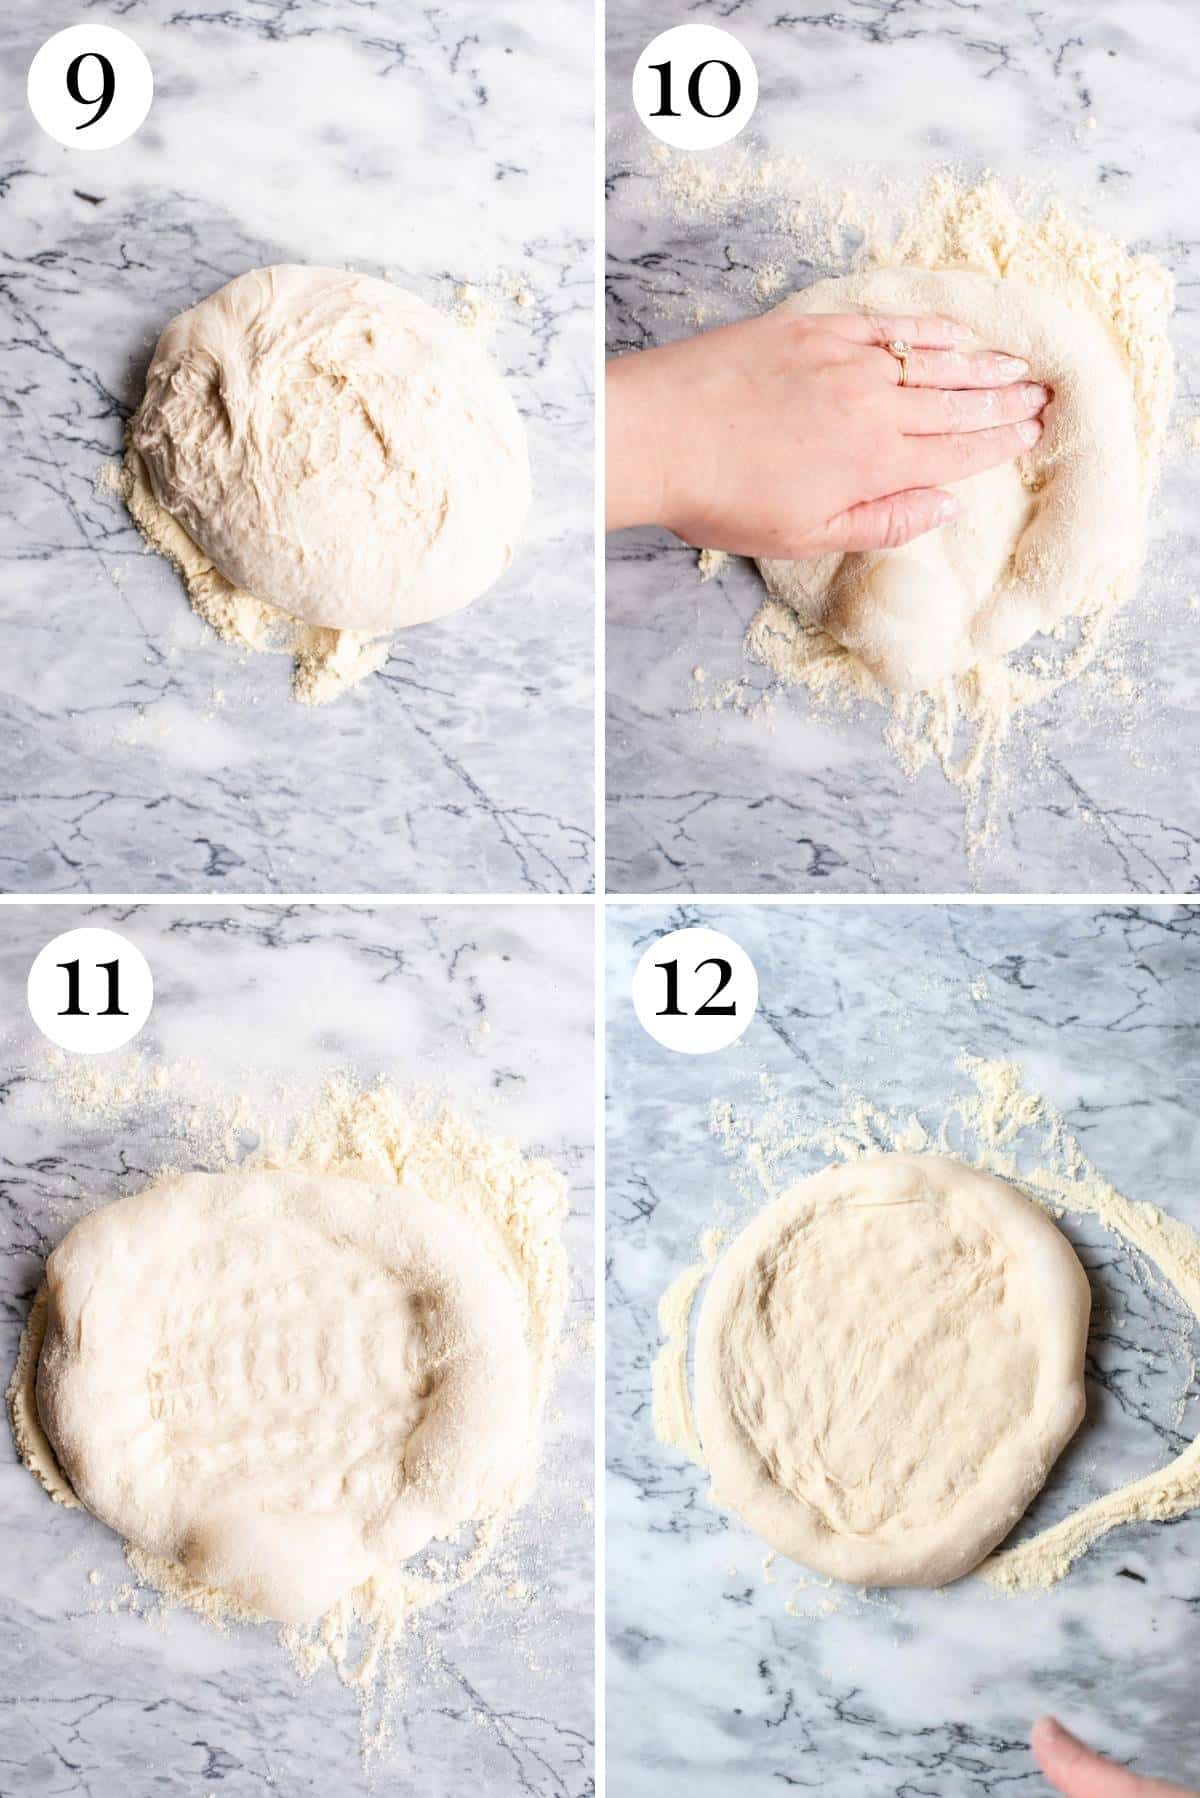
Step 10 – Sprinkle a generous handful of semola flour on a clean work surface and tip one dough ball directly on top of it. Flip it over so both sides are covered in semola. Next press your fingers 1/2 inch away from the edge of the dough to the other side (photos 9-12).
Step 11 – Do this a few times, then stretch the dough gently with turning it in a circle (or use your fists (photos 13 and 14).
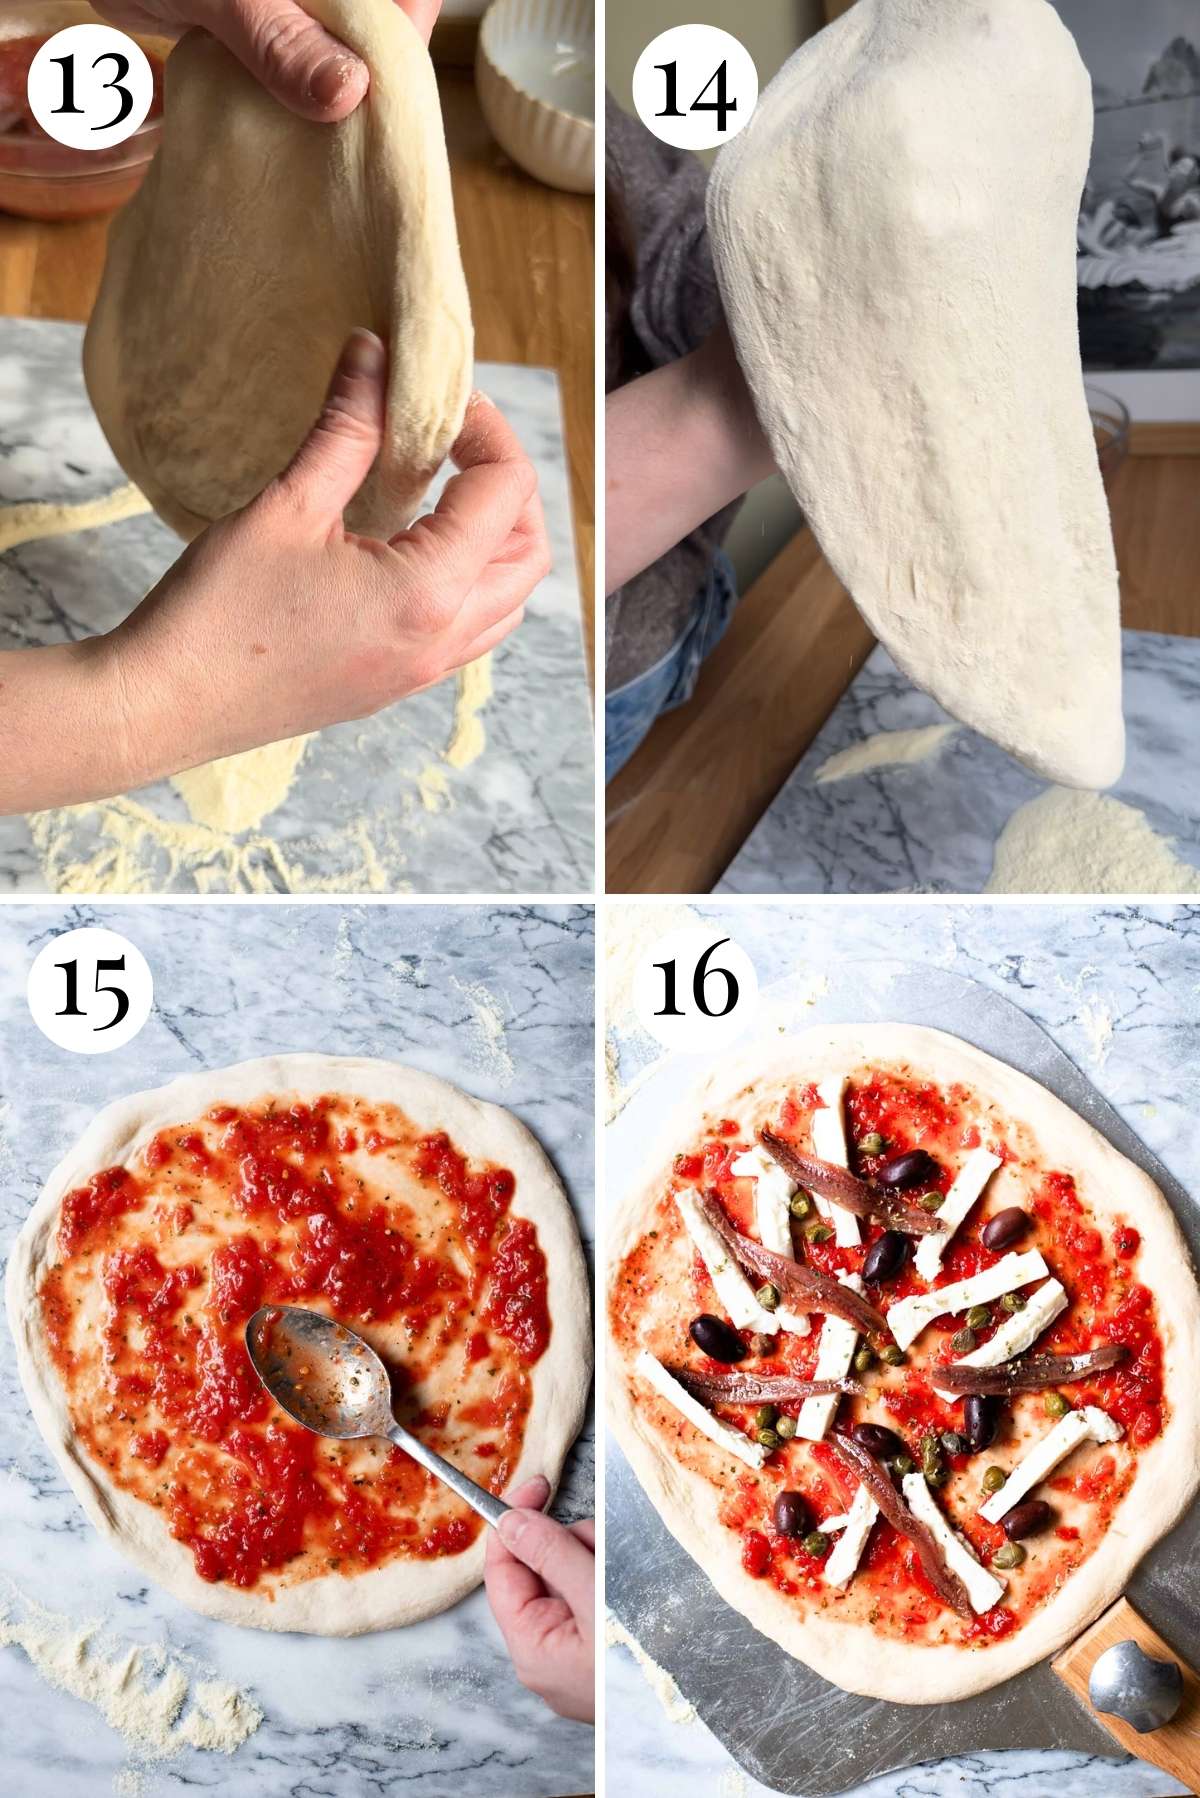
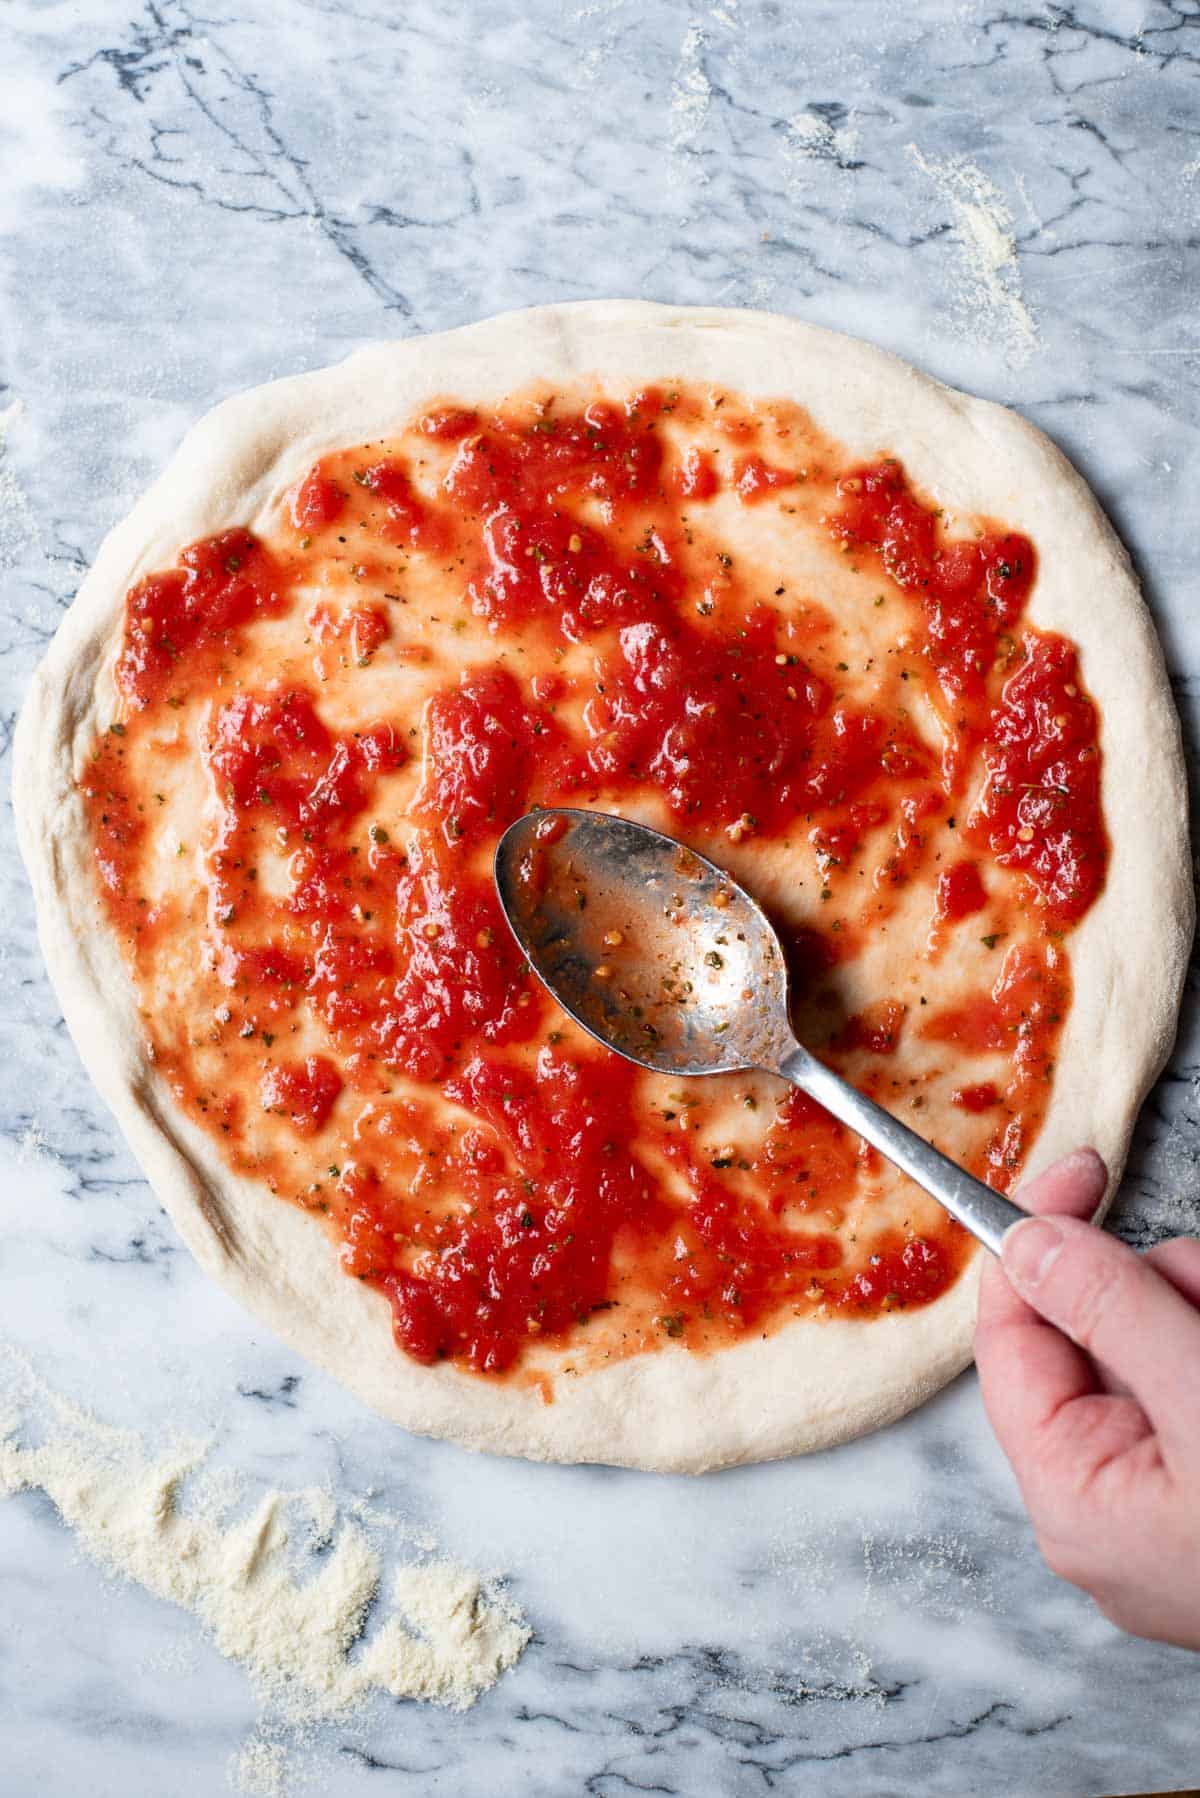
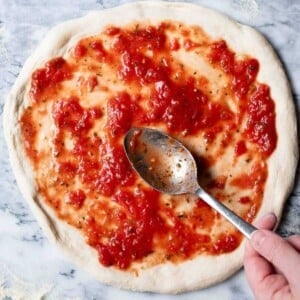
Step 12 – spread tomato sauce over the base of your pizza and add your toppings. Slide the pizza onto your pizza peel and stretch it out slightly. Transfer to the oven and bake for 5-10 minutes until the crust is golden and the cheese melted (photos 15 and 16).
Recipe tips
- Weigh the ingredients – Although I have provided US cup measurements (I measured this myself), I highly recommend using a kitchen scale to weigh both the flour and water. There is so much room for error when using cups to measure flour, so to stay on the safe side and get accurate results, use a kitchen scale.
- Dough consistency – if the dough feels too sticky to handle, you can sprinkle your hands and the dough very lightly with flour but try not to add too much. The consistency will vary depending on the brand of flour used (due to water absorption) and the temperature of the room.
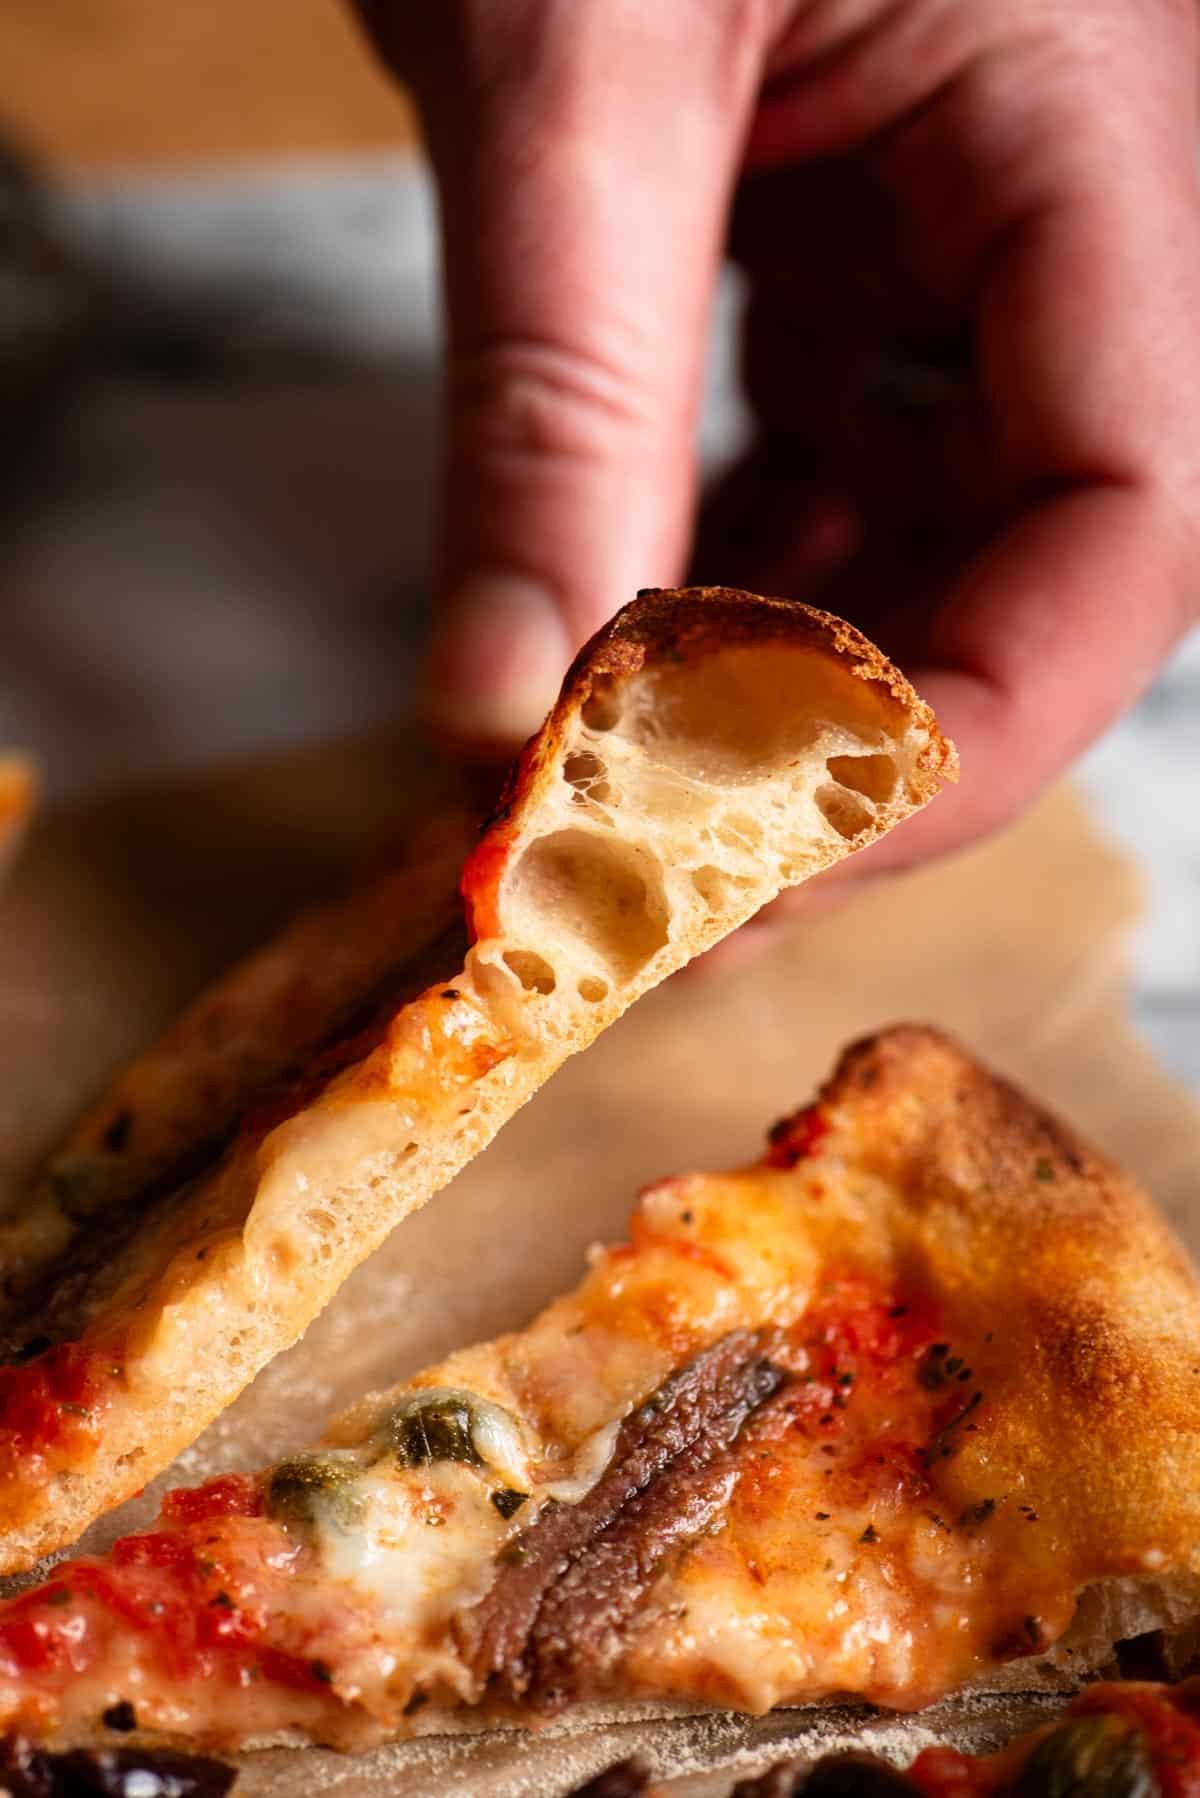
- Cook time – this will vary depending on what you use (pizza stone, steel or baking tray) and the temperature of your oven. My home oven goes up to 270°C (518°F) but also has a pizza setting that adds more heat from the bottom of the oven to help create a crispy base. This setting, along with using a pizza stone, cooks my pizza in just 5 minutes, but my previous oven took about 10 minutes.
FAQs
Yes, it’s great for freezing. Do this as soon as you divide the dough into balls (just place in a freezer bag or container) and freeze instead of letting it cold ferment in the fridge. Defrost completely and bring it to room temperature before using.
Do not worry, just skip straight to kneading the dough for 10 minutes and follow the rest of the recipe as written. Although I recommend giving the dough an initial rest before adding the salt for improved texture, you will still have a beautiful dough if you skip this step.
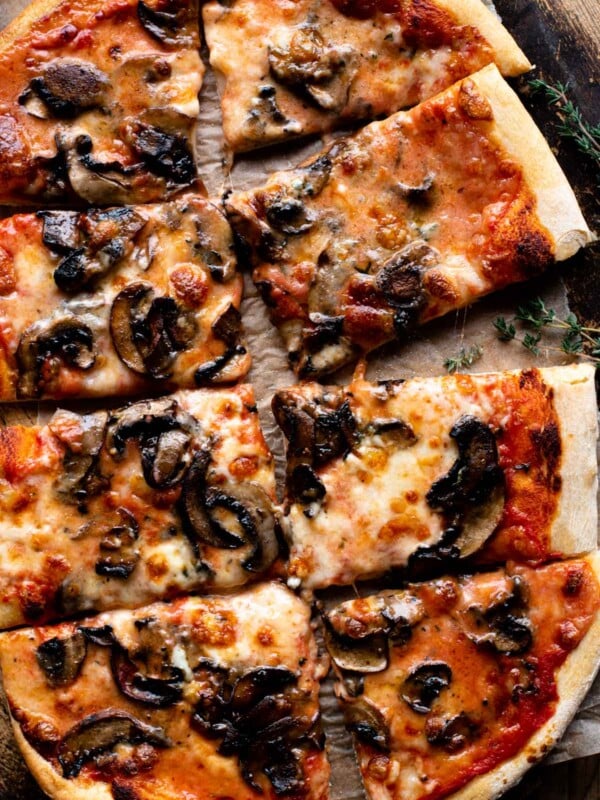
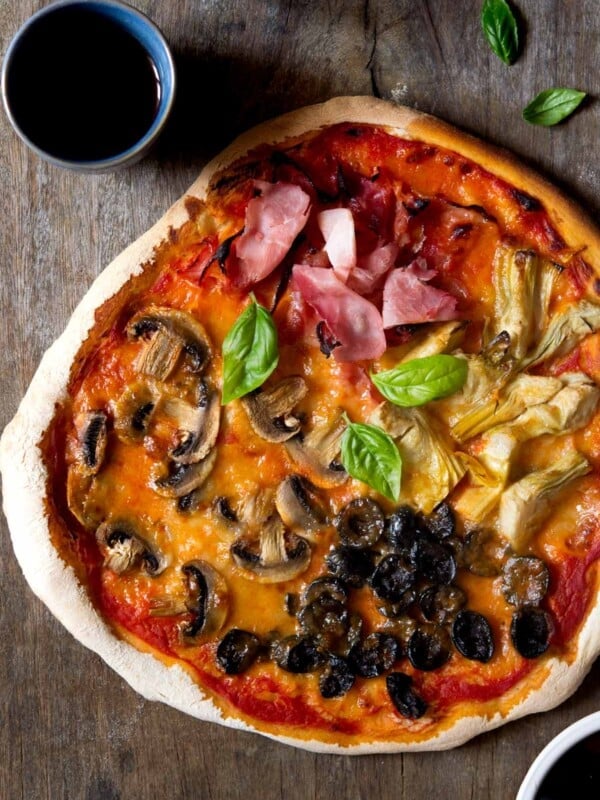
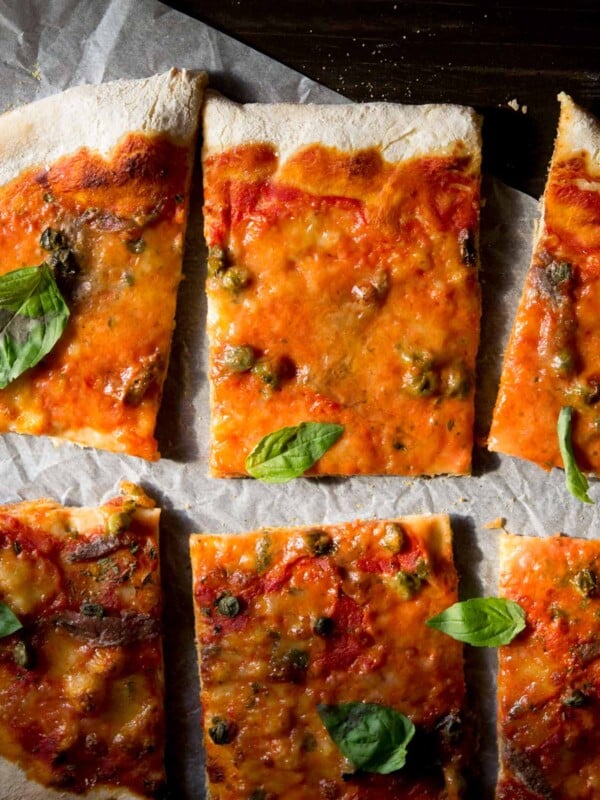
Pizza recipe to try
If you’ve tried this Homemade Pizza Dough Recipe or any other recipe on the blog then don’t forget to rate the recipe and let me know how you got on in the comments below, I love hearing from you! You can also follow us on Facebook, Instagram and Pinterest or sign up to our Newsletter to see more of our delicious food
Step By Step Photos Above
Most of our recipes come with step by step photos, helpful tips and tricks to make it perfectly first time and even video!
Homemade Pizza Dough
Equipment
- stand mixer with dough hook
- 4 bowls (I use cereal bowls) for refrigerating the dough
Ingredients
- 580 g Italian 00 flour, (about 4 cups plus 3 tablespoons)
- 377 ml water, (1 and ½ cups plus 2 tablespoons)
- 1 g dried instant yeast, (¼ teaspoon)
- 12 g fine salt, (1.5 teaspoons)
- Semola Rimancinata, or fine cornmeal for dusting
Instructions
- Put the flour, yeast and water (do not add the salt yet) in the bowl of a stand mixer with a dough hook attached. Mix until the ingredients are fully incorporated and a dough has formed.
- Cover the bowl with plastic wrap and let it rest for 30 minutes.
Add salt, knead, proof
- Sprinkle the salt over the dough and knead with the dough hook for 10 minutes (keep it on a low speed unless you have a strong machine).
- Tip the dough onto a clean work surface and shape it into a ball. I do this by cupping my hands around the dough and gently turning it to form a ball. Place the dough back in the bowl and cover with plastic wrap. Let it proof for 4 hours or until doubled in size.
Shape and cold ferment
- Tip the dough onto a clean work surface and cut it into 4 quarters. I like to weigh my pieces of dough to between 235-240g but you don’t have to do this.
- Take one piece of dough, gently pull the edges in towards the centre, then turn it over so the seam is underneath. Cup your hands around the dough and gently turn it on the work surface until it forms a smooth ball. Place it in a small bowl then repeat the process with all 4 pieces of dough, placing them in individual bowls.
- Tip: the dough will be sticky but not unworkable. If you find it difficult to work with then you can dust your hands with a little flour.
- Place the dough in the fridge to cold ferment for 18 to 48 hours.
Shape pizzas and bake
- Bring the dough out of the fridge 2-3 hours before baking so it’s not too cold.
- Preheat your oven to the highest temperature it will go. We use a pizza stone, which must be placed in a cold oven and preheated for 45 minutes to 1 hour.
- Sprinkle a generous handful of semola flour on a clean work surface and tip one dough ball directly on top of it. Flip it over so both sides are covered in semola. Next press your fingers 1/2 inch away from the edge of the dough to the other side. Do this a few times until it resembles a small pizza base.
- Pick the dough up by the edge and gently turn it in a circle, letting gravity stretch it slightly. You can also do this with your fists (see photos 13 and 14 for a visual representation).
- Now, spread tomato sauce over the base, followed by mozzarella and your choice of topping (don’t put too much on – less is more).
- Get your pizza peel ready and quickly transfer the base to the peel. Place on your pizza stone and bake for 7-10 minutes or until the crust is golden and cheese is melted.
If you don’t have a pizza peel or stone
- You can make pizzas in large baking trays instead. Just make sure to dust the tray with semola or cornmeal and transfer the pizza base to the tray before adding your sauce and toppings.
Notes
- No stand mixer? If you don’t have a stand mixer, that’s no problem, you can knead the dough by hand for 10 minutes instead.
- Portion sizes – this recipe makes four 10-12 inch pizzas, or you can make 2 large tray pizzas on baking trays.
- Pizza stone/steel – I highly recommend using a pizza stone or baking steel for a crispy base. The stone will need to be placed in a cold oven and then preheated. It will need at least 45 minutes to 1 hour for the heat to fully penetrate the stone.
- Pizza peel – I also love using a pizza peel. They are fairly inexpensive and make transferring the pizzas to and from the oven so easy.
- Don’t overload – it’s important that you don’t overload your pizzas with too many toppings (including sauce) or you’ll end up with soggy pizza.
- Mozzarella – We love to use fresh mozzarella and blot it dry with kitchen paper before putting on our pizzas. You can also use a low-moisture mozzarella if you prefer (usually sold in blocks).
Helpful Info for All Recipes
- I always use extra virgin olive oil in all of my recipes unless stated otherwise
- When I use canned or jarred tomatoes of any kind I always use Cirio or Mutti brands for the best results and flavour.
- All vegetables are medium sized unless stated otherwise
- All recipes are tested and developed using a fan (convection) oven
- Find out more about how nutrition is calculated.
- Check out our must have Italian Pantry Staples.
- You can also find all our Essential Kitchen Tools for Italian Cooking.
Nutrition
Nutrition information is automatically calculated, so should only be used as an approximation.


Nice easy recipe that is not doughy or crunchy. I have never seen aught flour, but our local mill makes double aught so I used have that and half all purpose….seemed to work beautifiully. Thanks for the recipe!
Annie
Hi,
If you wanted to use this dough the next (instead of the same)day, would you refrigerate after mixing the dough, or after the rise time? Thanks so much!
Hi Jan, if not using the dough until the next day just put it straight in the fridge after kneading (bowl covered with plastic wrap). Bring it out of the fridge for a couple of hours before using so it’s not really cold.
Such an easy recipe with delicious dough! Thank you for the recipe! It’s my go to from now on!
I can’t wait to try this recipe!! I just returned from 2 weeks in Italy and have never had such amazing pizza… or food in general! ☺️
hi! does it make a difference if i use a metal bowl and spoon?
No, you can use a metal spoon and bowl 🙂
At what temperature should it be baked at?
As high as your oven will go for about 10 minutes.
Sorry, what type of flour is ‘o’ flour? I’ve heard of it before but never used it. Thank you so much.
Italian Farina Tipo 0 (zero) flour is slightly less refined than 00 (double zero) flour so it contains more protein and gluten. It’s what’s used in Italy for making pizzas but it can be really difficult to find outside of Italy so if you can find 00 flour which is a little more common use that or you could use bread flour or all-purpose flour which you’ll have access to no problem but won’t give you as good a pizza as the other two flours.
Are there instructions for what temperature to cook the pizza dough at and for how long?
Hi Ali, I cook homemade pizzas at the highest temperature my oven will go or at least 450F (230C). You can find all our pizza recipes here if you’re looking for any topping ideas. It’ll take 10-15 minutes to cook.
Can a pizza be made, frozen and cooked at a later stage
Yes, pizzas are great for freezing.
Love this recipe, have used it quite a few times now and its fail safe and incredibly easy. If I wanted to double up the recipe, would I need to double the yeast also?
Hi Rav, so happy that you’ve been enjoying it! Yes, I’d also double the yeast if making a double batch 🙂
Just used this recipe today(using all purpose flour) and it turned out wonderful. I dont know how to post a picture on here but i would if i could. It was delicious and my family was eating the pizza as fast as i could make them. Thanks for the great recipe.
Hi Danielle, thank you so much for your lovely comment, I’m so happy you enjoyed it!