This post may contain affiliate links. Please read our disclosure policy.
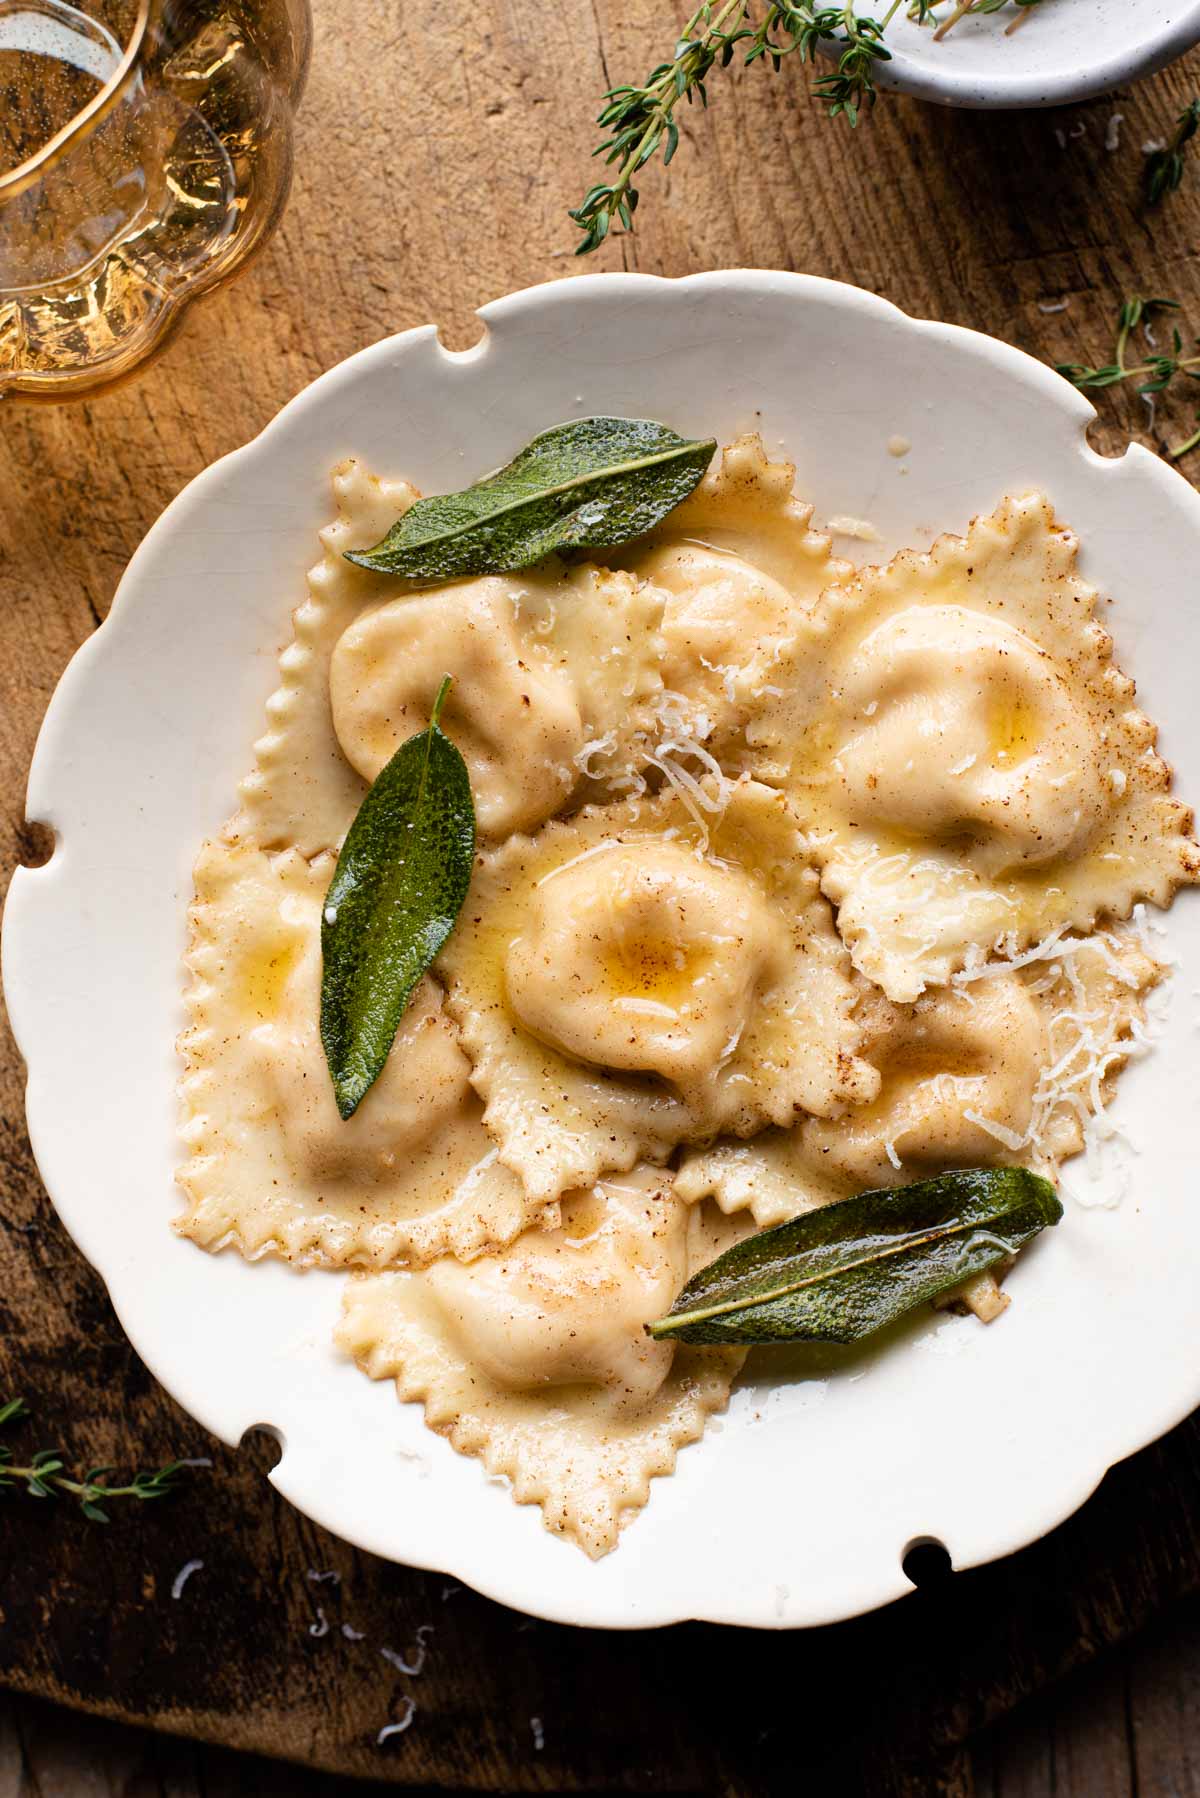
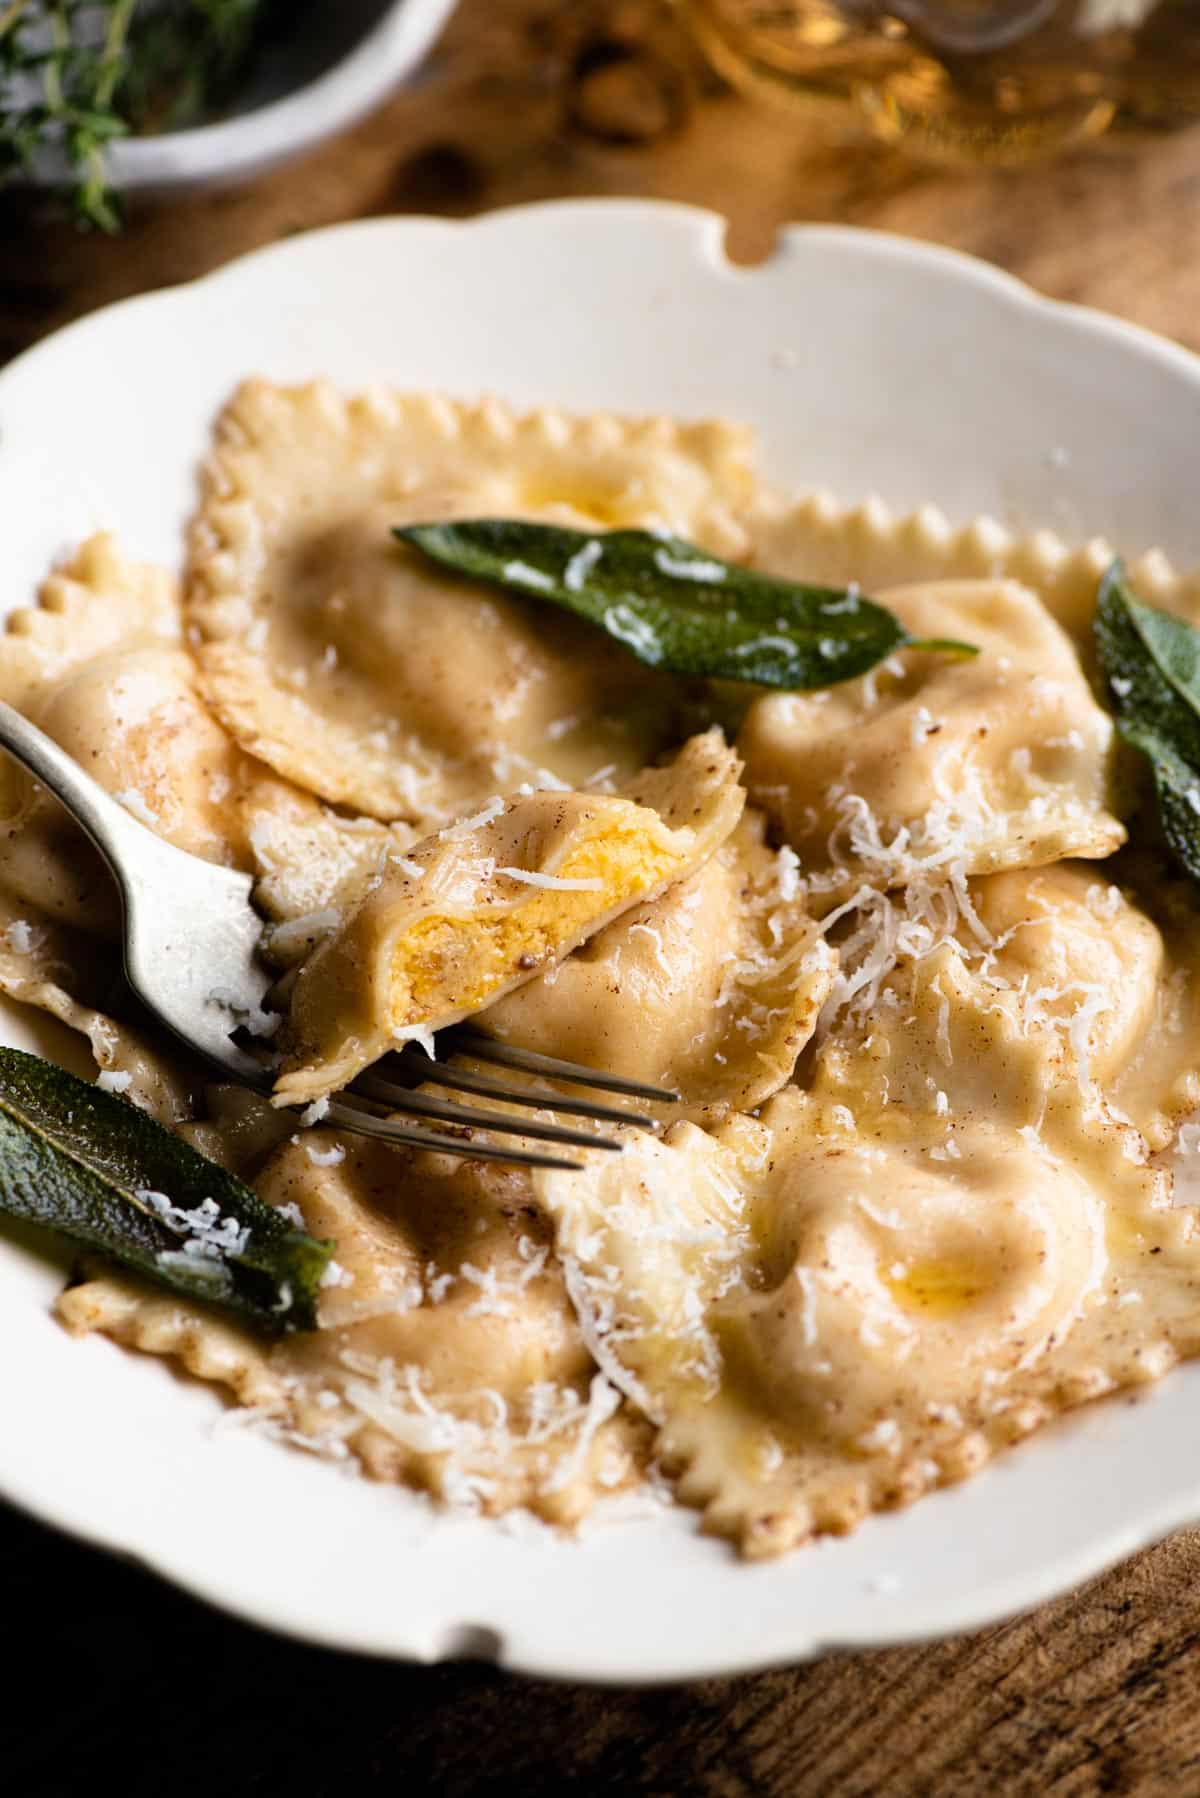
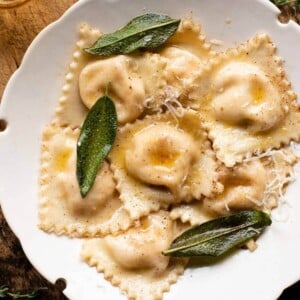
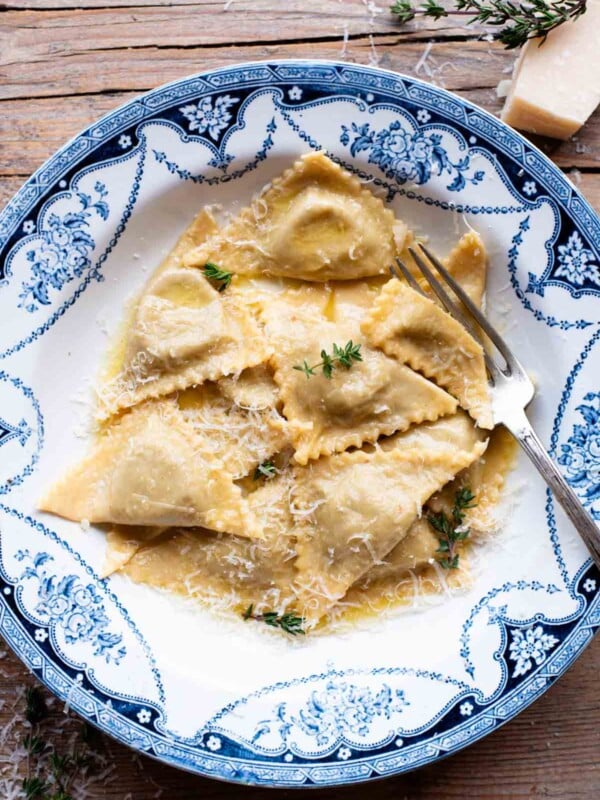
Homemade Butternut Squash Ravioli made with fresh egg pasta dough, rich and creamy butternut squash and ricotta filling tossed in a simple brown butter and sage sauce. A cosy bowl of pasta that’s perfect for Fall.
What better way to celebrate Fall flavours than with butternut squash and sage. As soon as temperatures start to drop and summer is over it’s the first flavour combo I reach for.
This recipe is such a fun and delicious way to use them. Silky homemade pasta filled with the creamiest yet simple butternut squash filling and a 2-minute sage and brown butter sauce, heaven!
Making ravioli from scratch does take some time and effort but it’s so worth it and it seems that you guys love making them too! Our mushroom ravioli recipe and our ravioli making guide are super popular.
Also, check out our Egg Yolk Ravioli with Spinach and Ricotta. This makes just one large ravioli per person so it’s the perfect recipe for special occasions.
See the recipe below including notes on ingredients, step by step photos, tips, variations and a video tutorial. For the full printable recipe scroll to the bottom or click the recipe link below
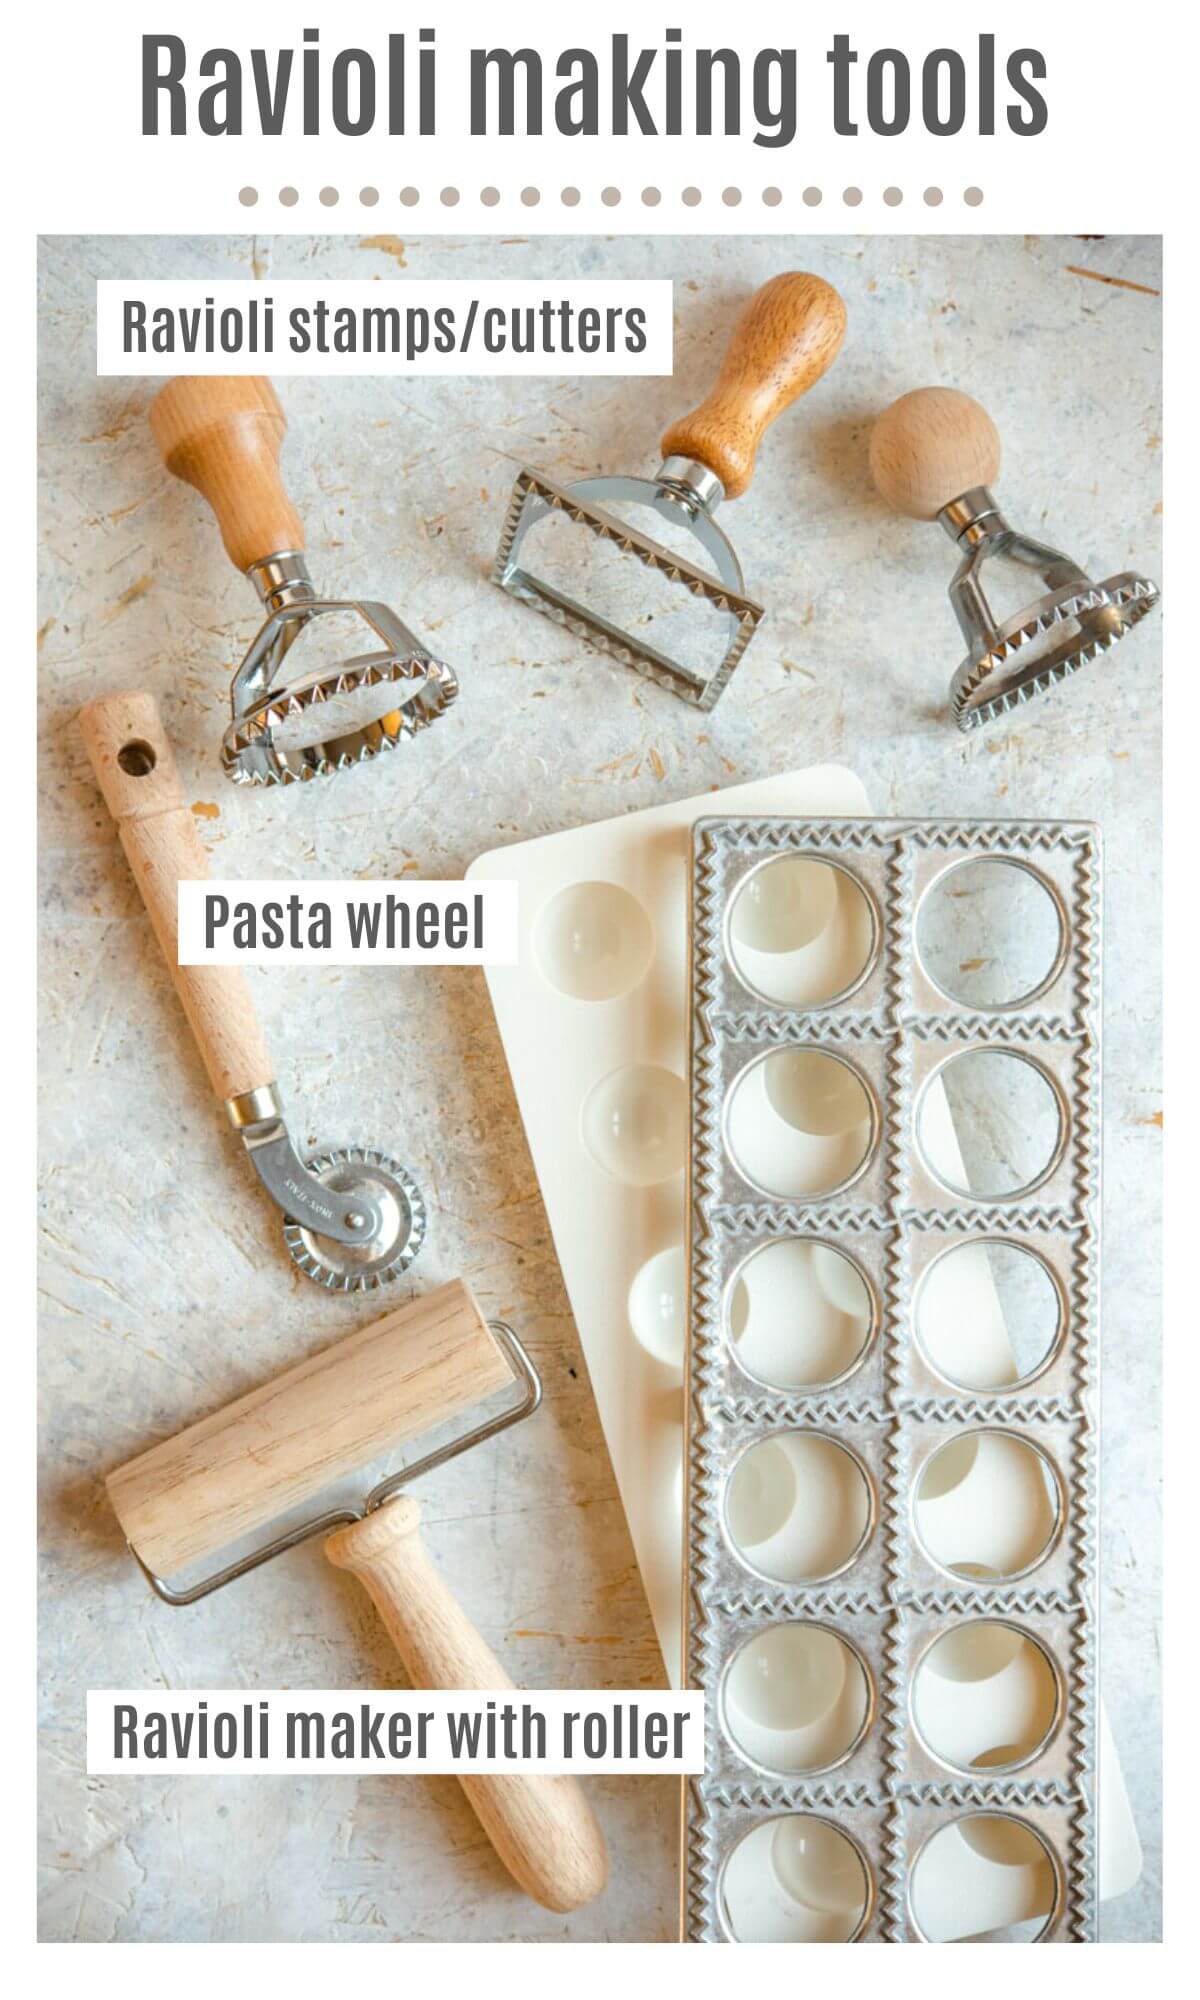
Ravioli making tools
There are some pasta and ravioli making tools that will make the process so much easier.
We use a ravioli maker to make this recipe, it’s a simple tool and nowhere near as elaborate or expensive as it sounds (see the photo below). It helps to create even, filled ravioli and I find that you have way less scrap pasta left over.
You can, of course, use a ravioli stamp, pasta wheel or even just a knife to cut out your ravioli instead.
Pin this now to find it later
Pin ItIngredients
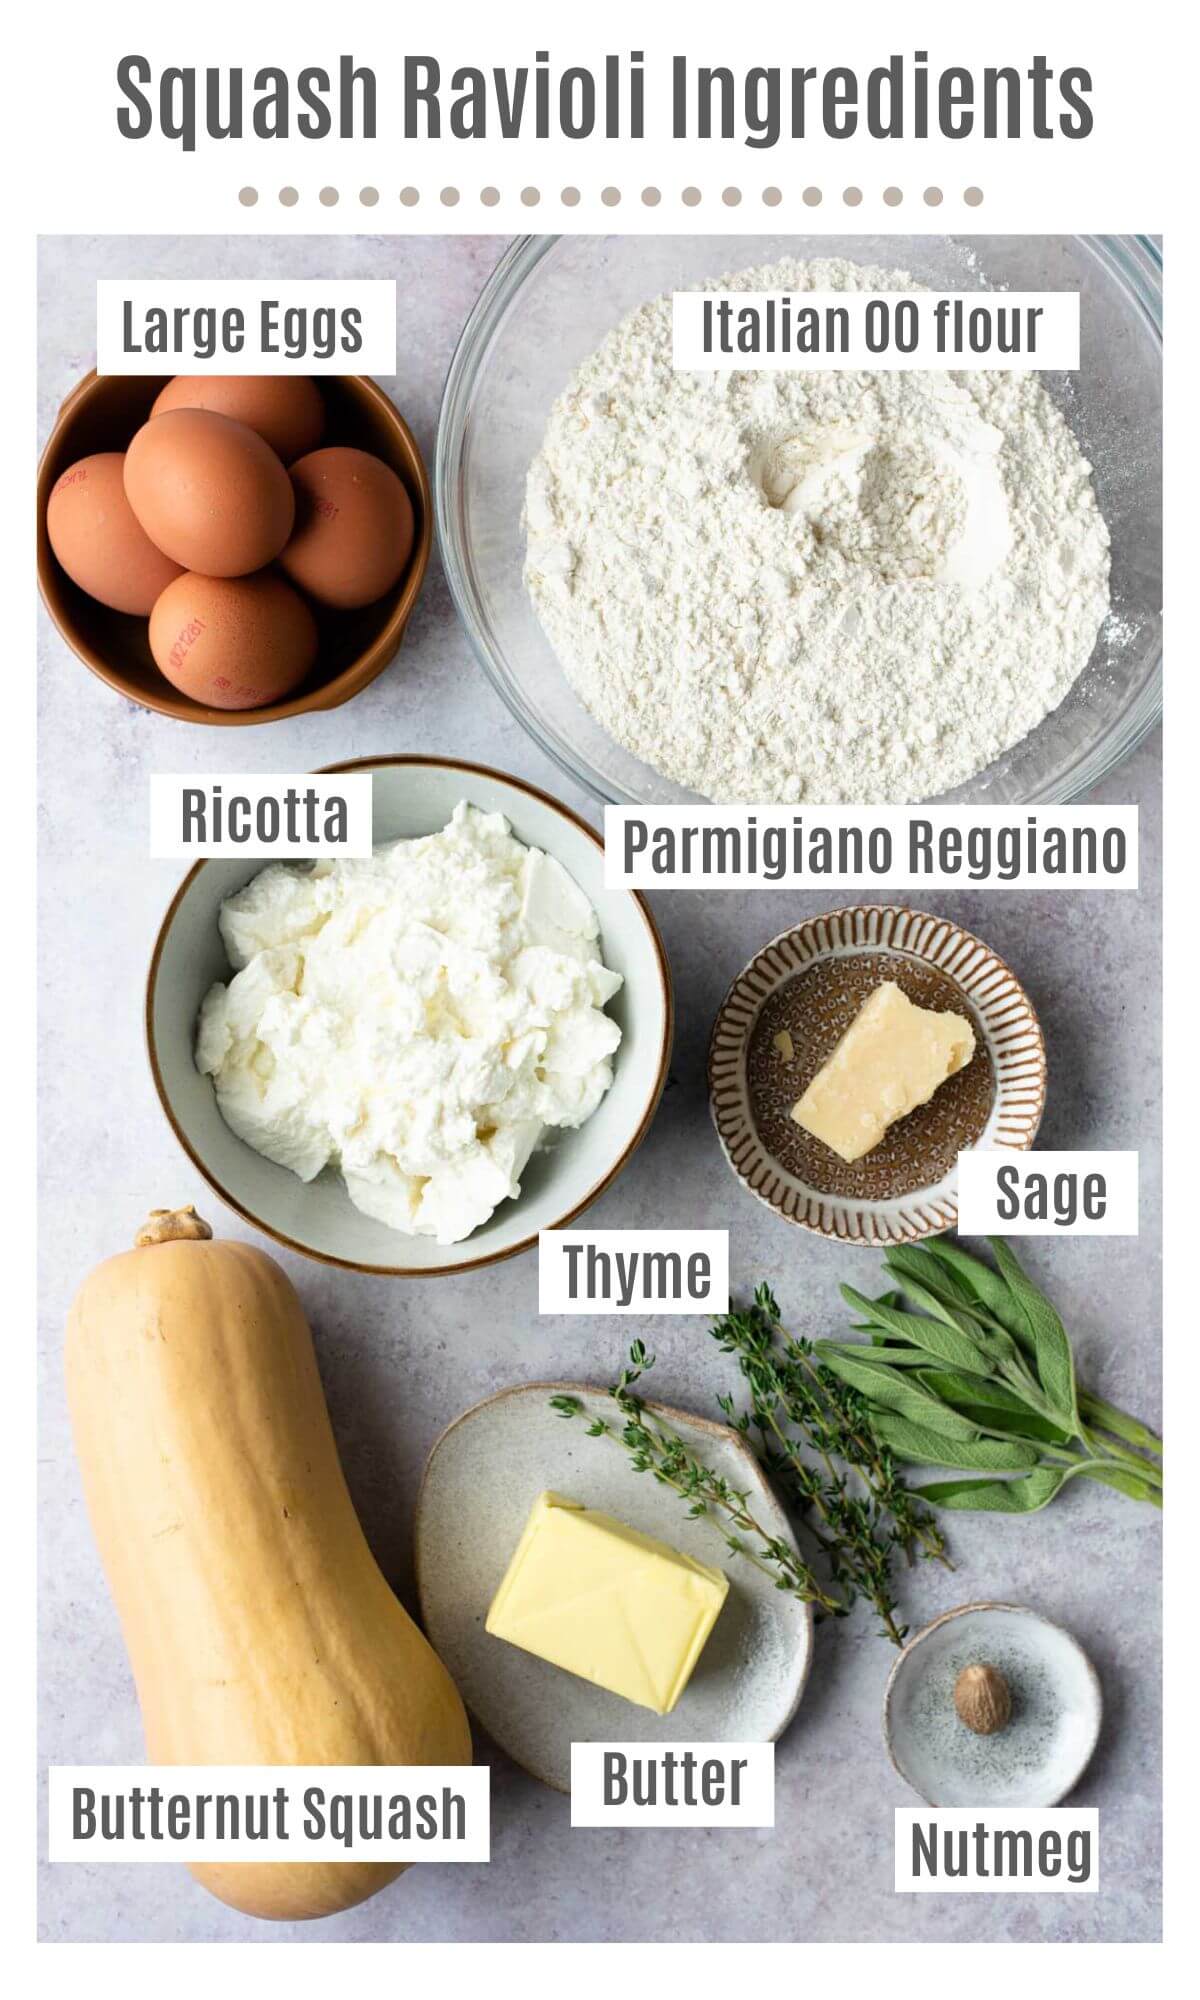
See the photo below that shows you everything you need to make our homemade butternut squash ravioli plus some important notes on ingredients.
Ingredient notes and substitutions
- Butternut squash – you can replace this with other similar squash or pumpkin.
- Ricotta – make sure to drain any excess liquid from the tub before using.
- Parmigiano Reggiano – you can also use Pecorino just make sure you grate the cheese yourself instead of buying pre-grated which I don’t think tastes anywhere near as good.
- Sage – use fresh sage leaves, if you can’t find any then thyme or rosemary would be a good substitute. Always use fresh and not dried.
- Unsalted butter – make sure it’s unsalted so you can add a pinch yourself if needed. Salted butter would be way too salty and overpowering for the sauce.
Step by step photos and instructions
Before you start
- The instructions are long and detailed to make the recipe as easy and clear as possible. If you’ve made ravioli before you’ll know that it’s not too difficult and gets easier with practice but it does take some time.
- This recipe will show you how to make the ravioli using a ravioli maker. If you don’t have one you can use a ravioli stamp, pasta wheel or knife. Refer to our Homemade Ravioli Guide if you’re unsure how to use them.
Make the pasta dough
Tip the flour onto a clean work surface and make a large well in the middle. I find that placing a mixing bowl directly on top of the flour helps create the perfect-sized well for adding the eggs (photos 1 & 2).
If the well is too narrow the eggs will spill out onto the surface so watch out for that. Alternatively, you can use a large mixing bowl until a rough dough has formed or use a stand mixer.
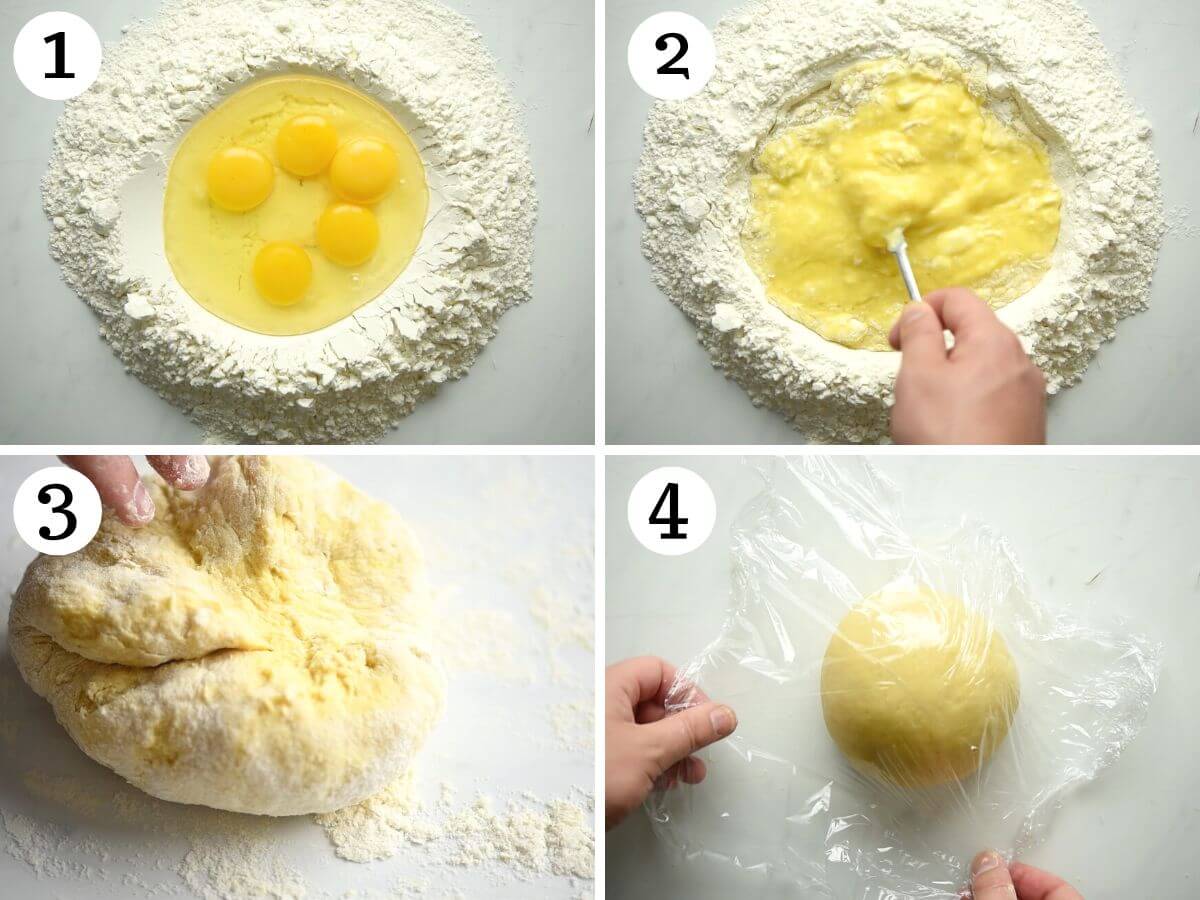
The dough must be kneaded for 10 minutes to allow the gluten to develop and should be rested for at least 30 minutes (at room temperature) and wrapped in plastic wrap (photos 3 & 4).
Make the filling
Peel and cut the squash into medium-sized pieces. Place on a baking tray with fresh thyme, salt, pepper and olive oil. Use your hands to toss everything so the squash is evenly coated in oil then roast in the oven until soft (photos 5 & 6).
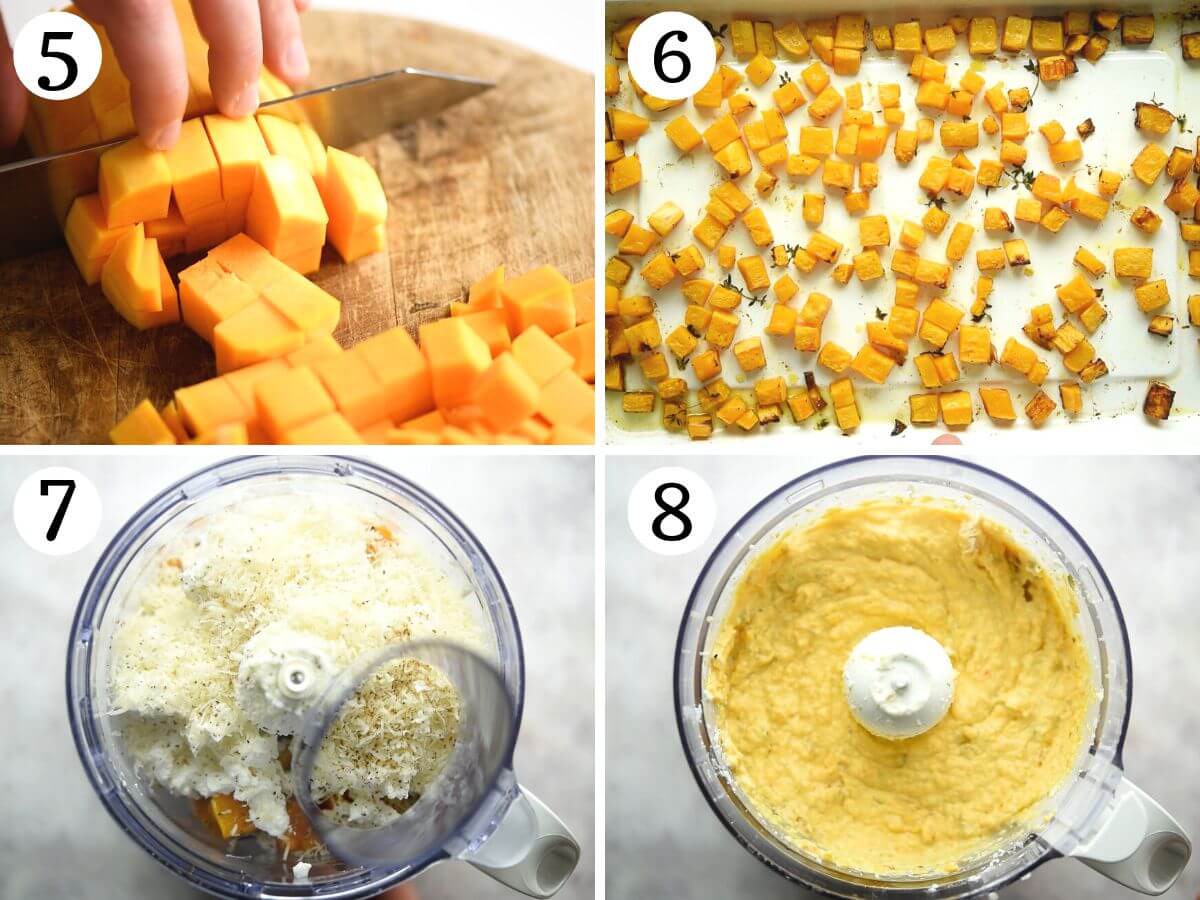
Blitz the filling in a food processor with the ricotta, Parmigiano Reggiano and nutmeg (photos 7 & 8).
I always check the filling for seasoning once blitzed and add salt as needed.
Roll out the pasta dough
Set up your pasta machine and have the set at the widest setting (usually number 0).
Cut your dough into 4 quarters and work with one quarter at a time keeping the rest covered in plastic wrap.
Sprinkle your work surface and pasta machine with flour. Press and flatten the piece of dough so it’ll fit through your pasta machine easily making sure it’s lightly dusted in flour (photo 9).
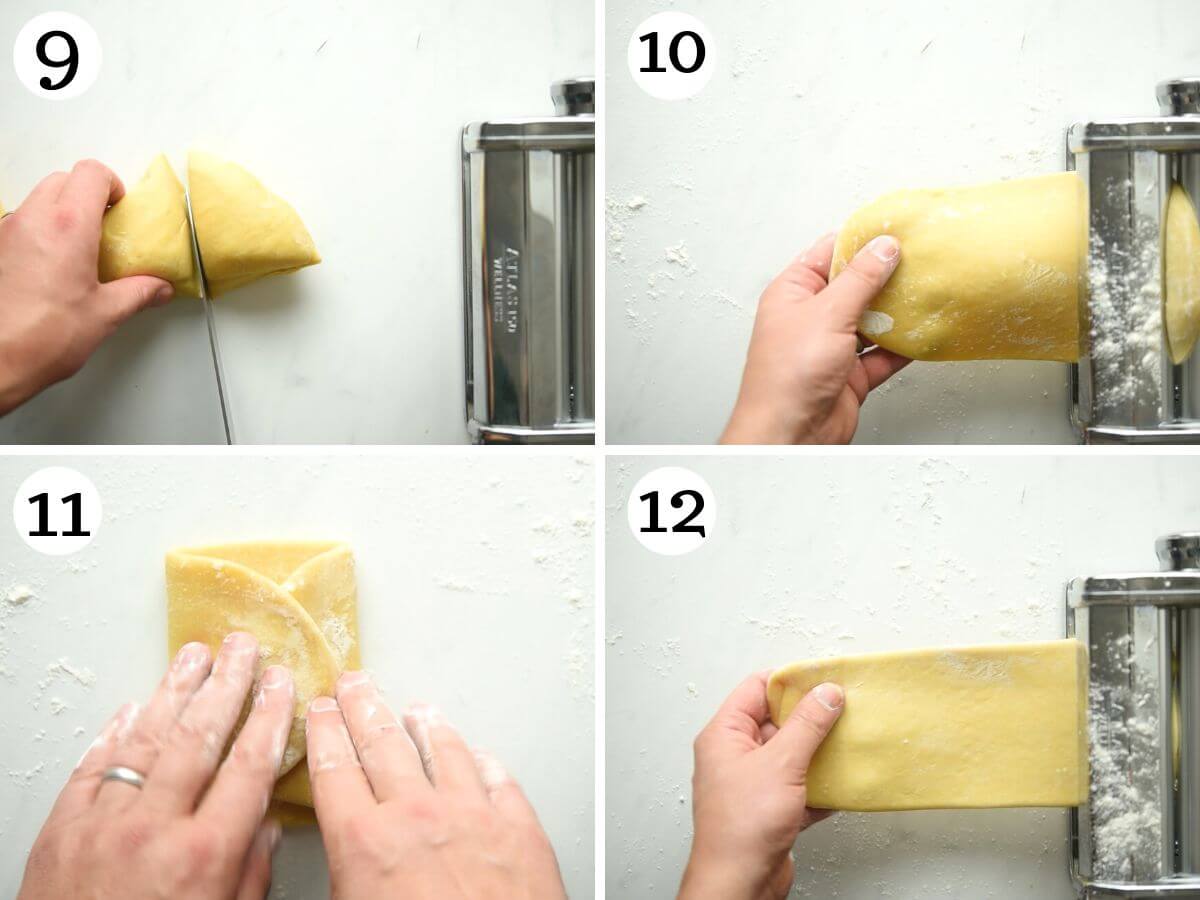
Pass your piece of dough through your pasta machine. Fold one end into the middle and the other end over that (as if you’re folding a leaflet), press it down and pass it through the machine again at the same setting. Repeat this step 4-5 times (photos 10 – 12).
Now you’re ready to roll your pasta dough. Change the setting on your pasta machine to the second widest setting (usually number 1) and pass the dough through. Keep passing the dough through each setting until you reach number 6 or 7, I like to go up to setting 6 on my Marcato Atlas 150 pasta machine for this recipe (photo 13).
Assemble the butternut squash ravioli
If using a ravioli maker dust it well with flour or dust your surface if not. Cut your long sheet of pasta into two equal lengths (photo 14).

Place one over the ravioli maker, top with the indent mould then fill each ravioli with the butternut squash filling (using a spoon or piping bag). Lay the second sheet of pasta directly on top and use the mini roller or rolling pin to seal the ravioli (photos 15-18).
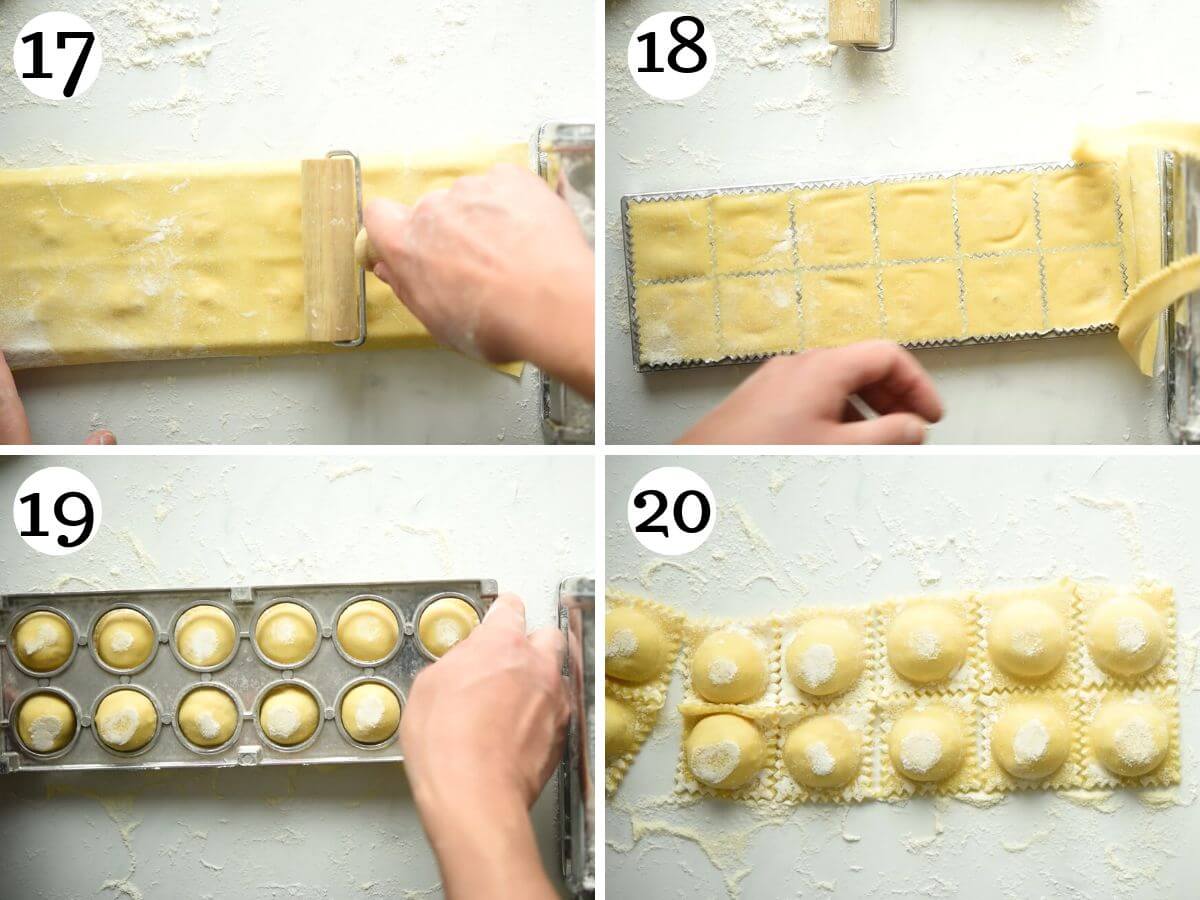
Tip the ravioli maker upside down, remove the ravioli, they should come away easily and place them on a clean surface or board dusted with flour. Repeat these steps from the start with each quarter of dough (photos 19 & 20).
Cook the ravioli and make the sauce
When you’ve made all of the ravioli bring a large pot of water to a boil and salt it well. Add your ravioli to the boiling water, stir to make sure none of them stick to the bottom then boil for 4 minutes.
Add the butter, sage and a small pinch of salt to a large skillet. On a medium heat, melt the butter for the same time the ravioli are cooking. It should start to turn a light golden brown colour. If it turns too quickly turn the heat down or off (photos 21 & 22).
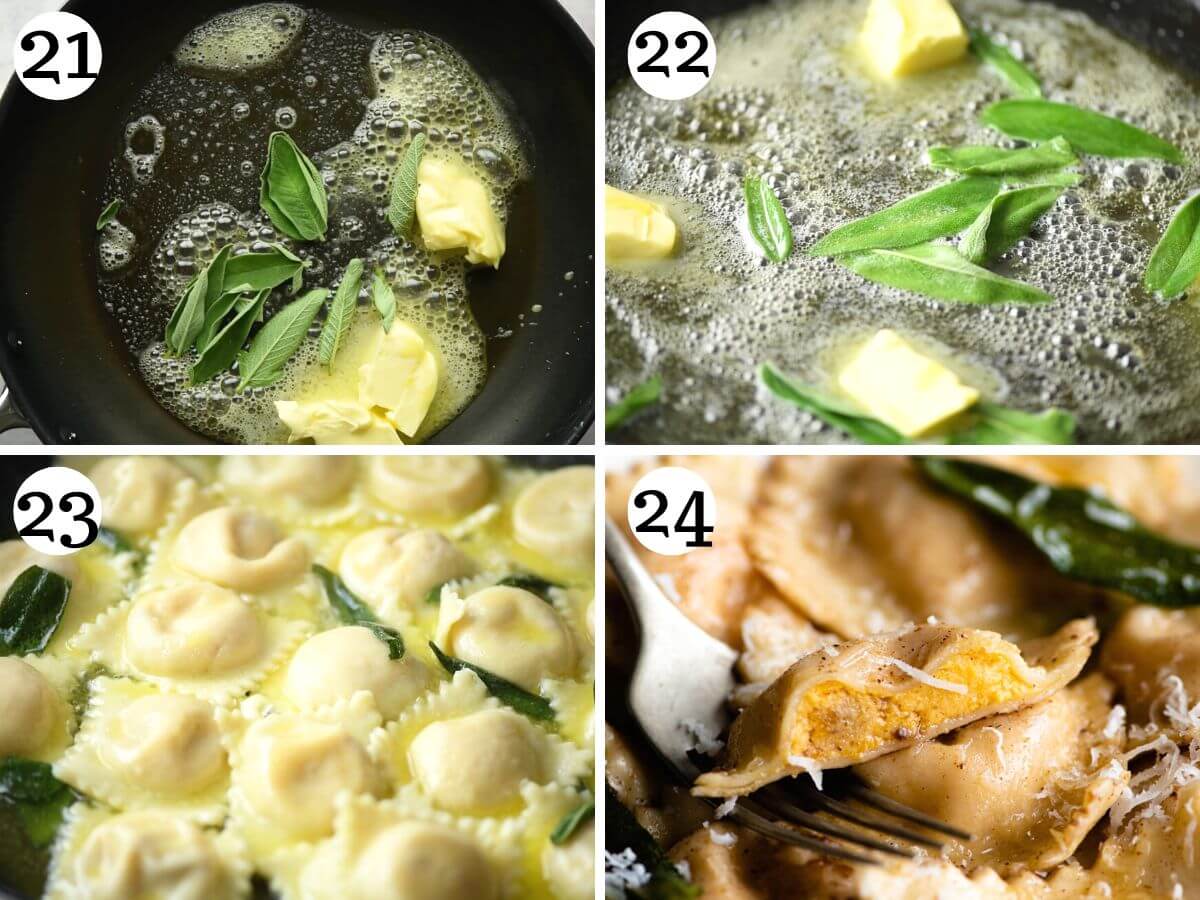
Transfer the ravioli to the sauce using a slotted spoon and toss to coat in the butter. Serve in bowls topped with extra grated Parmigiano Reggiano (photos 23 & 24).
Top Tip – if you’re cooking the whole batch of ravioli you may not have a pan big enough to hold them all. You might find it easier to pour the sage and brown butter sauce over them in bowls instead.
How to store fresh homemade ravioli
You can’t let filled homemade ravioli sit for very long otherwise the pasta will start to absorb the moisture from the filling making them sticky and extremely difficult to handle.
The best way to store them is by blanching them first. Bring a large pot of water to a boil and salt it well. Blanch the ravioli in batches for about 1 minute, remove them with a slotted spoon and place them on a clean kitchen towel on top of a cooling rack or similar.
Let them air dry for about 20-30 minutes on each side, they should feel tacky but not wet. You can then store them in the fridge for up to 3 days or freeze them.
Top Tip – blanching makes the pasta much more durable and better for freezing. You can freeze them without blanching first but they can become brittle and sometimes crack or burst in boiling water.
Recipe tips
- The best flour to use – Italian 00 (double zero) flour is the best flour to use when making homemade pasta.
- Kitchen scale vs cups – I highly recommend using a kitchen scale to weigh the flour as cup measurements can vary drastically depending on the brand of flour, how it’s filled etc. If using cups I’ve found that spooning the flour into the cups then levelling it off with a knife is the best method to avoid over-packing.
- Making the filling – blitzing the filling in a processor gets it nice and smooth making it easy to pipe or spoon into the ravioli. If you don’t have one you can mash the squash in a bowl.
- Rolling out the dough – make sure to dust your work surface and the pasta machine well with flour when rolling out. You’ll need to add more as you go.
- Using a ravioli maker – dust the ravioli maker/mould well with flour so you can remove the ravioli easily.
- Make the filling in advance – to make things easier you can prepare the filling a day or two before and store it in the fridge.
FAQs
Yes, make sure to use a dough hook attachment. Scramble the eggs in a bowl prior to adding to the flour. Mix on a low-medium speed until a dough has formed then continue kneading for 10 minutes at a medium to medium-high speed.
Absolutely, roast cloves of garlic (2-3) in their skins with the butternut squash. Remove from the skins before blitzing with the filling. Alternatively, you can add finely chopped or crushed garlic to the sauce, I’d use 1/2-1 clove.
Yes, once made you can use the blanching method as described above to store them in the fridge or can freeze them. Freeze them in an even layer on a baking tray. Once frozen transfer them to freezer bags to save room. Boil the ravioli straight from frozen, do not defrost first.
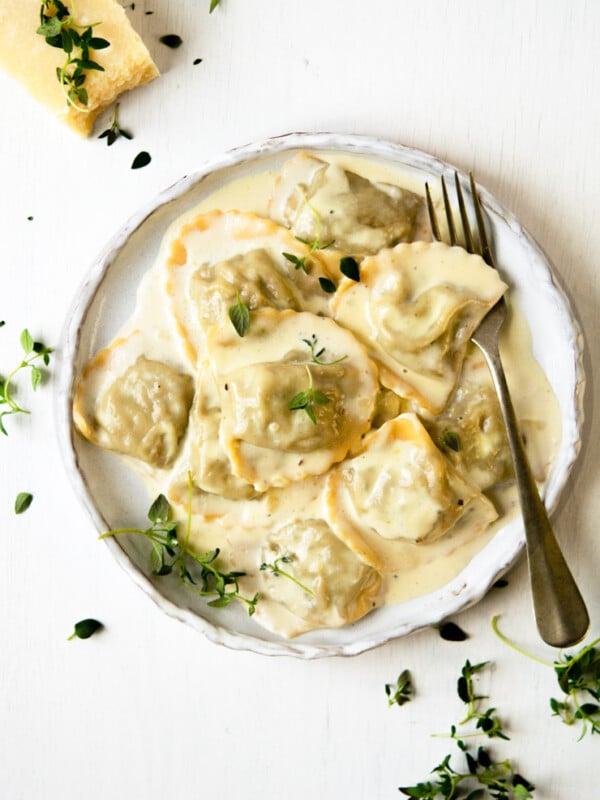
If want a different option than brown butter and sage you could try our parmesan cream sauce from our other ravioli recipe, it’s rich, creamy and delicious. Another great option would be our tomato vodka sauce.
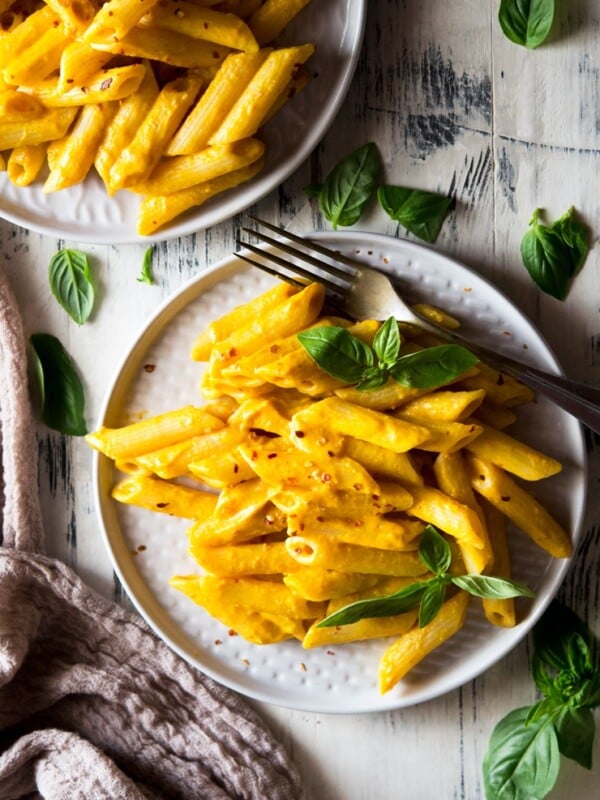
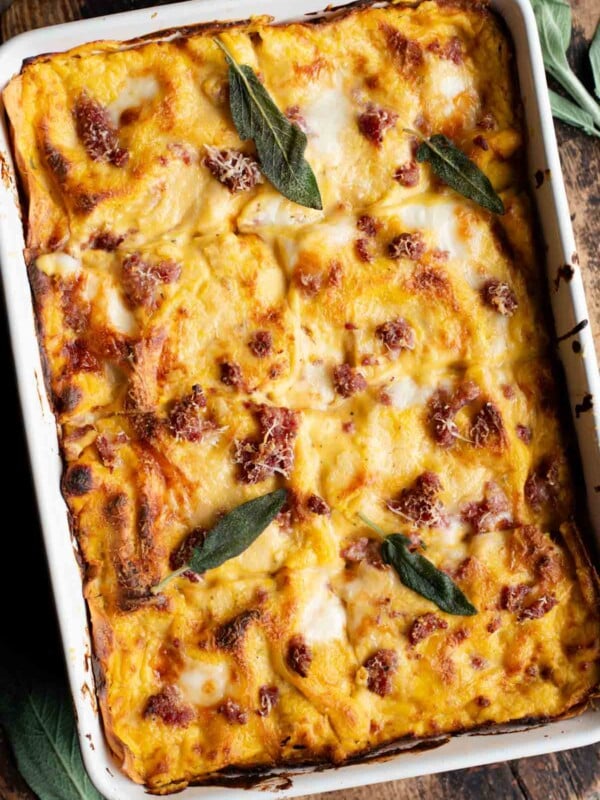
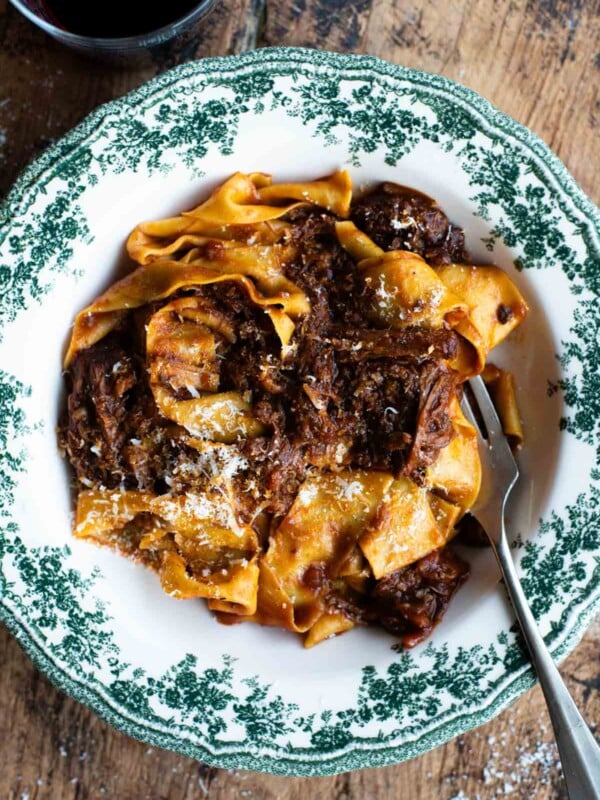
More delicious recipes for Fall
If you’ve tried this Butternut Squash Ravioli recipe or any other recipe on the blog then don’t forget to rate the recipe and let me know how you got on in the comments below, I love hearing from you! You can also follow us on Facebook, Instagram and Pinterest or sign up to our Newsletter to see more of our delicious food.
Step By Step Photos Above
Most of our recipes come with step by step photos, helpful tips and tricks to make it perfectly first time and even video!
Butternut Squash Ravioli with Brown Butter and Sage Sauce
Equipment
- Food processor
- Piping bag, for the filling (optional)
Ingredients
For the pasta dough
- 3 cups* Italian 00 flour, (400g) *spooned and levelled (plus extra for dusting)
- 4 large eggs, , at room temperature
- 1 egg yolk, , at room temperature
For the filling
- 1-2 tablespoons olive oil
- 4 cups butternut squash, (630g/1.3lbs) cut into medium-sized cubes
- 1 sprig fresh thyme
- 1.5 cups ricotta cheese, (375g/13oz)
- ¾ cup Parmigiano Reggiano or Pecorino Romano, (30g) freshly grated
- salt and pepper
For the sauce
- 1 stick unsalted butter, (100g)
- 8-10 sage leaves
Instructions
Make the pasta dough
- Tip the flour on a large clean work surface and make a wide well in the middle (you can also do this in a large bowl or mixer).
- Add the eggs and yolk to the well the scramble them with a fork. Gradually start to incorporate the flour into the eggs until a rough dough has formed.
- Use your hands to knead the dough until all or most of the flour has been absorbed. Continue kneading for around 10 minutes until the dough is smooth and elastic. Wrap in cling wrap and let it rest for at least 30 minutes.
Make the filling
- Preheat the oven to 400F (200C).
- Cut the skin from the squash using a knife or vegetable peeler and cut it into medium-sized cubes.
- Place on a baking tray and sprinkle with a good pinch of salt, pepper and thyme. Drizzle with olive oil and toss to coat the squash in oil then arrange in an even layer. Roast in the oven for 30-14 minutes until soft.
- Let the squash cool slightly then add it to a food processor with the ricotta, Parmigiano Reggiano, and nutmeg. Blitz together until smooth and combined. Taste it for seasoning and add any salt if needed.
- You can transfer the filling to a piping bag if using or leave it in a bowl and spoon the filling into the ravioli.
Assemble the ravioli
- Set up your pasta machine and have the set at the widest setting (usually number 0).
- Cut your dough into 4 quarters and work with one quarter at a time keeping the rest covered in plastic wrap.
- Sprinkle your work surface and pasta machine with flour. Press and flatten the piece of dough so it’ll fit through your pasta machine easily making sure it’s lightly dusted in flour.
- Pass your piece of dough through your pasta machine. Fold one end into the middle and the other end over that (as if you’re folding a leaflet), press it down and pass it through the machine again at the same setting. Repeat this step 4-5 times.
- Now you’re ready to roll your pasta dough. Change the setting on your pasta machine to the second widest setting (usually number 1) and pass the dough through. Keep passing the dough through each setting until you reach number 6 or 7, I like to go up to setting 6 on my Atlas pasta machine for this recipe.
- If using a ravioli maker dust it well with flour or dust your surface if not. Cut your long sheet of pasta into two equal lengths. Place one over the ravioli maker, top with the indent mould then fill each ravioli with the butternut squash filling (using a spoon or piping bag). Lay the second sheet of pasta directly on top and use the mini roller or rolling pin to seal the ravioli.
- Tip the ravioli maker upside down, remove the ravioli, they should come away easily and place them on a clean surface or board dusted with flour. Repeat these steps from the start with each quarter of dough.
Cooking the ravioli
- When you’ve made all of the ravioli bring a large pot of water to a boil and salt it well. Add your ravioli to the boiling water, stir to make sure none of them stick to the bottom then boil for 4 minutes.
- Add the butter, sage and a small pinch of salt to a large skillet. On a medium heat, melt the butter for the same time the ravioli are cooking. It should start to turn a light golden brown colour. If it turns too quickly turn the heat down or off.
- Transfer the ravioli to the sauce using a slotted spoon and toss to coat in the butter. Serve in bowls topped with extra grated Parmigiano Reggiano.
Video
Notes
- Kitchen scale vs cups – I highly recommend using a kitchen scale to weigh the flour as cup measurements can vary drastically depending on the brand of flour, how it’s filled etc. If using cups I’ve found that spooning the flour into the cups then levelling it off with a knife is the best method to avoid over-packing.
- Making the filling – blitzing the filling in a processor gets it nice and smooth making it easy to pipe or spoon into the ravioli. If you don’t have one you can mash the squash in a bowl.
- Rolling out the dough – make sure to dust your work surface and the pasta machine well with flour when rolling out. You’ll need to add more as you go.
- Using a ravioli maker – dust the ravioli maker/mould well with flour so you can remove the ravioli easily.
- Make the filling in advance – to make things easier you can prepare the filling a day or two before and store it in the fridge.
- Storage & freezing – Blanch the ravioli in boiling salted water in batches for about 1 minute, remove them with a slotted spoon and place them on a clean kitchen towel on top of a cooling rack or similar.
Let them air dry for about 20-30 minutes on each side, they should feel tacky but not wet. You can then store them in the fridge for up to 3 days or freeze them. - Freezing note 2 – You can freeze the ravioli without blanching first it just helps makes them more durable and less likely to crack or burst in the water. Cook the ravioli straight from frozen for 5 minutes, do not defrost first.
Helpful Info for All Recipes
- I always use extra virgin olive oil in all of my recipes unless stated otherwise
- When I use canned or jarred tomatoes of any kind I always use Cirio or Mutti brands for the best results and flavour.
- All vegetables are medium sized unless stated otherwise
- All recipes are tested and developed using a fan (convection) oven
- Find out more about how nutrition is calculated.
- Check out our must have Italian Pantry Staples.
- You can also find all our Essential Kitchen Tools for Italian Cooking.
Nutrition
Nutrition information is automatically calculated, so should only be used as an approximation.


Great recipe. I was glad to find one that used ricotta in the filling. Everything about this dish is just luscious. Only problem is 8 of these per serving is not enough. I cooked 60 for 6 adults and we all, even the light eaters, wished we had a few more.
So I would change to 4-6 servings per recipe.
My wife and I made this butternut squash ravioli and it was delicious! We made a Parmesan and cream sauce (from the mushroom ravioli recipe) instead of the sage and butter. Lovely sweetness from the butternut squash and contrast from the Parmesan worked really well. Nice bite on the edges of the ravioli as we followed the advice on the pasta machine setting. It is a bit of work but well worth the effort and is an absolutely perfect dish with a nice white wine.
Hi Tony, I’m so happy you enjoyed the recipe. I’ve never tried them with the parmesan cream but I know it would be so delicious! I agree, they are a labour of love but so worth it 🙂
It’s delicious, but a bit of work especially, if you don’t have all the tools. While the pasta machine comes in handy, you can also simply roll out the dough and use a 3” (~7cm) diameter juice glass 🍷 to stamp out round pieces of dough you then fold into half to make crescent 🌙 shaped ravioli. Goes well with any pasta sauce including marinara. I don’t have a big enough blender either, so just mashing the butternut squash with a fork works fine. Put the squash in the oven first and while it’s baking make the dough.