La Giardiniera sott’aceto – Italian Pickled Vegetables
Updated Jun 27, 2024, Published Aug 19, 2020
This post may contain affiliate links. Please read our disclosure policy.

How to make La Giardiniera. Got an abundance of beautiful summer veggies? Use this recipe to make Italian pickled vegetables and enjoy them all throughout the winter. Serve with cured meats or cheese.

La Giardiniera literally means the gardener, it’s a classic Italian preserve made with season vegetables so you can enjoy them all throughout the winter months.
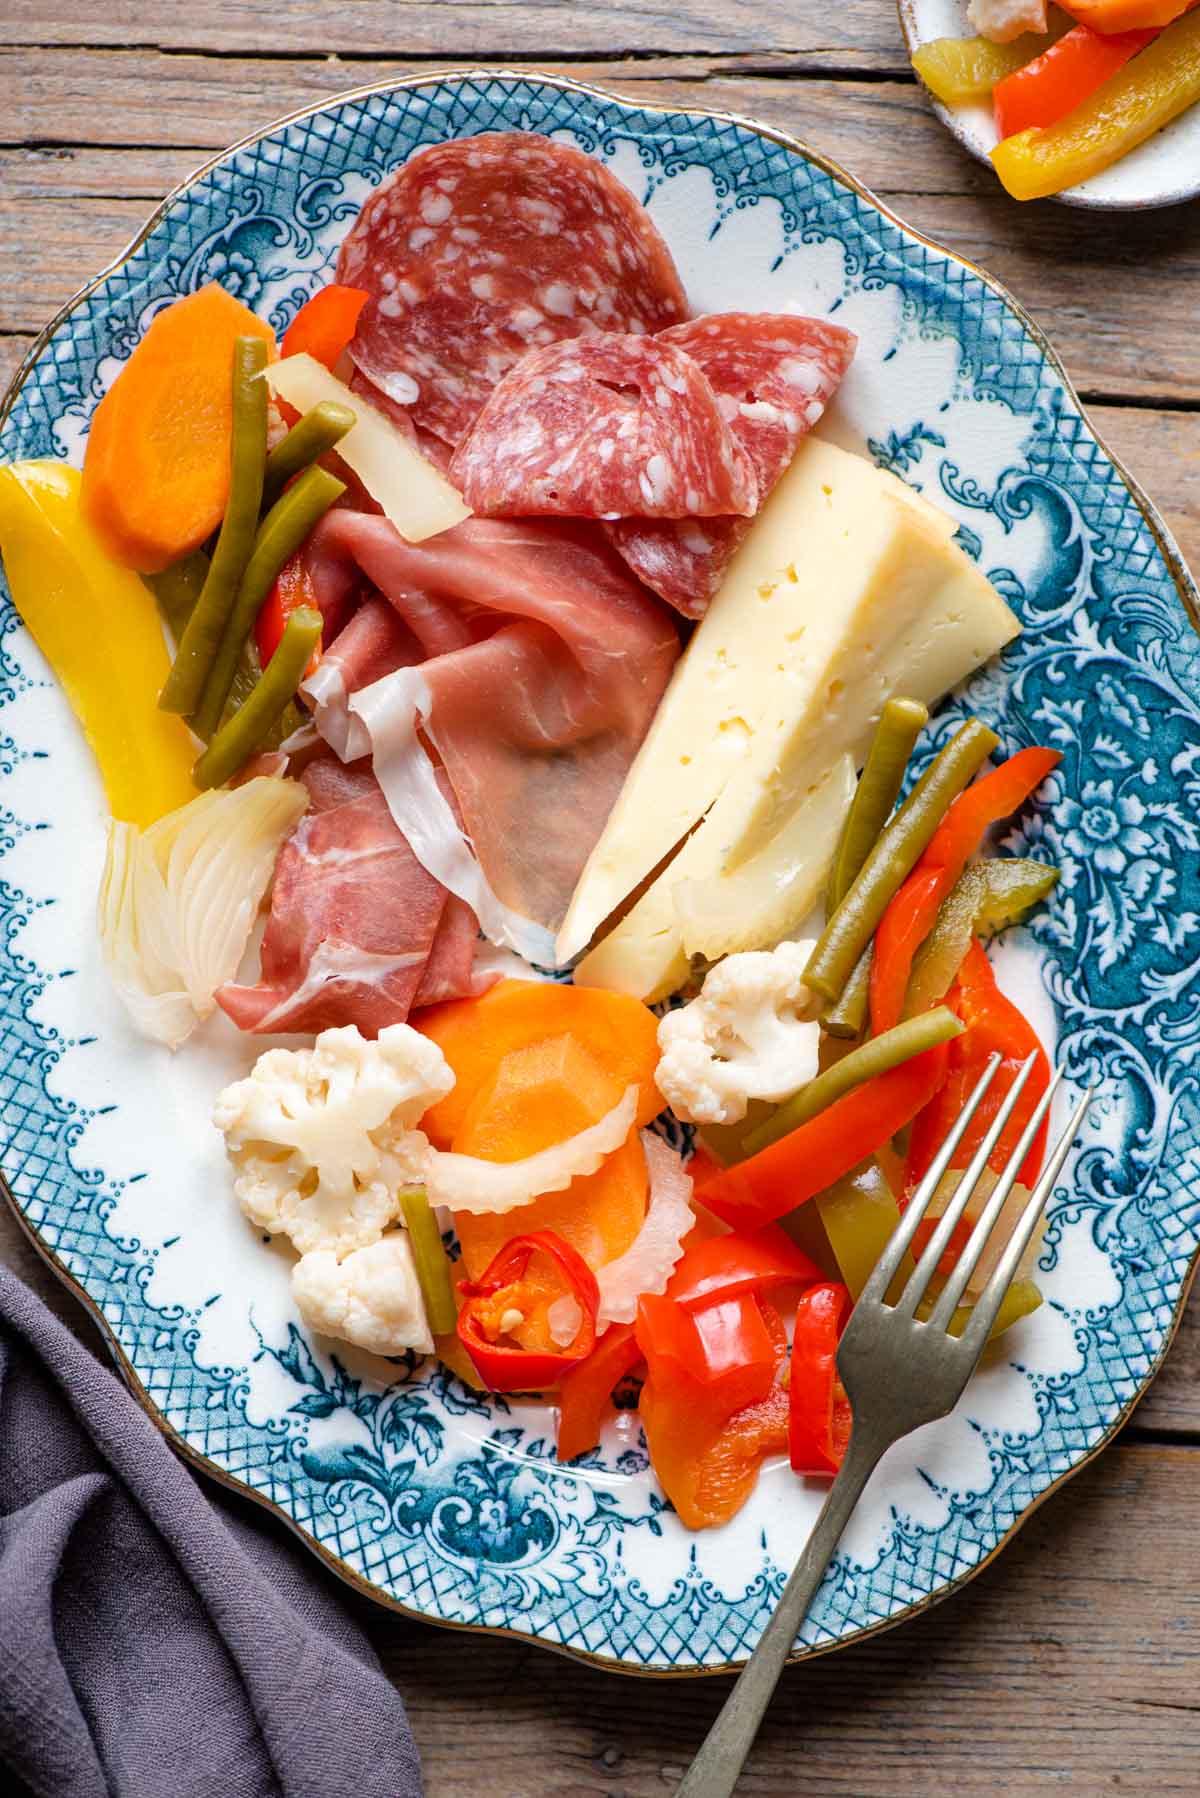
The pickled vegetables (verdure sott’aceto) are crisp, fresh and zingy and are perfect served alongside rich cured meats and cheeses. You can also serve them with grilled meats or add them to salads the list is endless.
There’s no rule on what vegetables you must use the point of this recipe is to preserve beautiful fresh, seasonal produce when it’s at its best.
Ingredients – what you need
- Vegetables – you can use any vegetables you like in this recipe. Vegetables commonly used are carrots, green beans, bell peppers (all colours), celery, fennel, cauliflower, cucumber, baby onions, scallions, chilli peppers.
- Vinegar – vinegar preserves the vegetables and keeps them crispy and fresh it also adds flavour, I use white wine vinegar.
- Salt & sugar
- Peppercorns & bay leaves
- Water
How to make La Giardinera – step by step
Sterilising jars
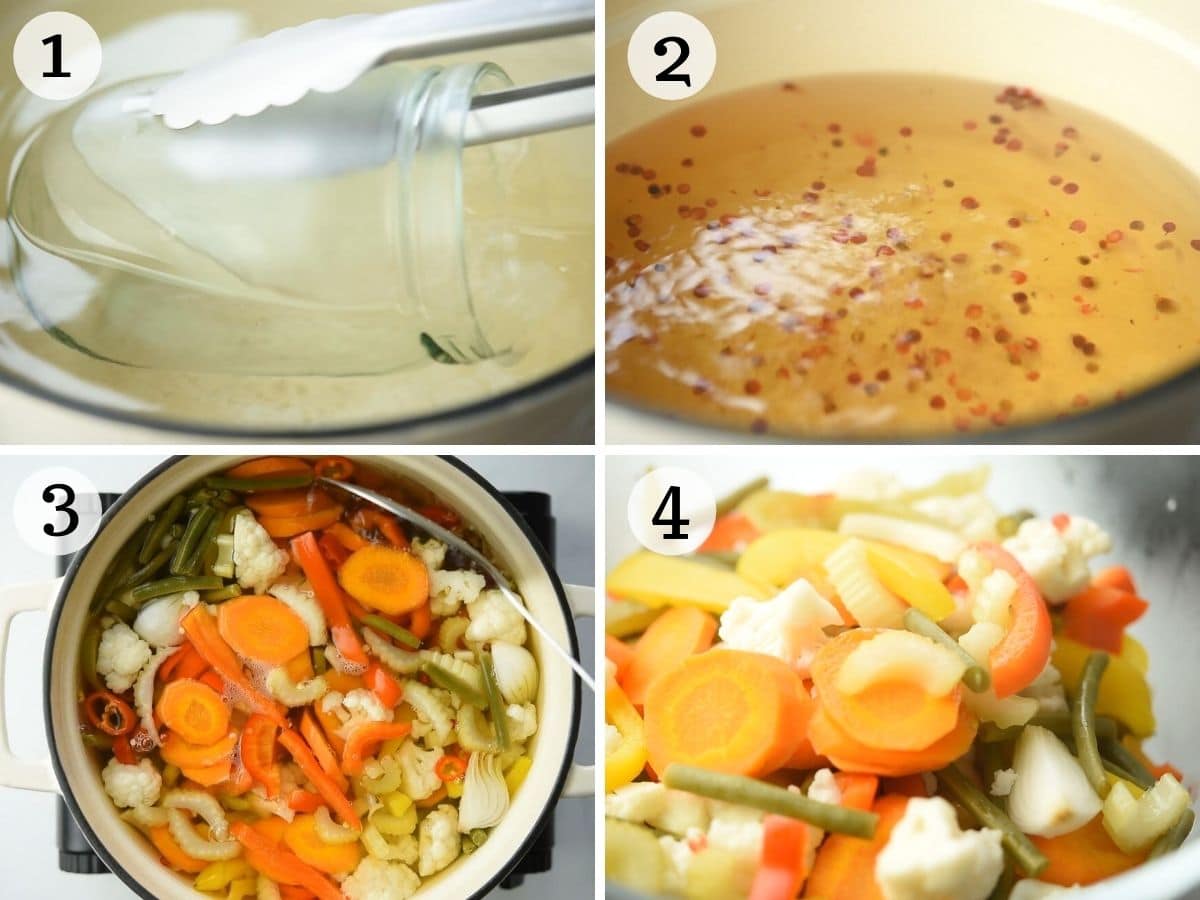
To sterilise the jars put them right side up in a deep pot or canning rack pour over hot water to the jars are fully submerged. Boil the jars for 10 minutes any rubber seal and lids should also be sterilised this way. Remove the sterilised jars with tongs and place upside down on a clean kitchen towel without drying. (photo 1).
Tip: If you don’t have a canning rack you can place clean kitchen towels (fabric towel) around the jars to stop them rattling.
Prepare the vegetables
Put the water, vinegar, salt, sugar and peppercorns into a large pot and bring to a boil. Once boiling add the cauliflower for 3 minutes then add the rest of the vegetables for another 5 minutes (photo 2 -3).
Pin this now to find it later
Pin ItCanning
After boiling remove the vegetables from the liquid to a clean bowl using a slotted spoon (photo 4).
Strain the liquid into a large clean bowl or measuring jug, this is an optional step (photo 5).
Fill the sterilised jars with the vegetables leaving 1 inch (2.5 cm) from the top of the jars then pour in the cooking liquid so it’s 1 cm (1/4 inch) above the vegetables. (photo 6).

Carefully place the jars back into hot water making sure the lids are not sealed completely shut and bring to a boil. Boil the jars for 10 minutes or according to your altitude *see notes below (photo 7).
Remove the jars with tongs straight after boiling and place on a clean kitchen towel. Seal the jars shut immediately and let them cool completely without moving. Once cooled they will keep well for up to 3 months, serve with meats or cheese (photo 8).
Top tips and recipe FAQs
- Vegetables – it’s important to boil the cauliflower for a little longer than the other veg or it won’t be tender enough.
- Herbs and spices – a classic giardiniera is usually flavoured with bay leaves and peppercorns but you can add any herbs and spices you like.
- Jars – you can use both clip top jars with rubber seals (as I have) or screw-top jam jars. See the note below on how to make sure they are sealed properly.
- Processing time* – If you live above 1000ft above sea level you’ll need to adjust the processing time (second boil) here’s a great guide and explanation on how long you should add to your processing time.
Sealing the jars
After the second boil you must tighten the lids so they seal. Once at room temperature you can check if they have sealed properly.
For clip top jars – loosen the clip without opening the jar, if you can pick up the jar by the lid only it means the rubber seal is air-tight and properly sealed.
Screw-top jars – you might hear the jar lids popping as they seal, this is a good thing. Sometimes it’ll happen too slowly to hear any popping sounds so make sure the lids are indented once at room temperature. This means they are sealed properly.
It depends, you can add as much or as little chilli pepper to the mix as you like. Generally classic Italian pickled vegetables are not spicy.
You need to boil the jars after canning for both extra sterilisation and to seal them properly. The length of boiling time varies depending on your altitude.
This recipe will last up to 3 months in a cool dry place. Once opened refrigerate and eat within 4-5 days.
If they don’t seal properly you’ll need to re-process the jars with new sterilised lids or rubber seals (there may be a problem with the previous ones). Alternatively you can either refrigerate the contents and eat within 2-3 days or freeze them until ready to use.
More Italian Antipasti recipes
- 5 Minute Marinated Olives
- Fried Sage Leaves with Anchovies
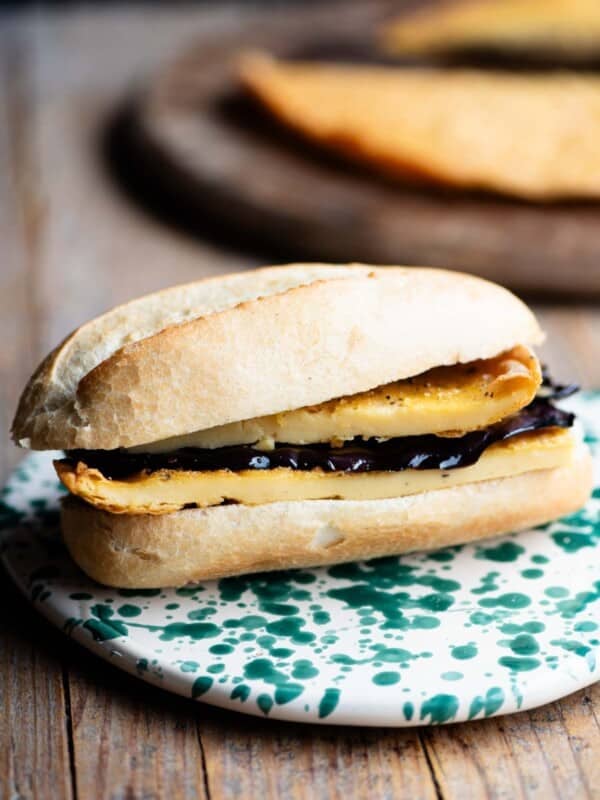
- Mozzarella in Carrozza (fried mozzarella sandwiches)
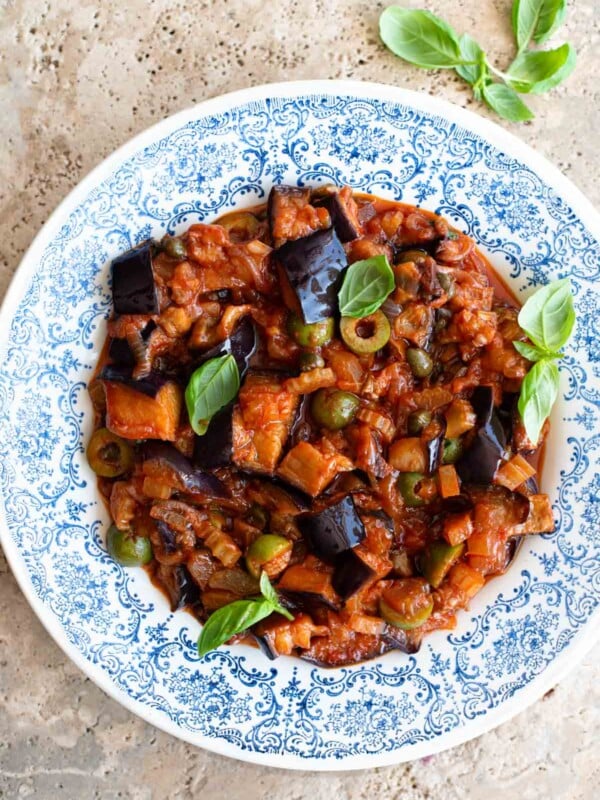
- Italian Marinated Eggplant
- Italian Farinata Chickpea Flatbread (La Cecina Toscana)
If you’ve tried this Giardiniera Recipe or any other recipe on the blog please let me know how you got on in the comments below, I love hearing from you! You can also FOLLOW ME on FACEBOOK, INSTAGRAM and PINTEREST to see more delicious food and what I’m getting up to.
Step By Step Photos Above
Most of our recipes come with step by step photos, helpful tips and tricks to make it perfectly first time and even video!
La Giardiniera

Ingredients
- 1 medium sized cauliflower, cut into small florets (300g)
- 3 bell peppers, yellow, green and red, sliced (450g)
- 3 large carrots, sliced (250g)
- 2 sticks celery, (150g)
- 1.5 cups green beans, trimmed and cut in half (150g)
- 4 giant scallions (spring onions) or baby onions, (the white of giant scallion can be cut into quarters)
- 2 fresh red chillies, medium heat
- 4 cups white wine vinegar, (1 litre)
- 4 cups water, (1 litre)
- 2 tbsp sea salt flakes
- 2 tbsp sugar
- 1 tbsp whole peppercorns
- 1 bay leaf per jar
Instructions
Sterilising jars
- To sterilise the jars put them right side up in a deep pot or canning rack pour over hot water to the jars are fully submerged. Boil the jars for 10 minutes any rubber seal and lids should also be sterilised this way. Remove the sterilised jars with tongs and place upside down on a clean kitchen towel without drying.
- Tip: If you don't have a canning rack you can place clean kitchen towels (fabric towel) around the jars to stop them rattling.
Prepare the vegetables
- Put the water, vinegar, salt, sugar and peppercorns into a large pot and bring to a boil. Once boiling add the cut cauliflower for 3 minutes then add the rest of the prepared vegetables for another 5 minutes.
Canning
- After boiling remove the vegetables from the liquid to a clean bowl using a slotted spoon.
- Strain the liquid into a large clean bowl or measuring jug, this is an optional step.
- Fill the sterilised jars with the vegetables and 1 bay leaf per jar leaving 1 inch (2.5 cm) from the top of the jars. Fill the jars with cooking liquid so it's 1/4 inch (1 cm) above the vegetables.
- Carefully place the jars back into hot water making sure the lids are not sealed completely shut and bring to a boil. Boil the jars for 10 minutes or according to your altitude *see notes.
- Remove the jars with tongs straight after boiling and place on a clean kitchen towel. Seal the jars shut immediately and let them cool completely without moving.
- Once at room temperature, they will keep well for up to 3 months. Once opened eat within 4-5 days, serve with meats or cheese.
Video
Notes
- Weight – You want around 2kg / 4.5 lbs of vegetables as a guide.
- Vegetables – it’s important to boil the cauliflower for a little longer than the other veg or it won’t be tender enough.
- Herbs and spices – a classic giardiniera is usually flavoured with bay leaves and peppercorns but you can add any herbs and spices you like.
- Jars – you can use both clip top jars with rubber seals (as I have) or screw-top jam jars. See the note below on how to make sure they are sealed properly.
- Processing time* – If you live above 1000ft above sea level you’ll need to adjust the processing time (second boil) here’s a great guide and explanation on how long you should add to your processing time.
Helpful Info for All Recipes
- I always use extra virgin olive oil in all of my recipes unless stated otherwise
- When I use canned or jarred tomatoes of any kind I always use Cirio or Mutti brands for the best results and flavour.
- All vegetables are medium sized unless stated otherwise
- All recipes are tested and developed using a fan (convection) oven
- Find out more about how nutrition is calculated.
- Check out our must have Italian Pantry Staples.
- You can also find all our Essential Kitchen Tools for Italian Cooking.
Nutrition
Nutrition information is automatically calculated, so should only be used as an approximation.